In this final part of the series on how to propagate plants for free in the container garden, we turn our attention to more advanced techniques to get more plants for free. In this article, we will be concentrating on layering, division, budding and grafting. In previous articles, we have covered sowing seeds and cuttings.
The propagation techniques described in this article are different from the other techniques previously described, as you are not increasing your plants by taking cuttings or by sowing seeds but by other methods.
After this final part, you will have a comprehensive list of techniques that can be used to increase your container plants from free.
LAYERING
This is one of the surest ways to propagate plants, as this involves inducing roots without actually cutting the shoots off the plant. As the plant have a source of food and water from the parent plant, whilst they are forming roots, and therefore increase their chances of survival.
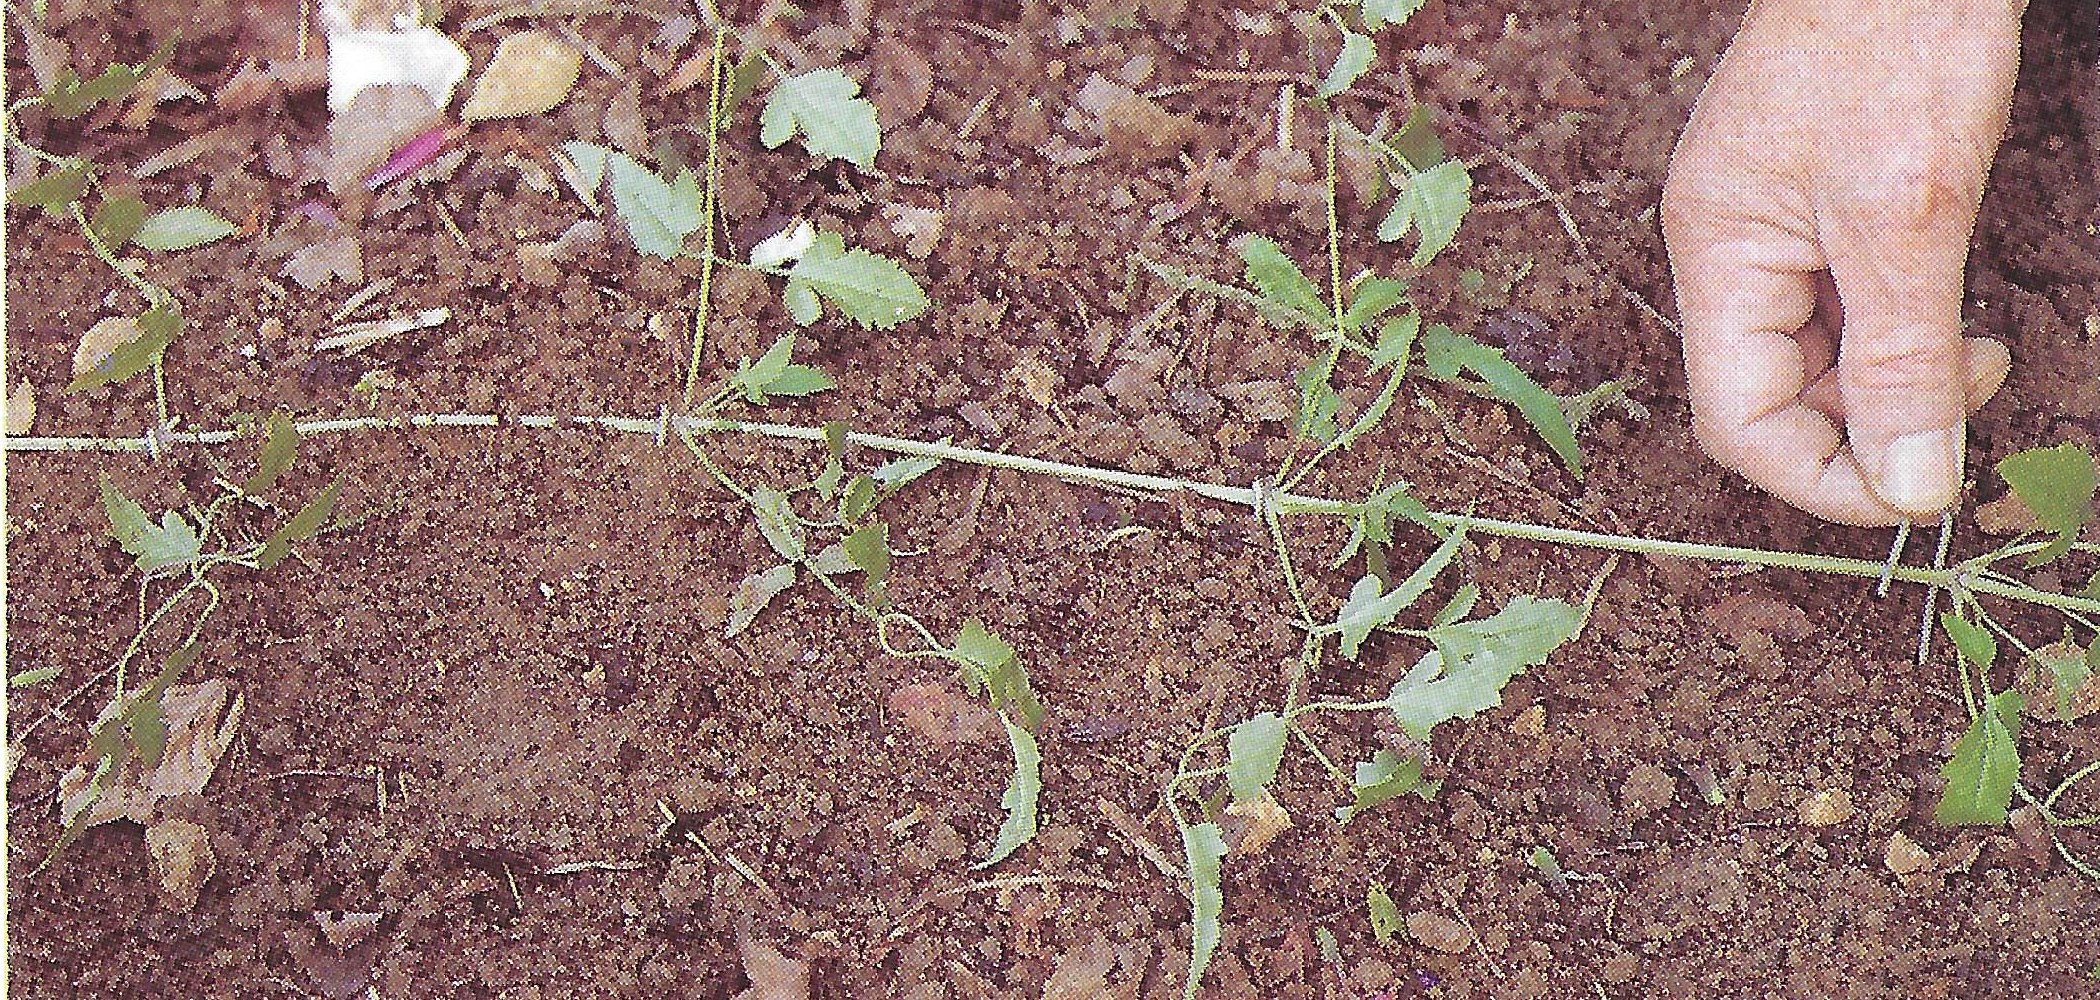
Select a branch that will reach the ground. You will then need to wound the underneath of that branch to induce the stem to root. This can be carried out by cutting a slit in the bark or by removing a small section entirely. With some plants like rhododendrons, a sharp twist will damage the tissue enough to make it form roots.
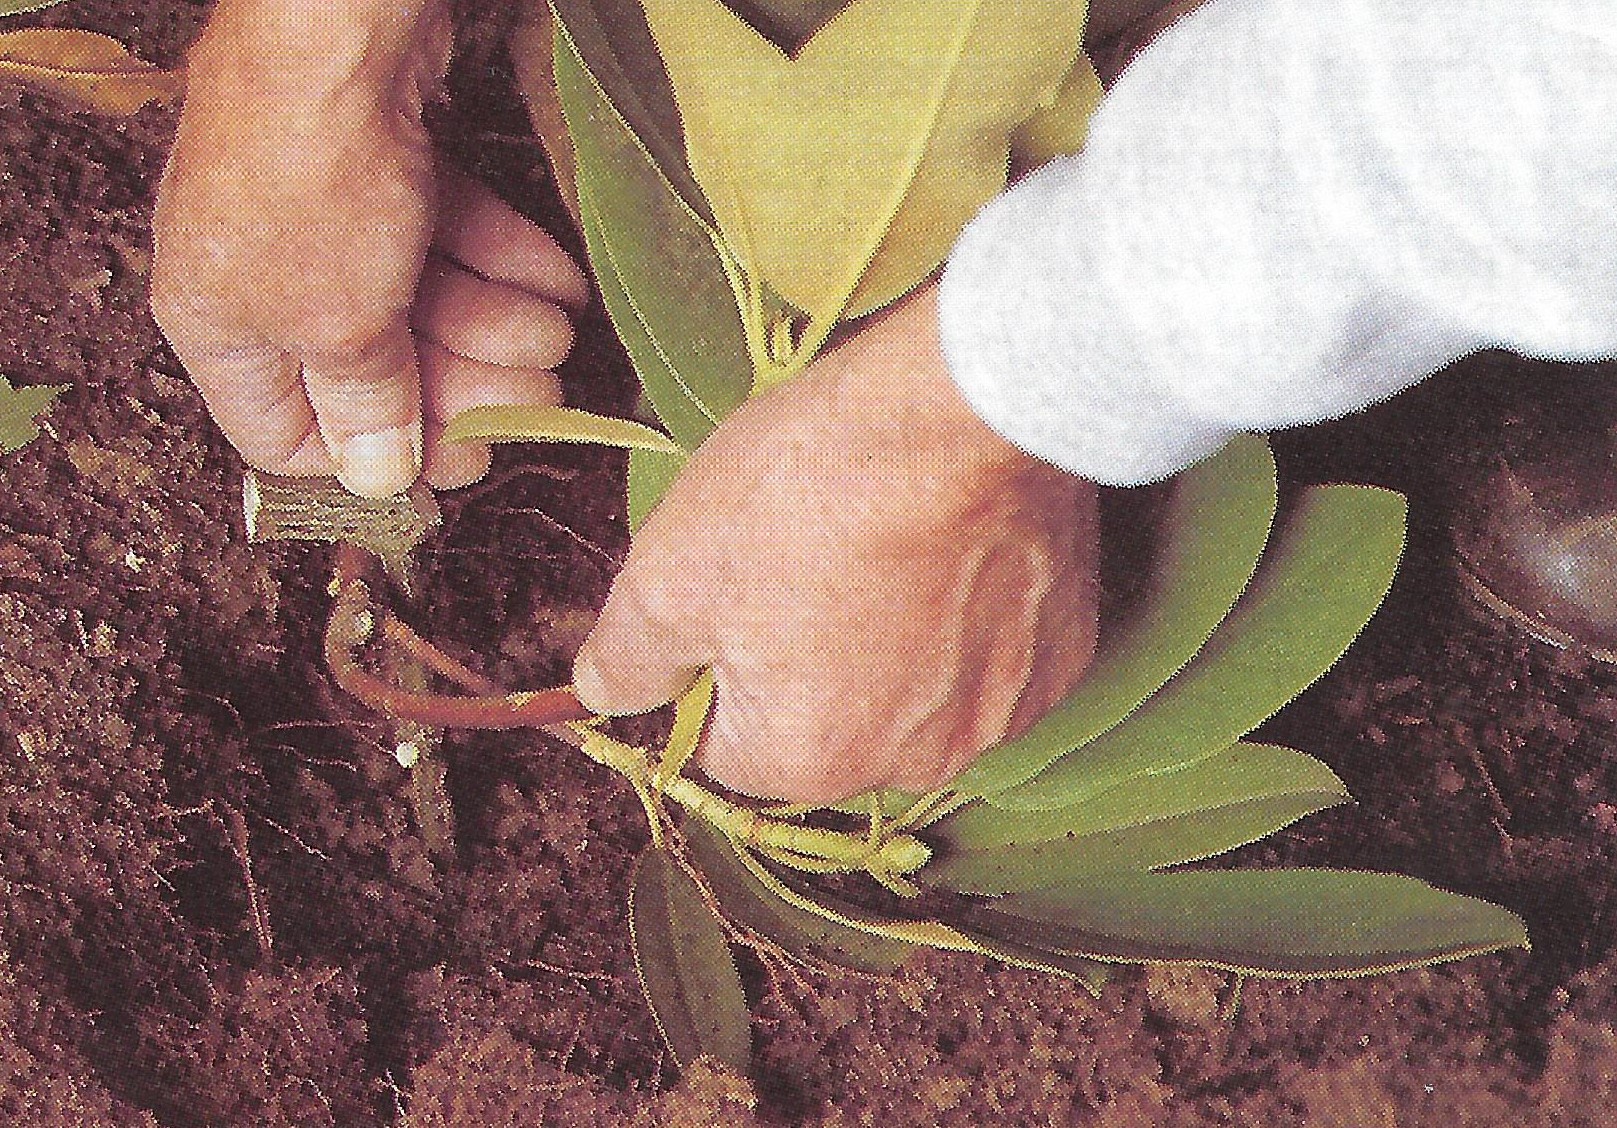
You can also ground the stem you want to layer in a pot full of seed and cutting compost. To do so it may be necessary to cut a nick in the side of the pot, to allow the plant to grow through.
To hold the branch down, use a large piece of wire and cover with compost.

It is a good idea to put a large stone over the top of the wire clip, to hold the layer in place and also to conserve moisture. It could take a long time for the layer to root, up to 2 years. When it does the plant can be detached and then repotted on to a larger container.
When plants have bendy stems like climbers several layers can be made from the same shoot, in what is called ‘serpentine layering’. You need to prepare a number of pots and lay a leaf joint at the top of each pot.
You will then need to pin down each layer using a wire clip around each leaf joint, ensuring that each leaf joint is in contact with the seed and cutting compost. After a while, each leaf joint should have produced a new root and it can be detached from the mother plant.
AIR LAYERING
Layering is good for flexible plants, whose stems can be bent down. For stiff stems, other techniques need to be adopted. In this case, you can still layer if the compost is taken to the layer rather than the other way around.
The technique of air layering is often used for houseplants, but some hardy plants can also be air layered. It is certainly worth trying, preferably in early spring.
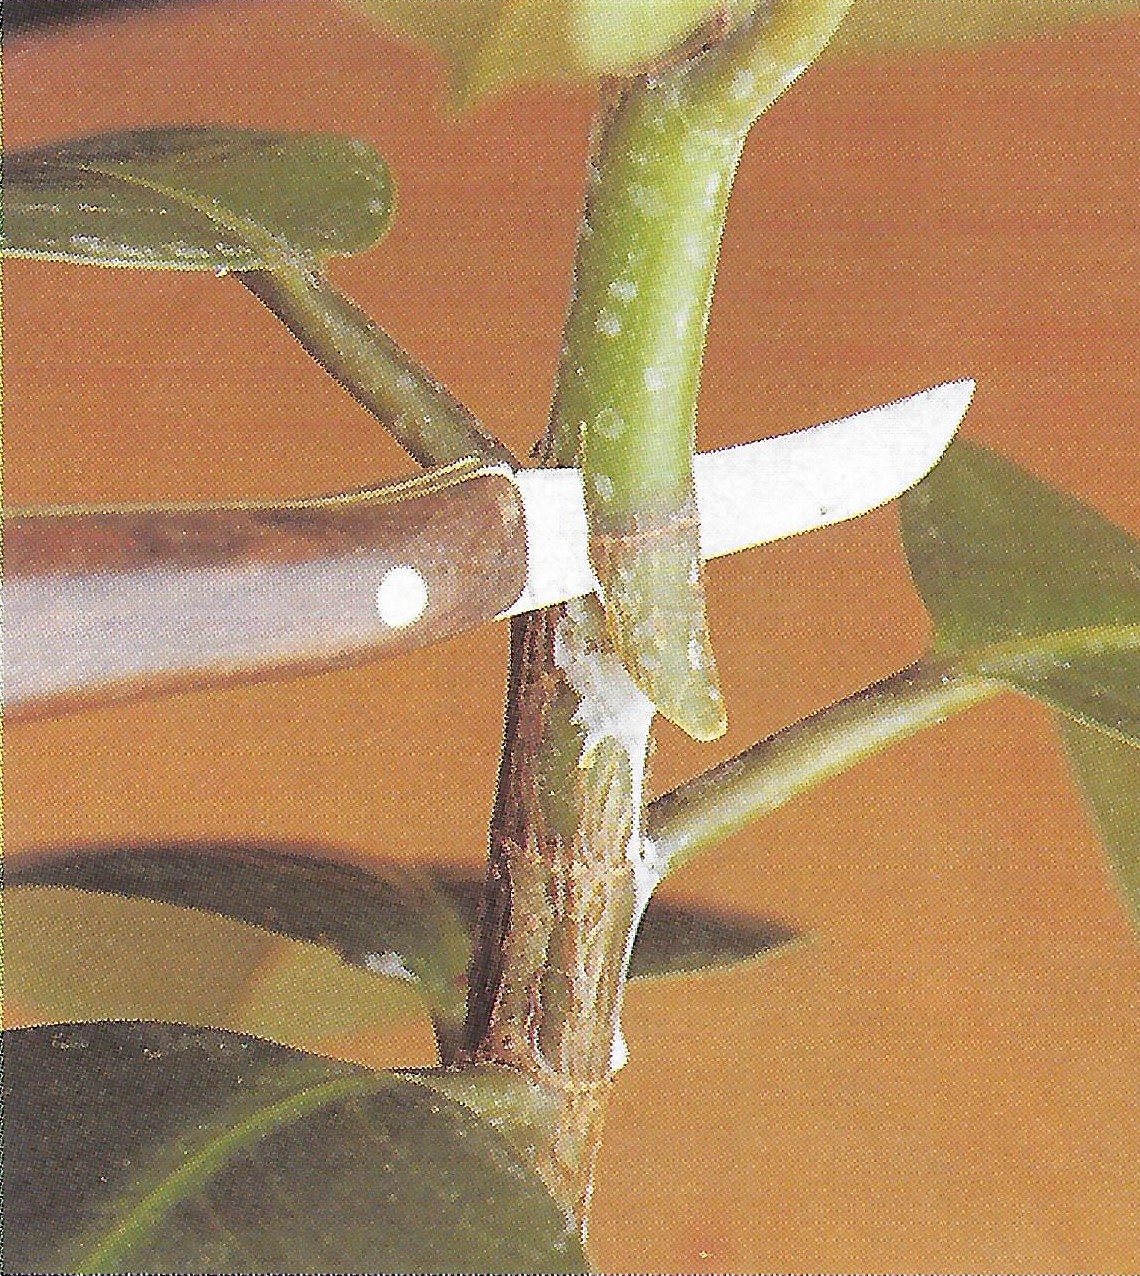
Start by making a cut in the stem just below a leaf joint by pulling a sharp cutting knife vertically through a stem. The cut should be no more than half the diameter of the stem, otherwise, it may weaken it badly at the top and it could fall off.
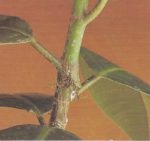
Sprinkle a little hormone rooting powder on the cut. Keep it open (prevent it from healing) by either using a matchstick or a small amount of sphagnum moss.
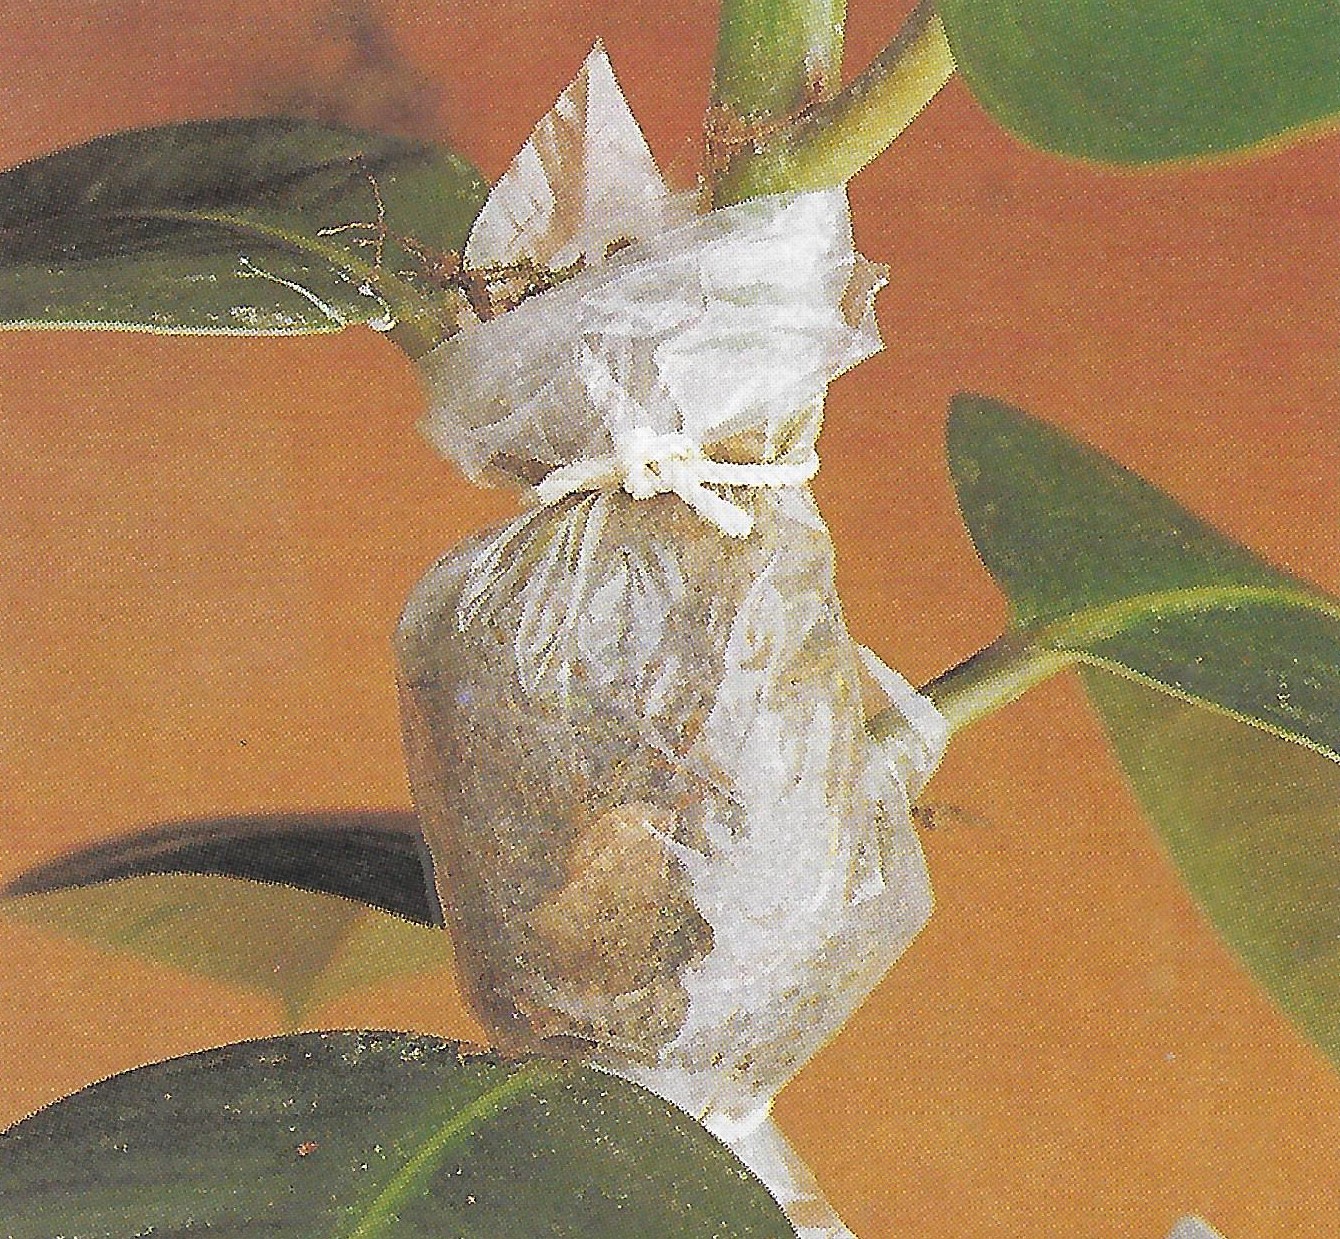
Around the cut wrap moist moss around the joint, and then wrap the whole thing with a piece of Clingfilm at the top and the bottom. This will prevent moisture losses as the root establish.
After a while roots will form and you should be able to see the newly formed roots through the Clingfilm. If you cannot, unwrap the plastic and check from time to time.
When the shoots have well-formed roots, you can detach it from the parent by simply cutting below the roots section by using secateurs.
The newly formed young plants need to be planted in the normal way, but it may be quickly repotted as it has the vigour of youth.
The plants suitable for layering include Alchea, Azalea, Azara, Blackberry, Camellia, Campsis, Celastrus, Clematis, Cornus, Corylopsis. Cotinus, Fothergilla, Hamamelis, Hedera, Hydrangea, Jasminum, Kalmia, Magnolia, Osmanthus, Parrotia, Pieris, Rubus, Sunberry, Syringa, Tayberry, Vitis and Wisteria.
DIVISION OF HERBACEOUS PERENNIALS AND ALPINES
This is the easiest and most convenient way to increase your stock of herbaceous perennials and alpines. Most mat or clump-forming perennials will actually benefit from being split from time to time, once every three to four-year intervals.
This is good because the centre of the plants tends to become old and tired, leaving vigorous area of growth on the outside with an ugly bare patch in the centre. By dividing you are actually promoting better health for the plant.
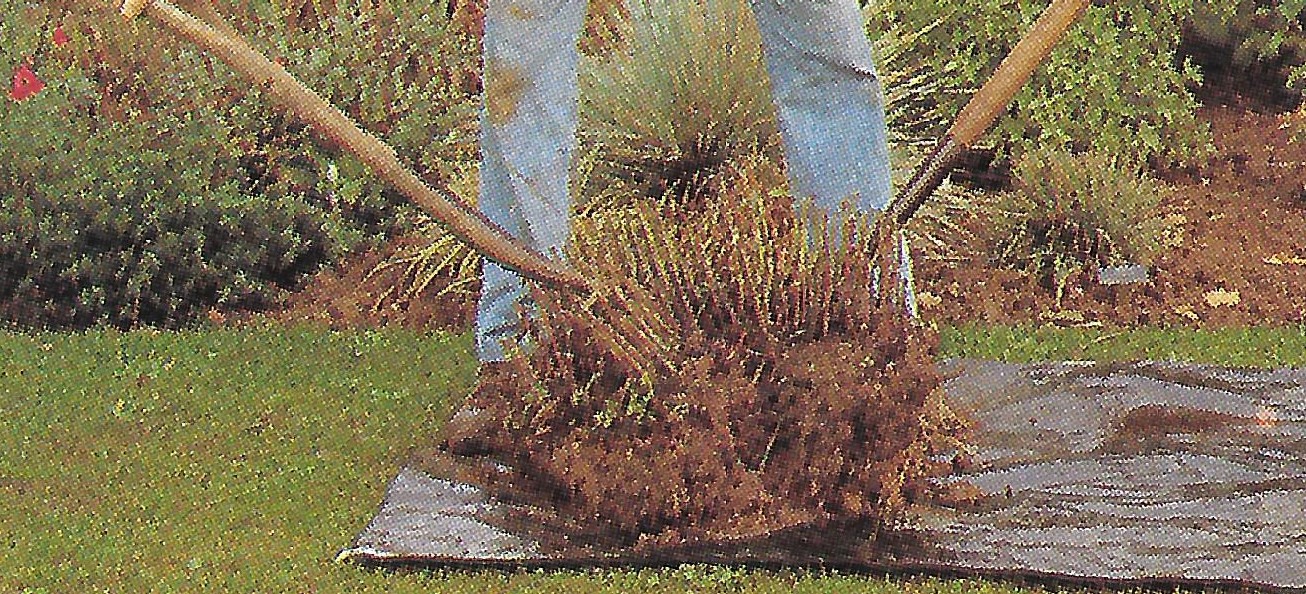
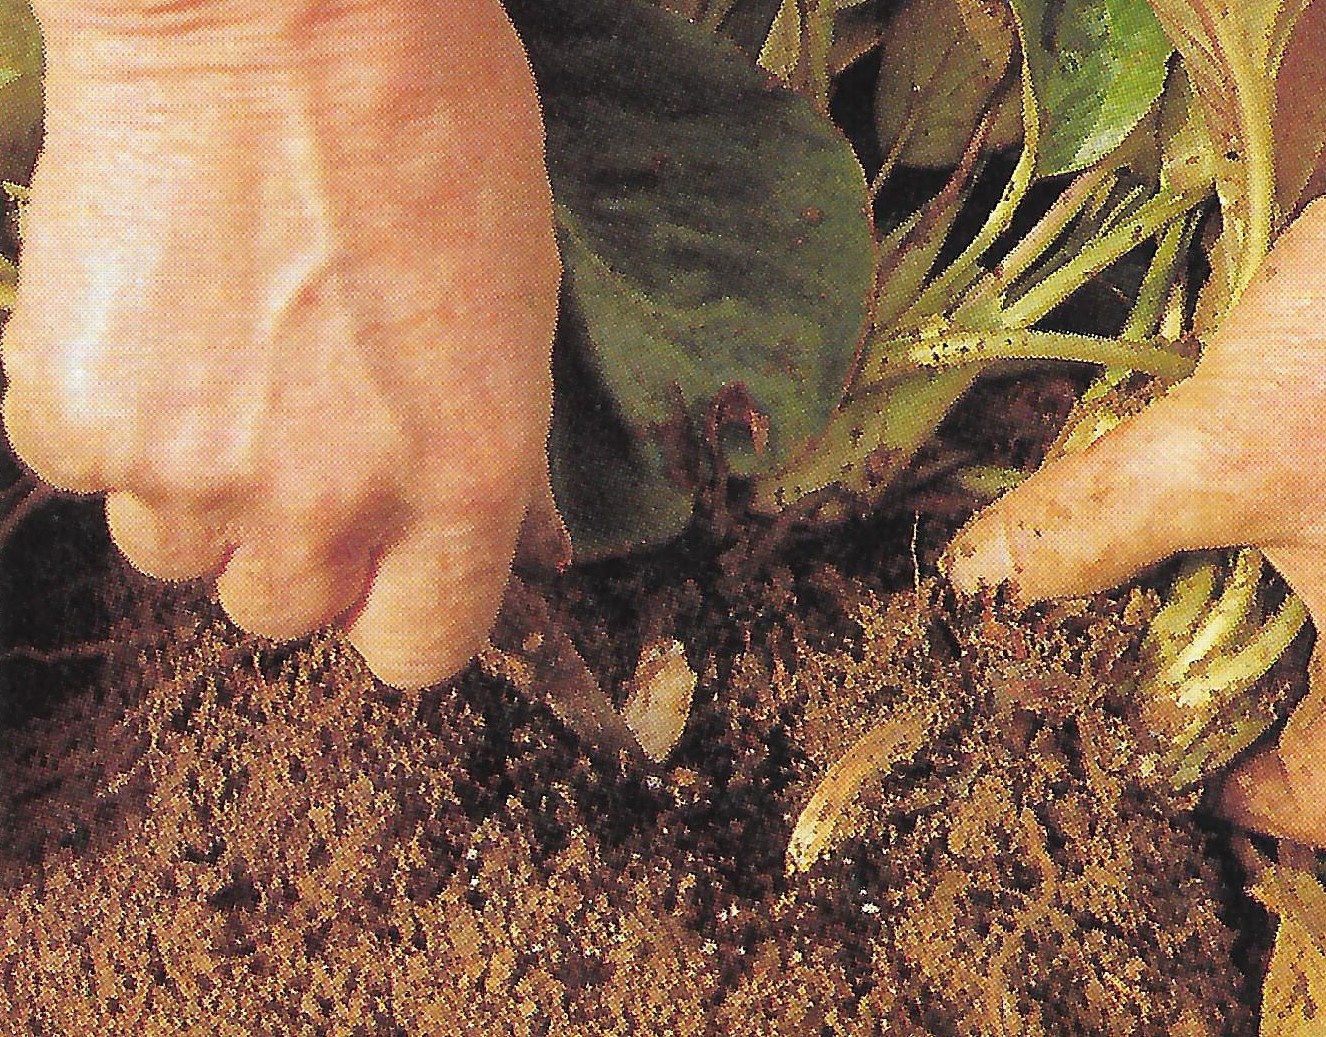
Division is best done either in early autumn, where the soil is still warm or during spring just before the plant springs back to life. You will need to lift the whole clump and place it on a hard surface.
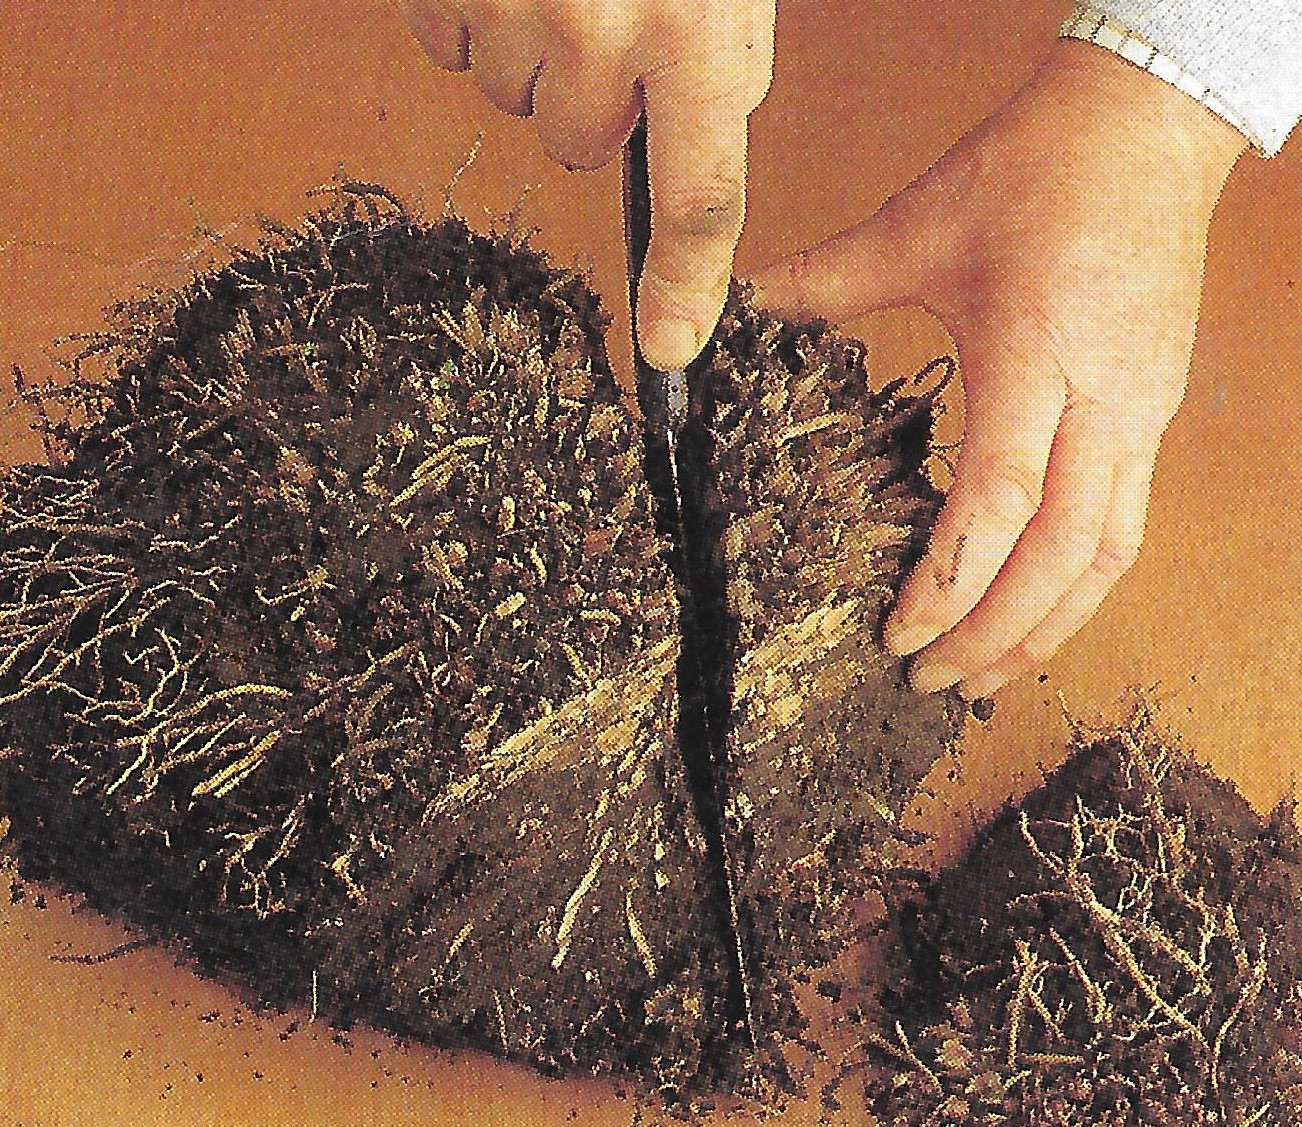
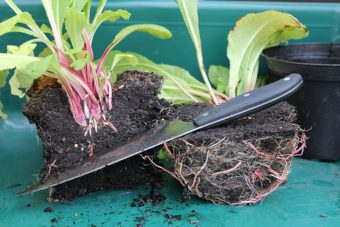
Some plants can be divided by forcing a spade into the clump and split it into 3 or more parts, where each part are individually planted in new container of compost. Only plant the vigorous new shoots from the outside of the clump, whilst discarding the old unproductive centre.
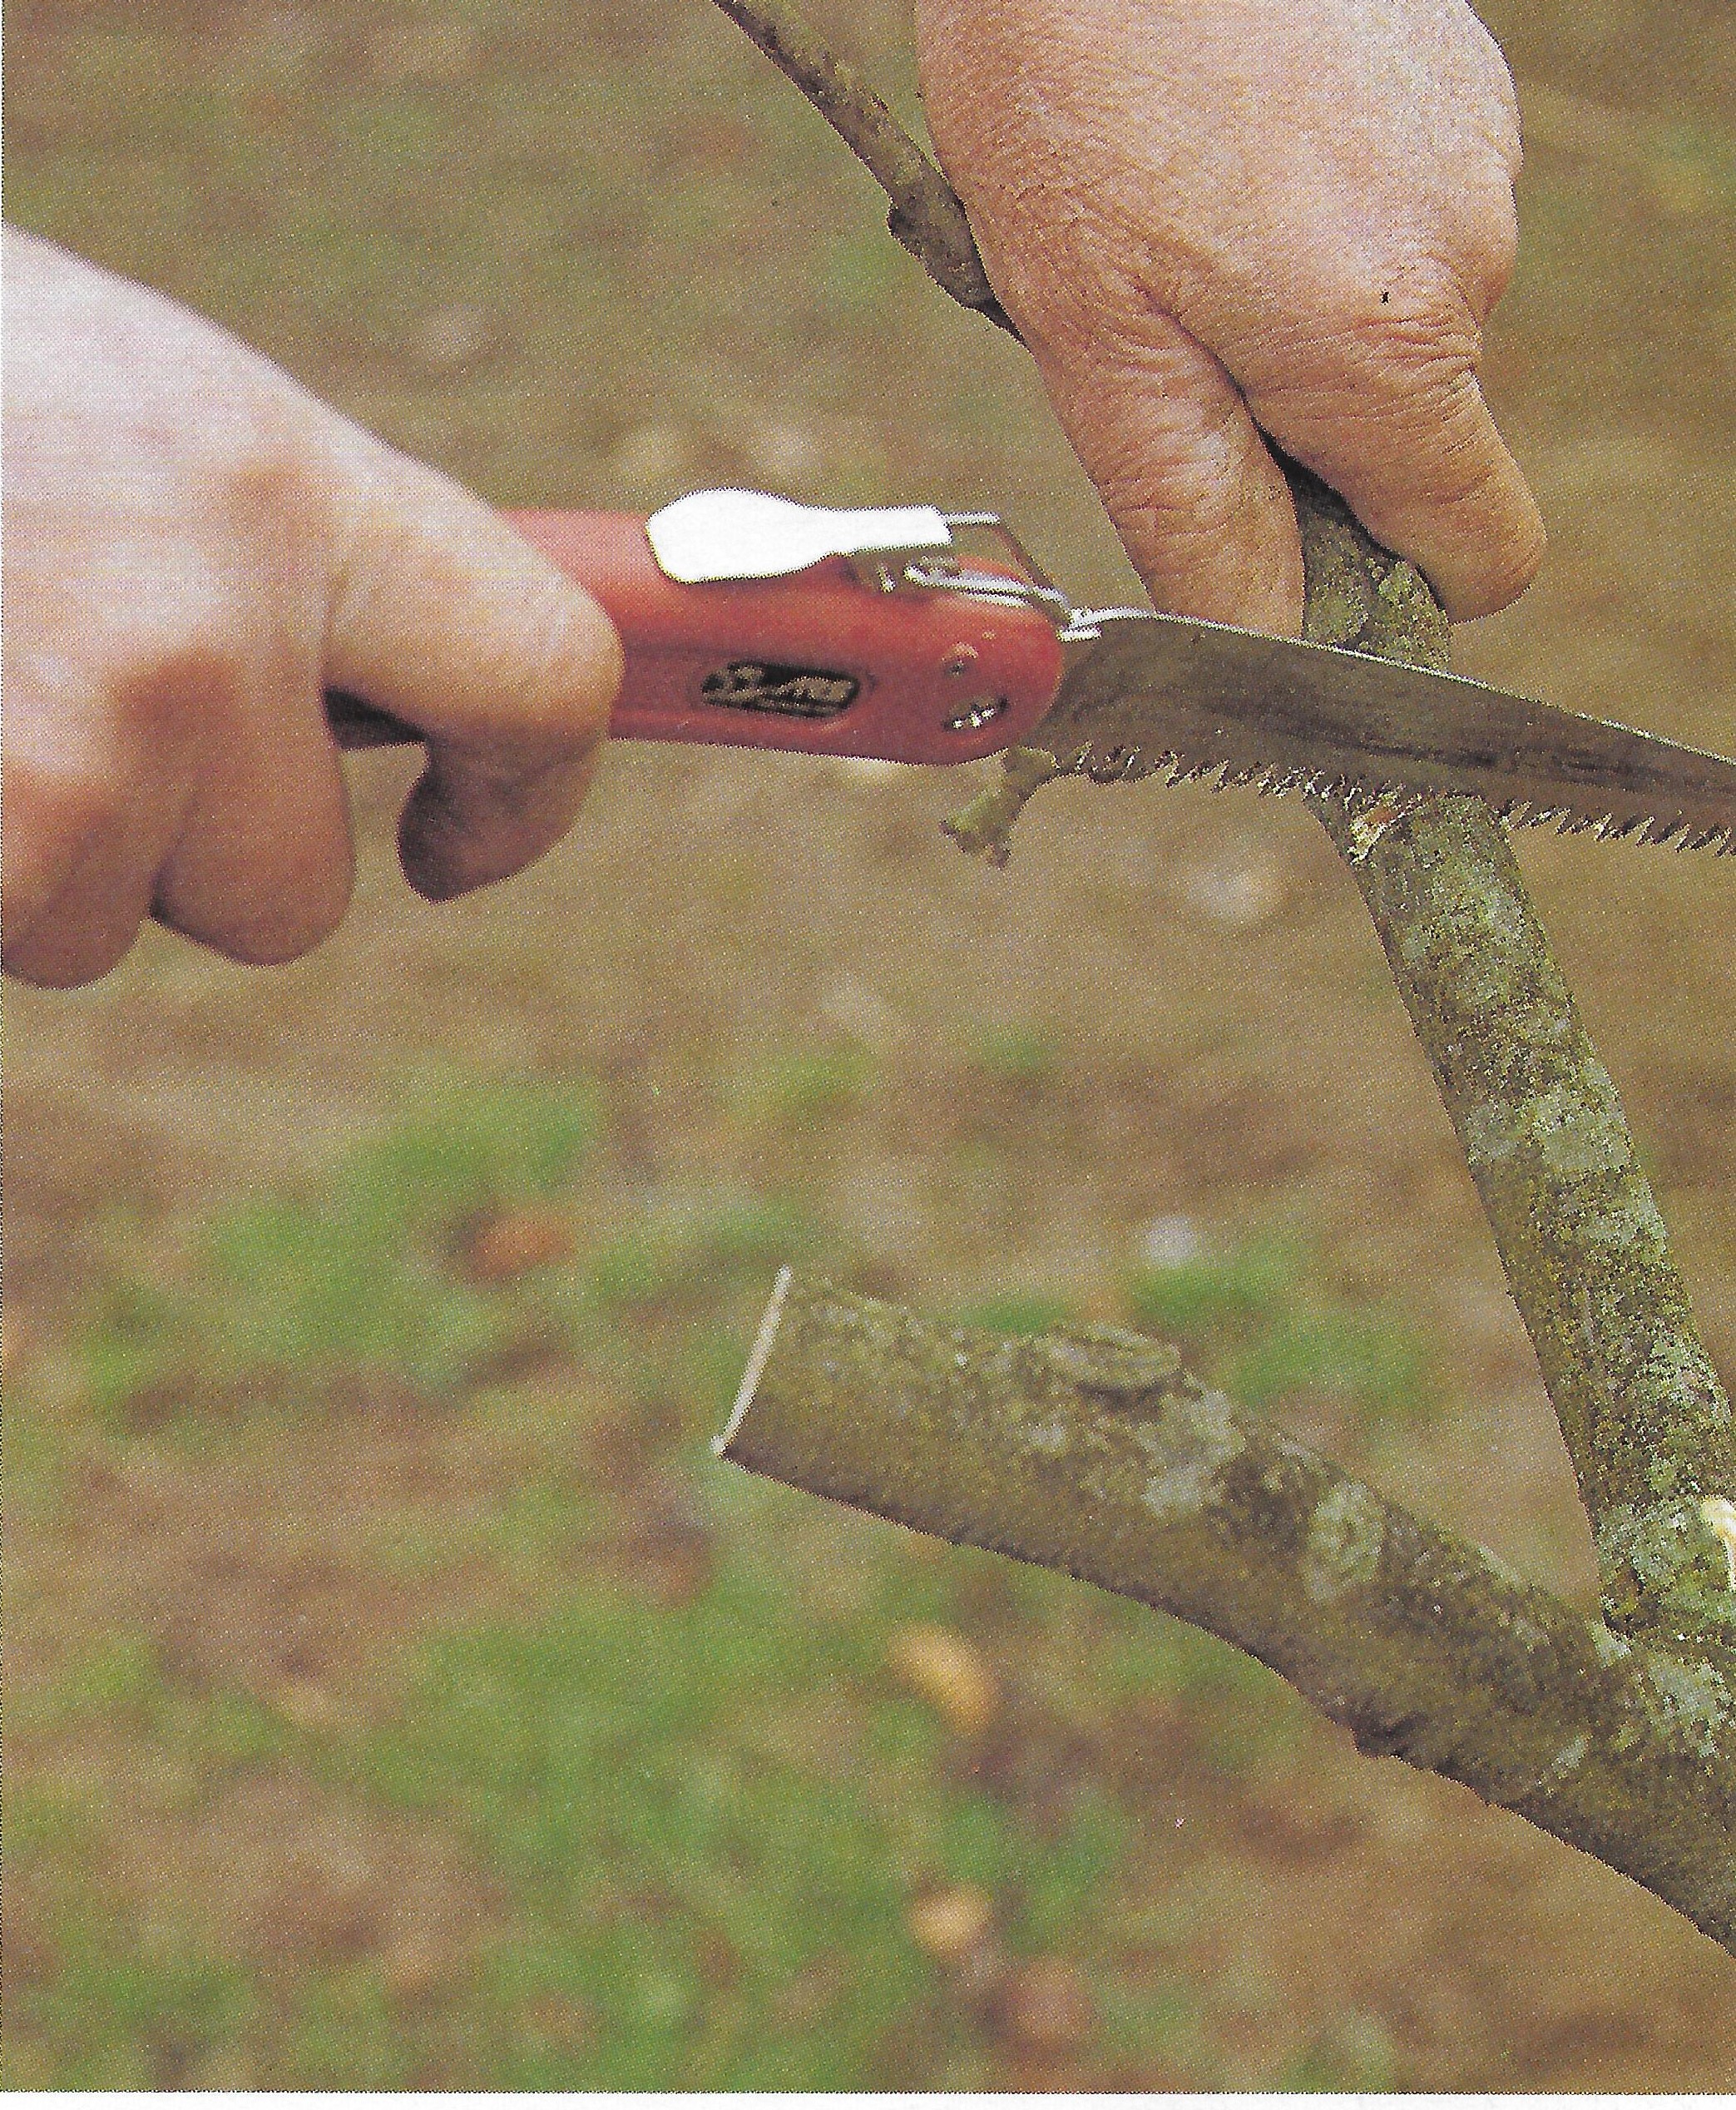
Plants with thicker, fleshier roots like hostas need to be sawn into pieces by using a pruning saw. It is best to do this in spring when it is possible to make sure that each piece cut is living and producing new shoots. Each clump must be of a decent size, something like 7.5 cm by 7.5cm.
The divisions will grow up quickly, especially if it looked after well, especially with frequent watering and feeding.
There is a vast array of plants that are suitable for division include Acaena, Achillea, Alchemilla, Anaphalis, Aquilegia, America, Aster, Astilbe, Astrantia, Bergenia, Brunnera, Campanula, Centaurea, Chrysanthemum, Coreopsis, Crocosmia, Delphinium, Dicentra, Doronicum, Echinacea, Echinops, Epimedium, Erigeron, Filipendula, Geranium, Geum, Helleborus, Helenium, Hemerocallis, Hesperis, Heuchera, Hosta, Iris, Lamium, Liatris, Liriope, Lysimachia, Miscanthus, Molinia, Papver, Phlomis, Phlox, Polygonatum, Polygonum, Potentilla, Primula, Pulmonaria, Rheum, Rodgersia, Rudbeckia, Saponaria, Saxifraga, Scizostylis, Sedum, Sidalcea, Solidago, Stachys, Stipa, Tellima, Tiarella, Tradescantia, Trollius, Veronica and Waldersteinia
ALPINES
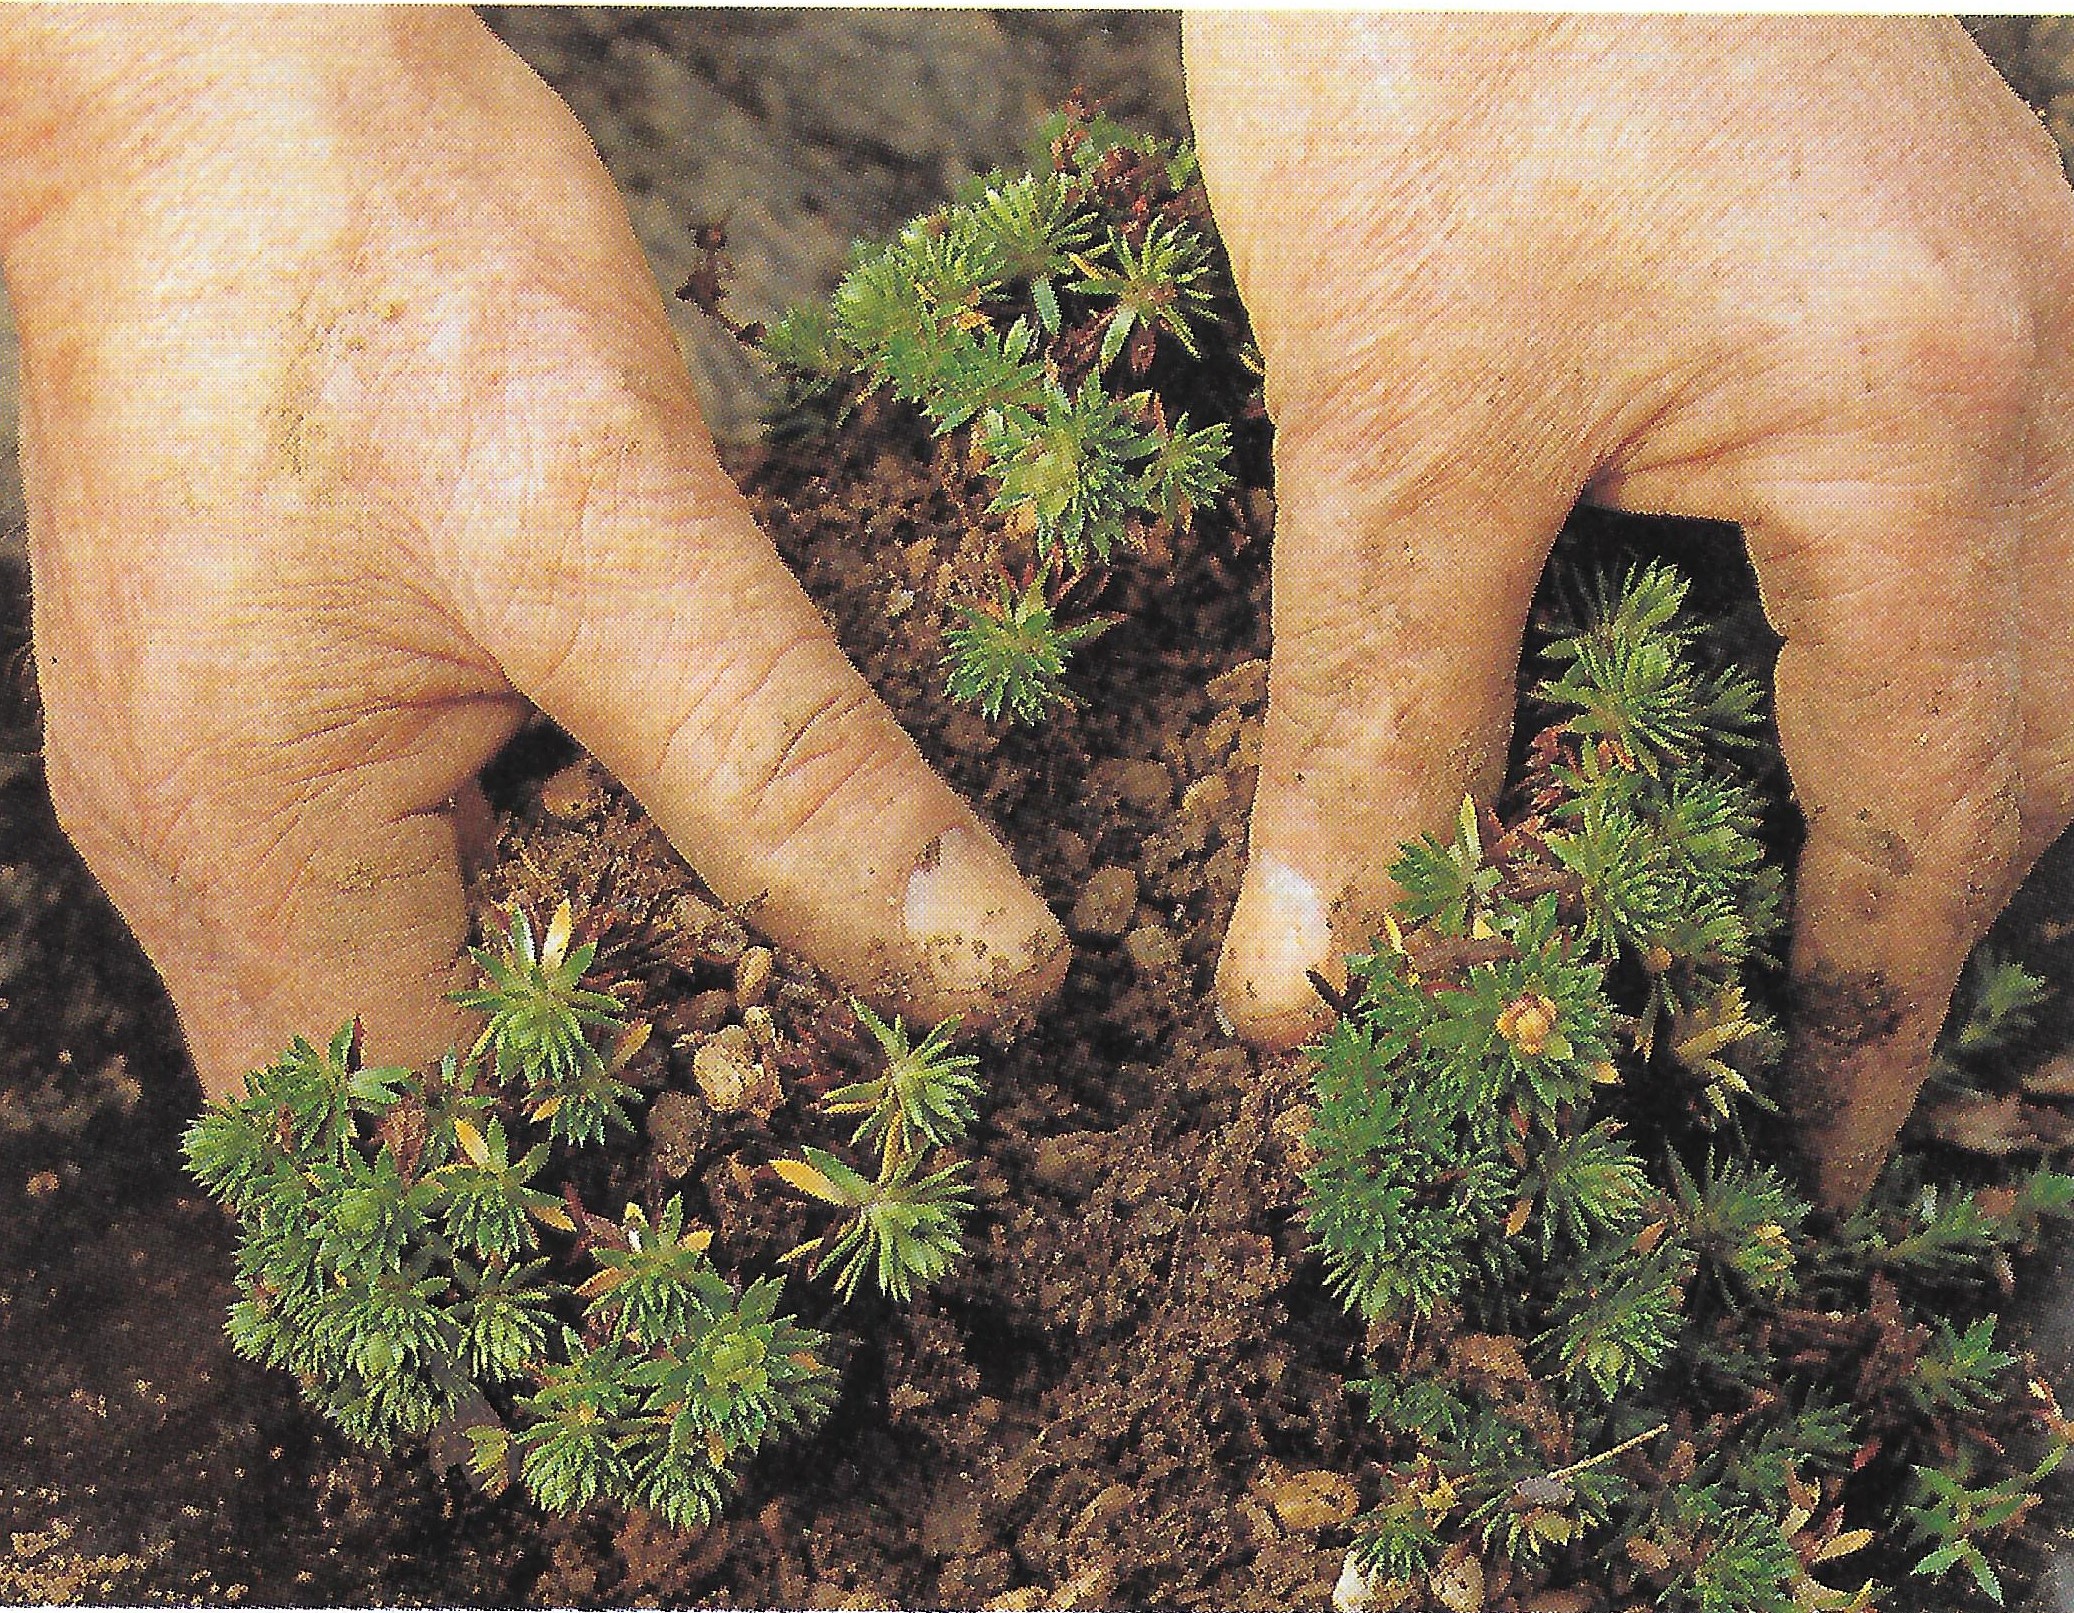
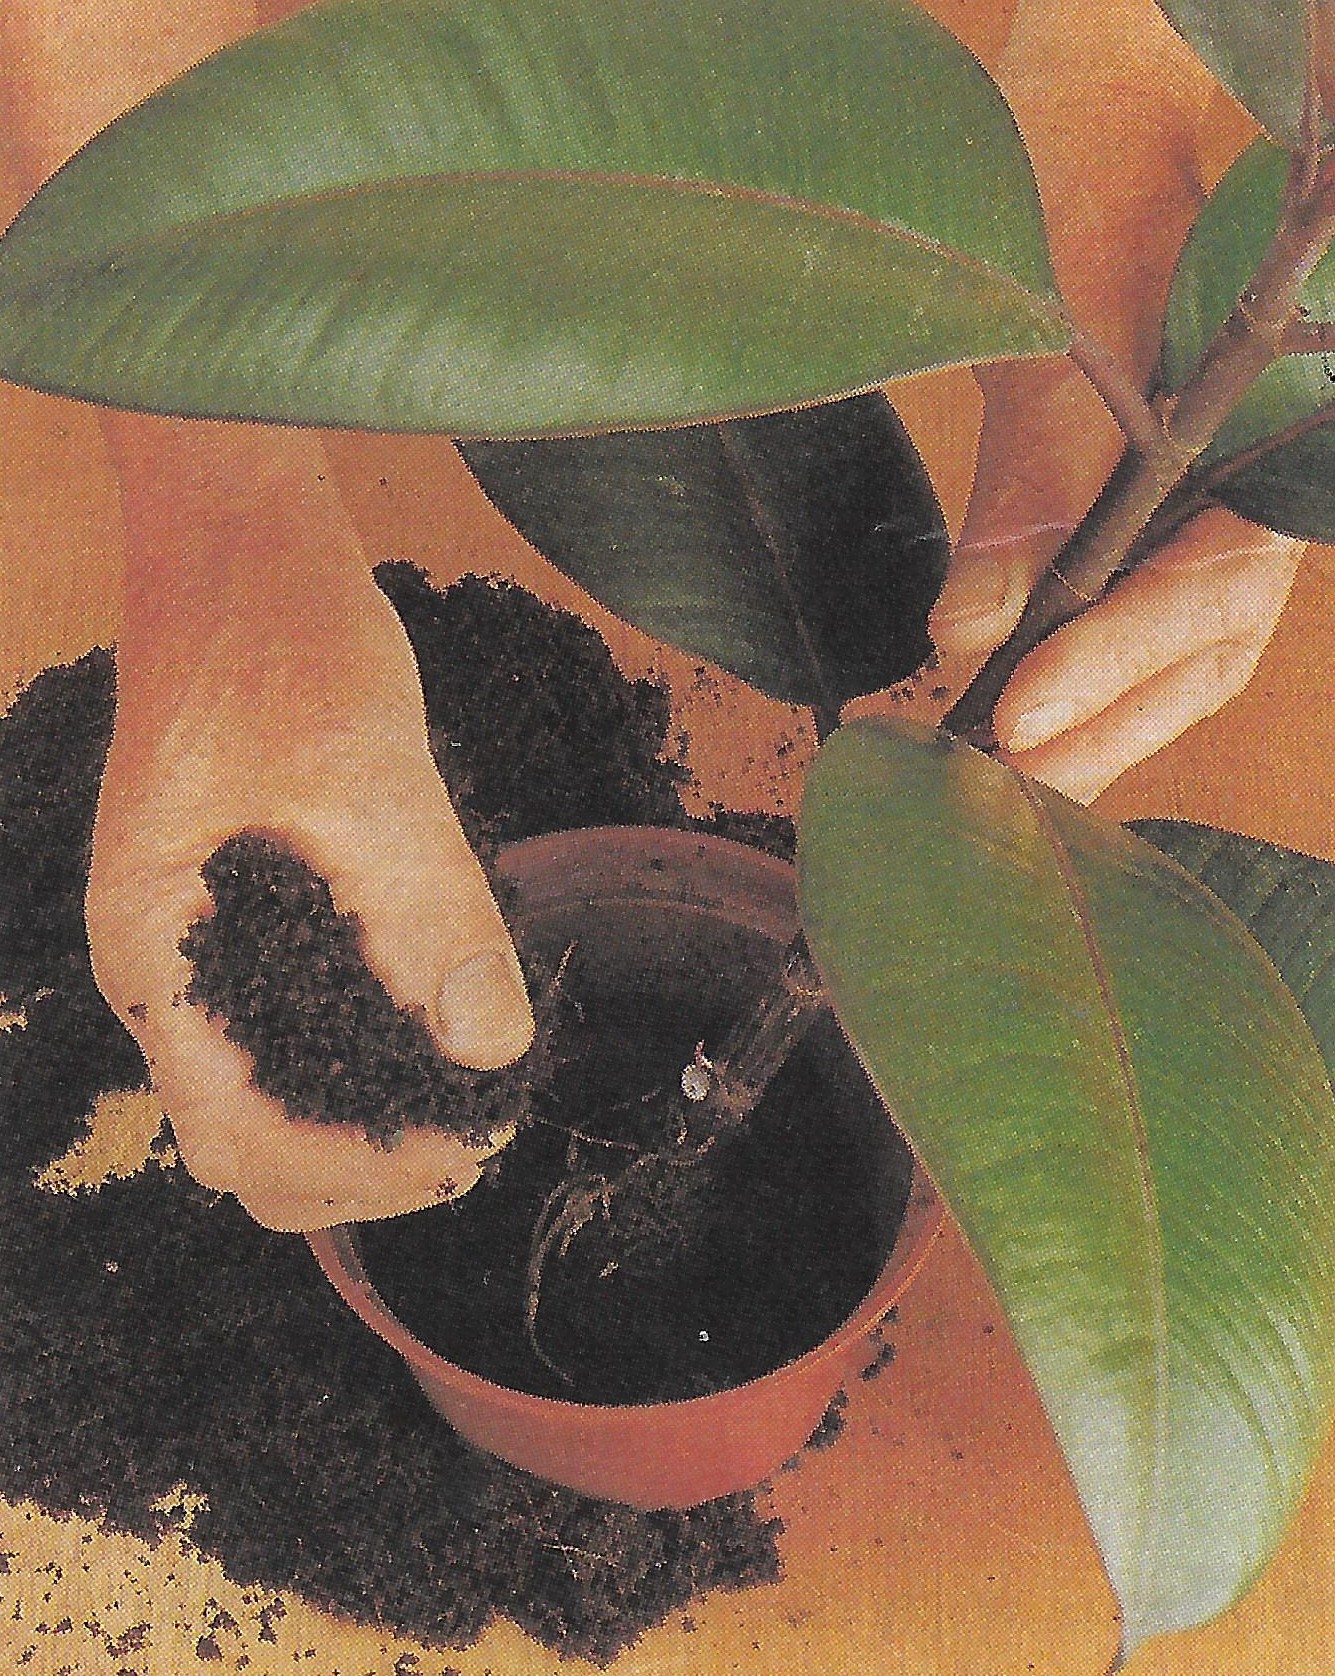
Alpines can be divided in much the same way, although the plants are generally on the smaller size. All you need to do is dig the plant up from the pot and gently by hand pull the plants apart to form decent-sized clumps. Each clump can then be housed in their own container full of multipurpose compost.
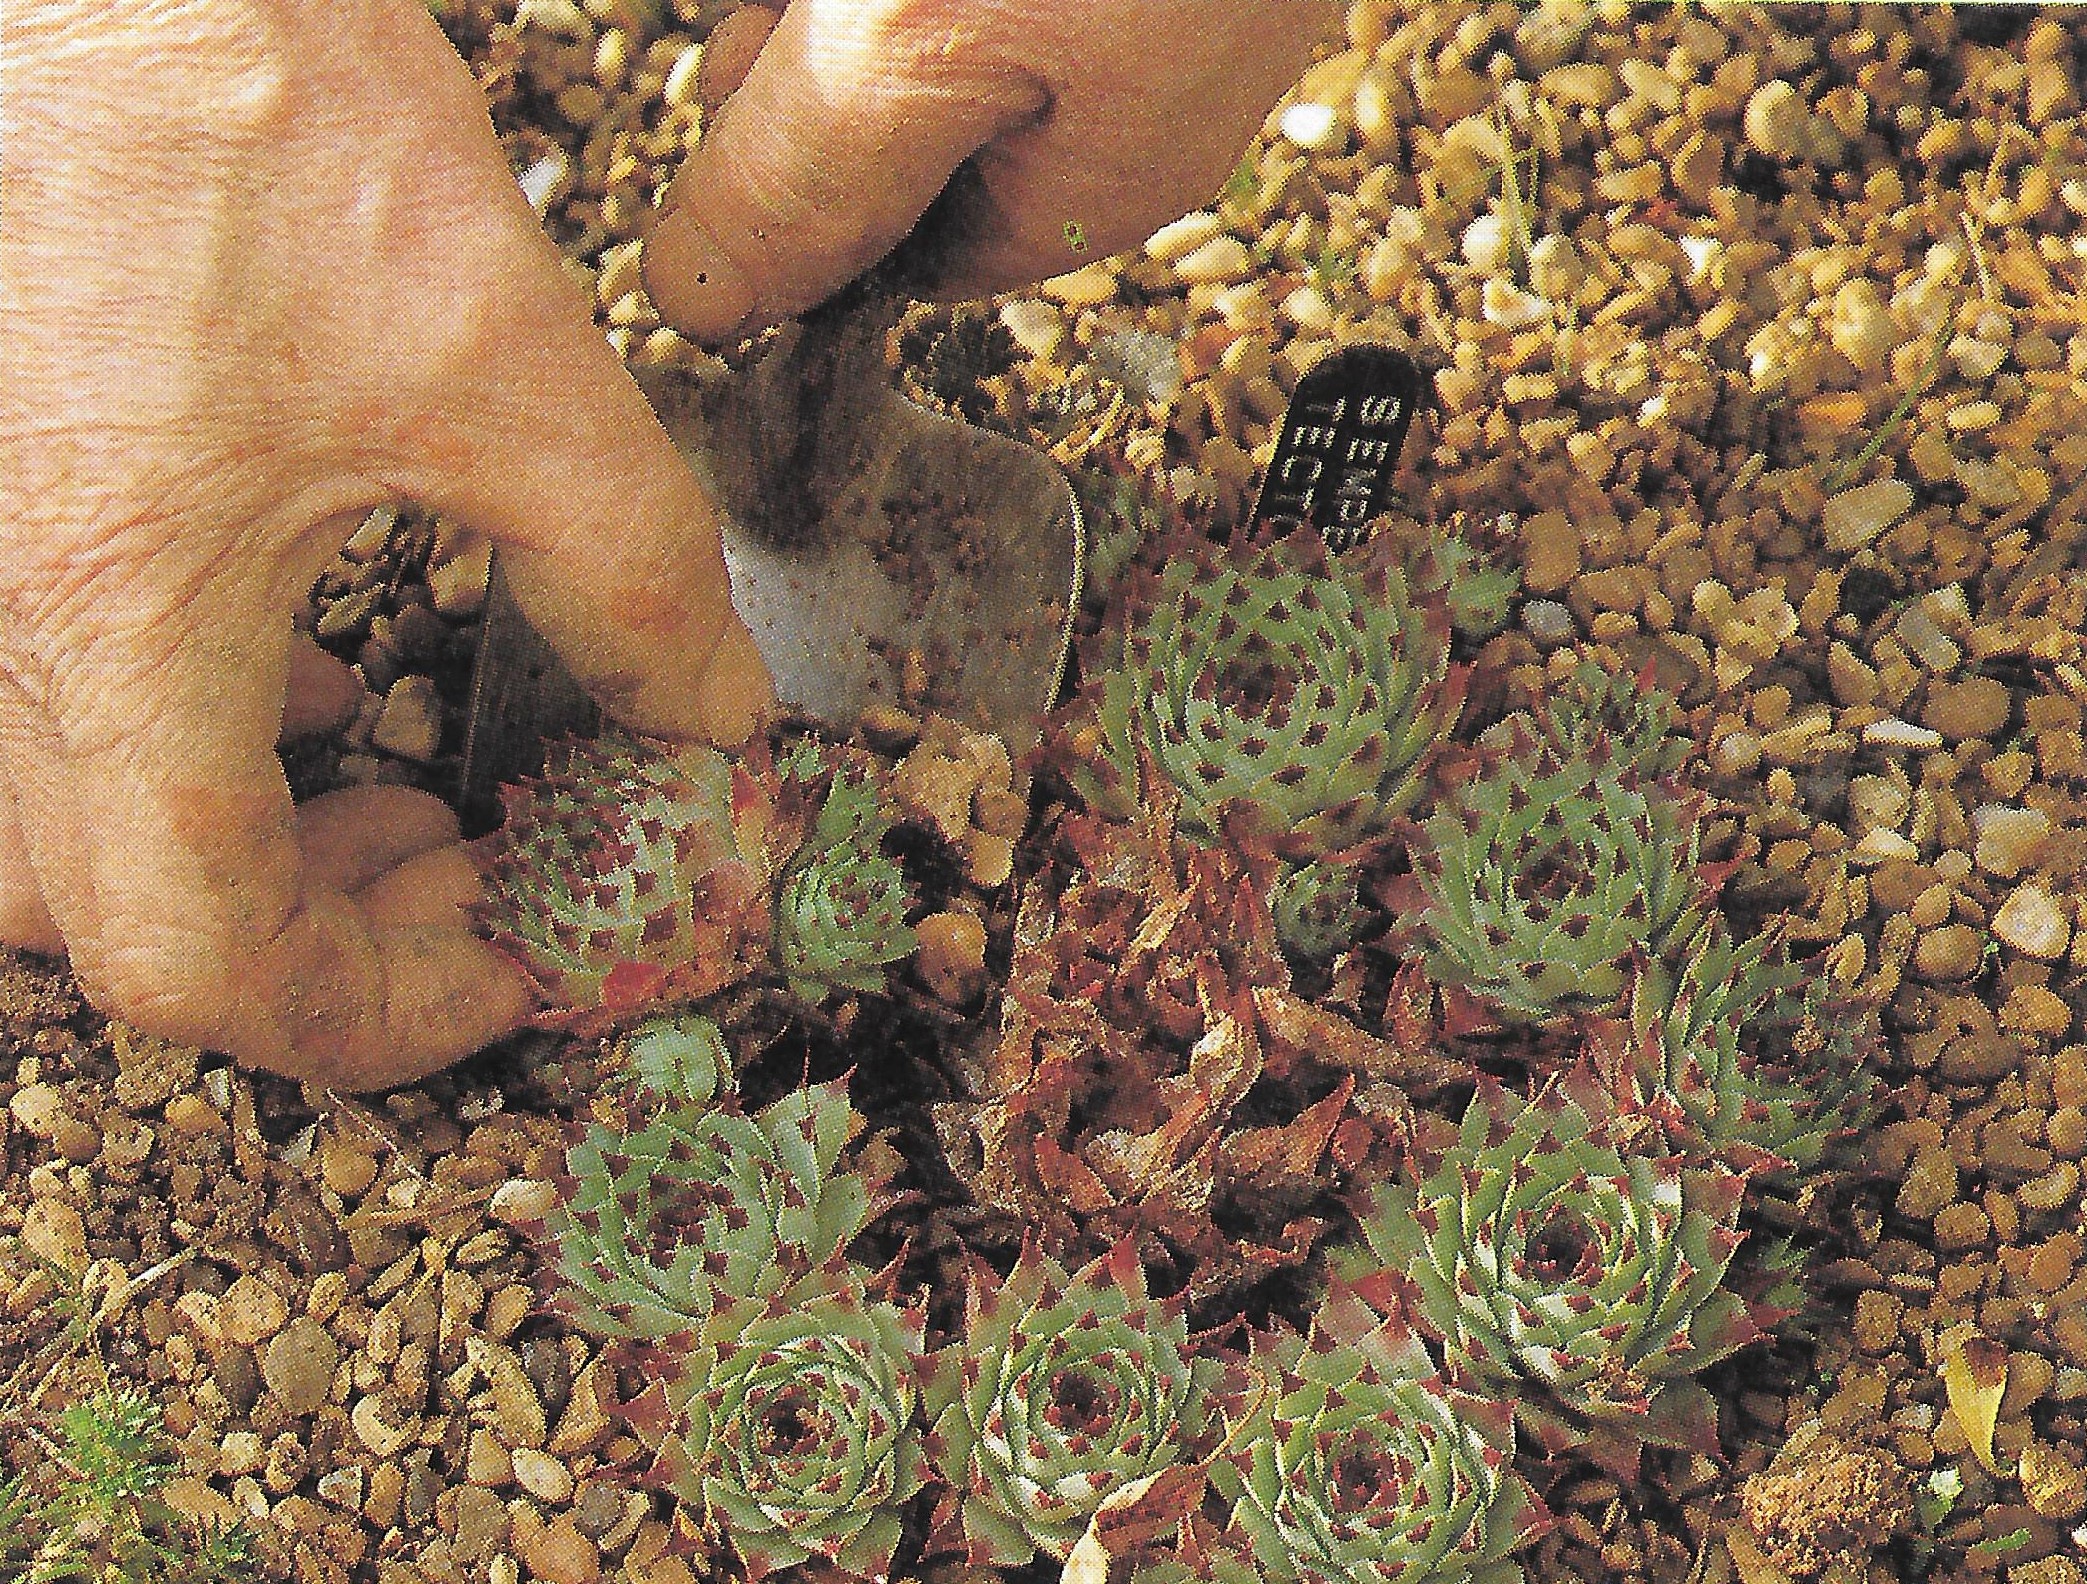
Other alpines such as houseleeks form young offsets, which can be lifted carefully with a trowel and then replanted in the usual way.
PLANTS WITH RHIZOMES
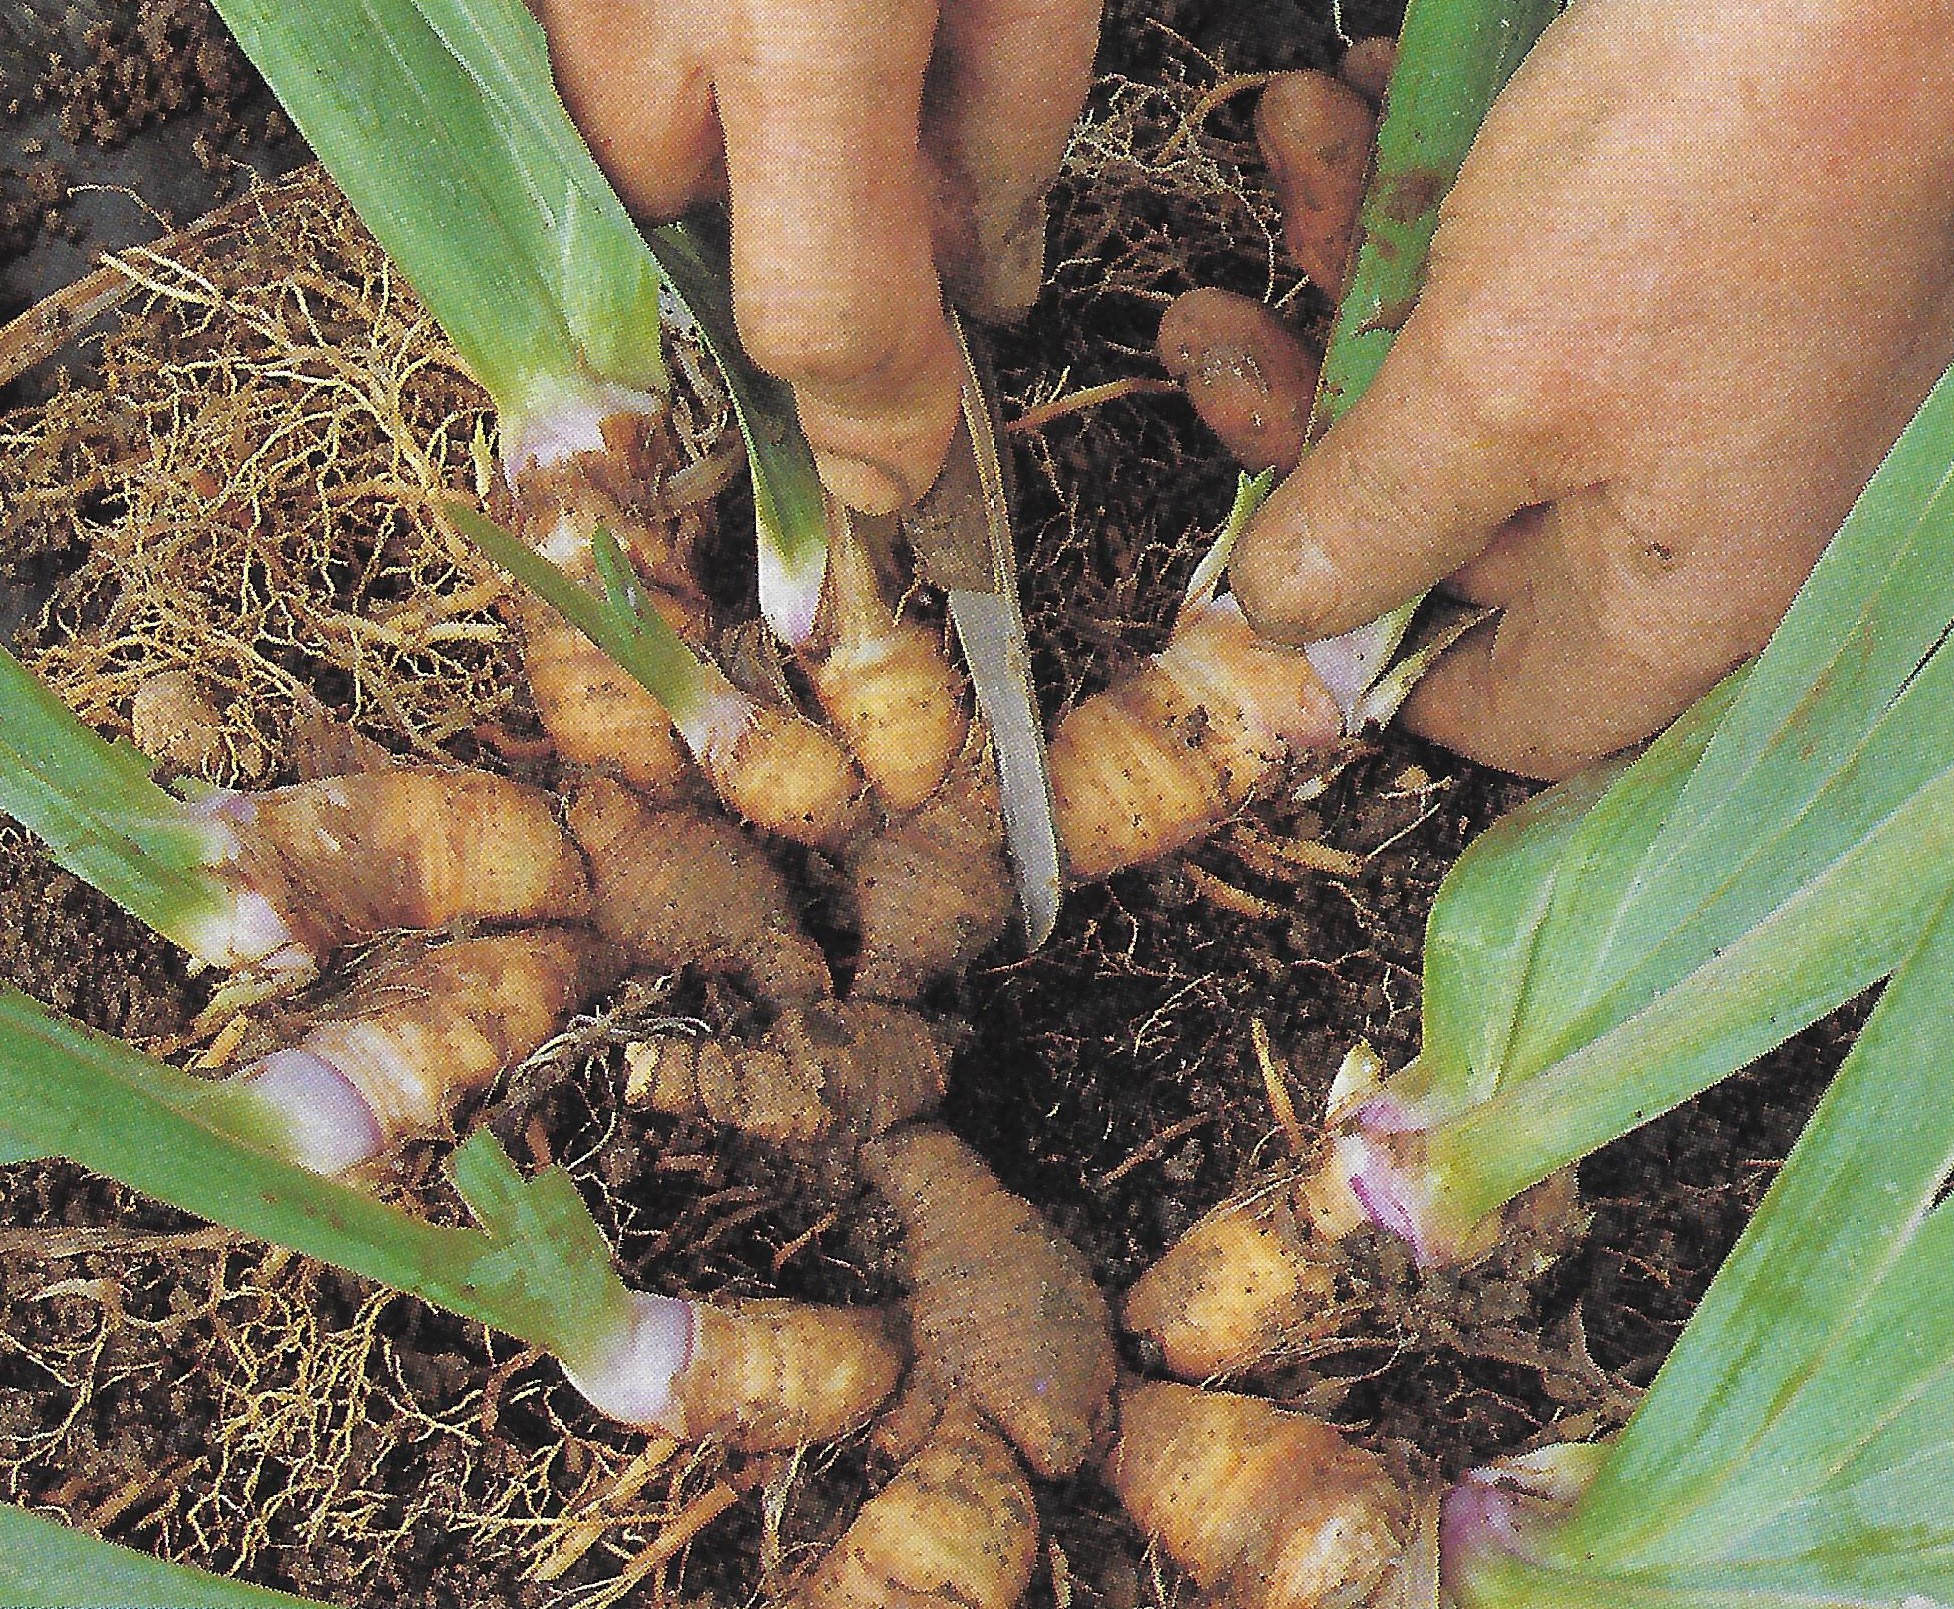
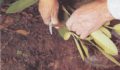
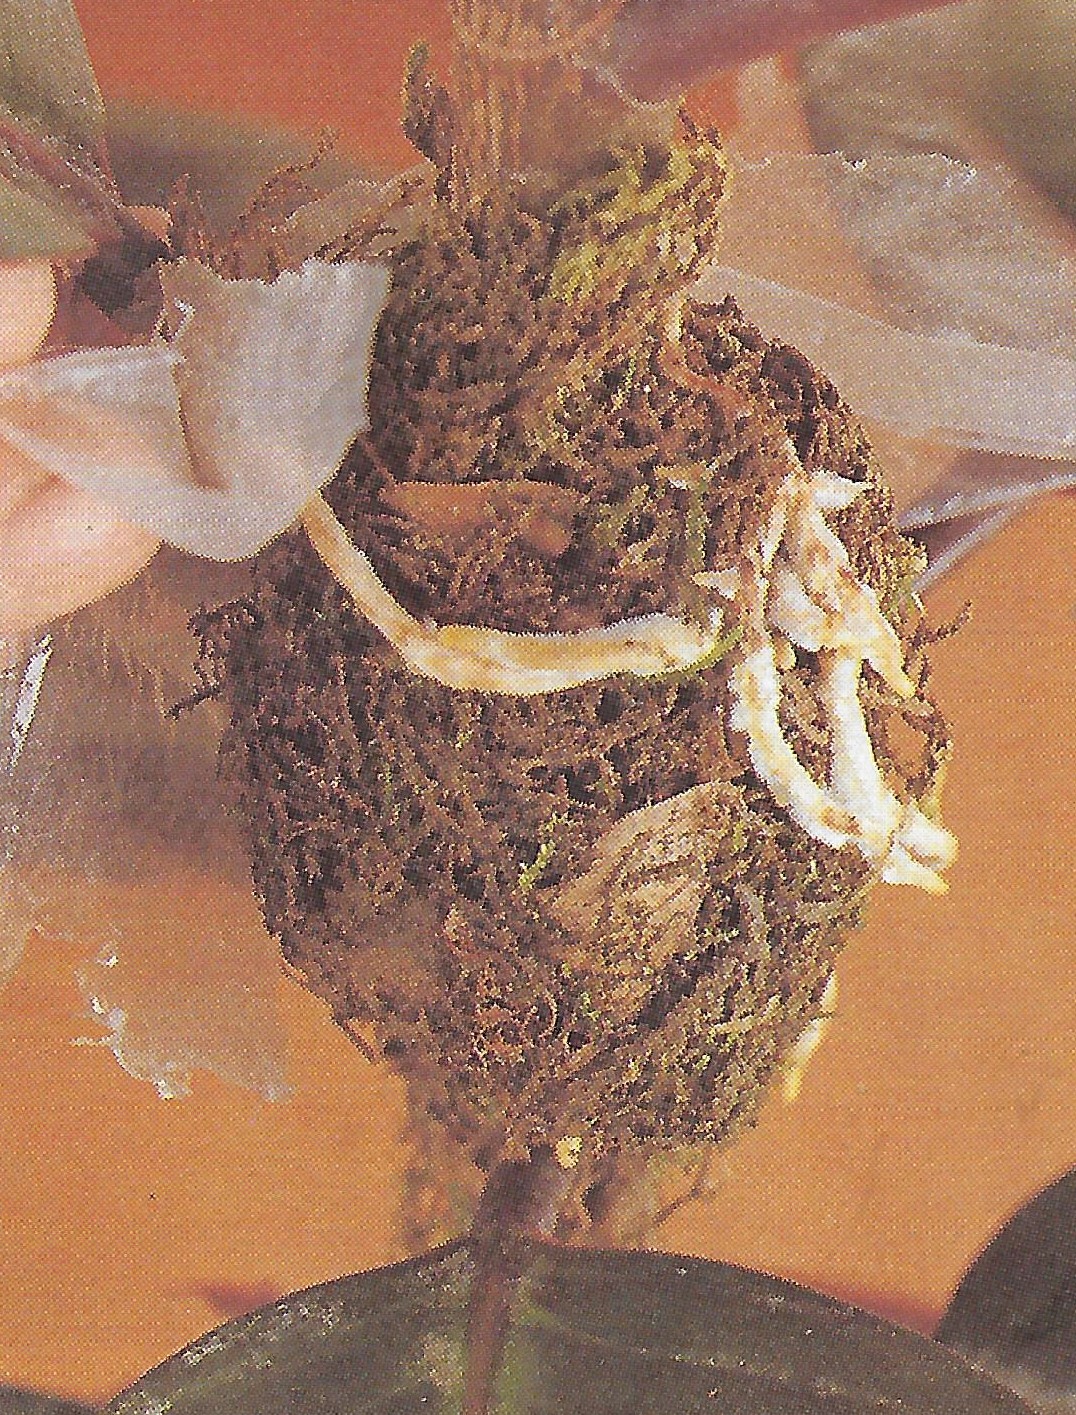
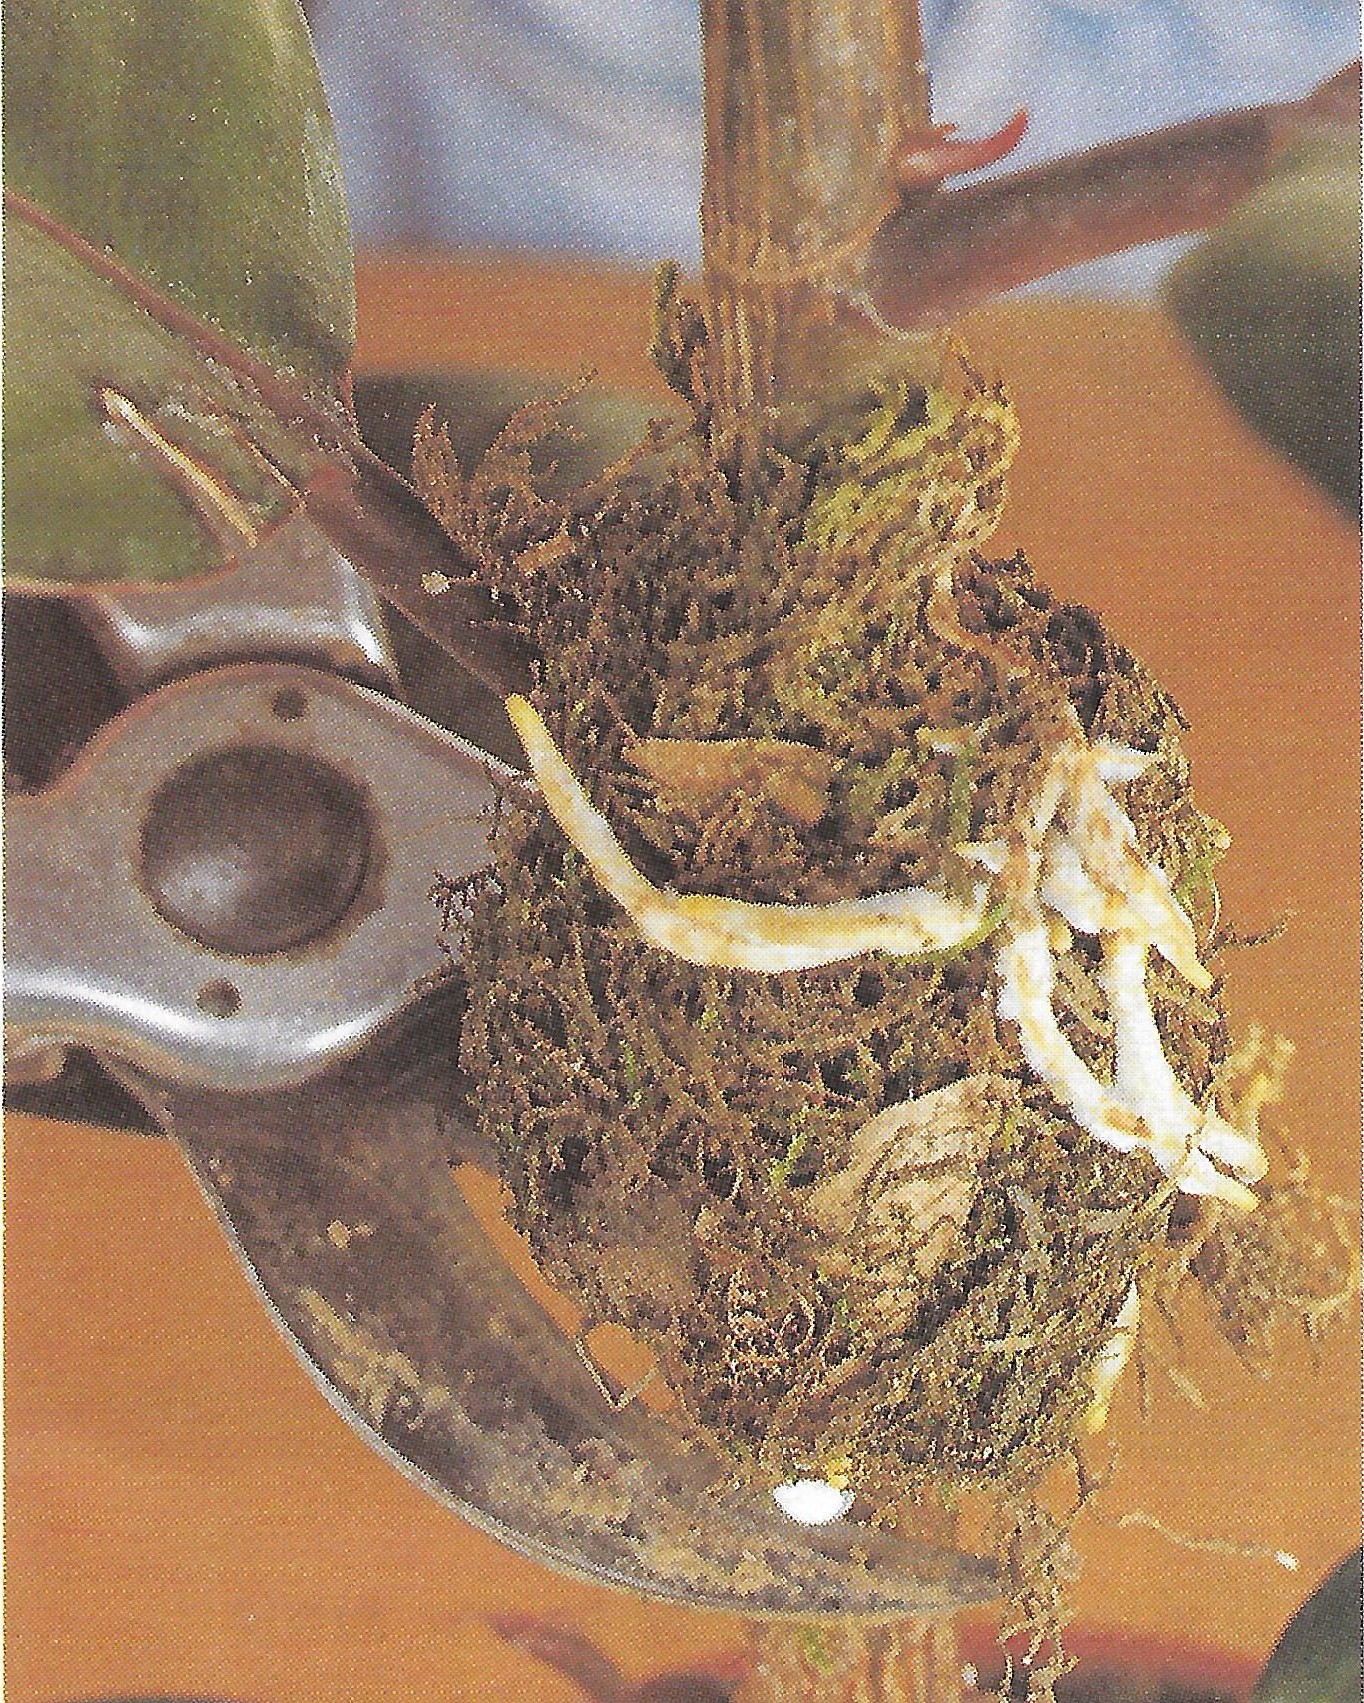
Plants with thick, fibrous roots, which are known as rhizomes are split differently. They are lifted from the plant after flowering in summer, where young newly formed rhizomes are cut from the old plant. Young rhizomes are easy to distinguish ad they are lighter in colour and are smaller in size than the parent rhizome. Cut the rhizomes close to the darker parent plant.
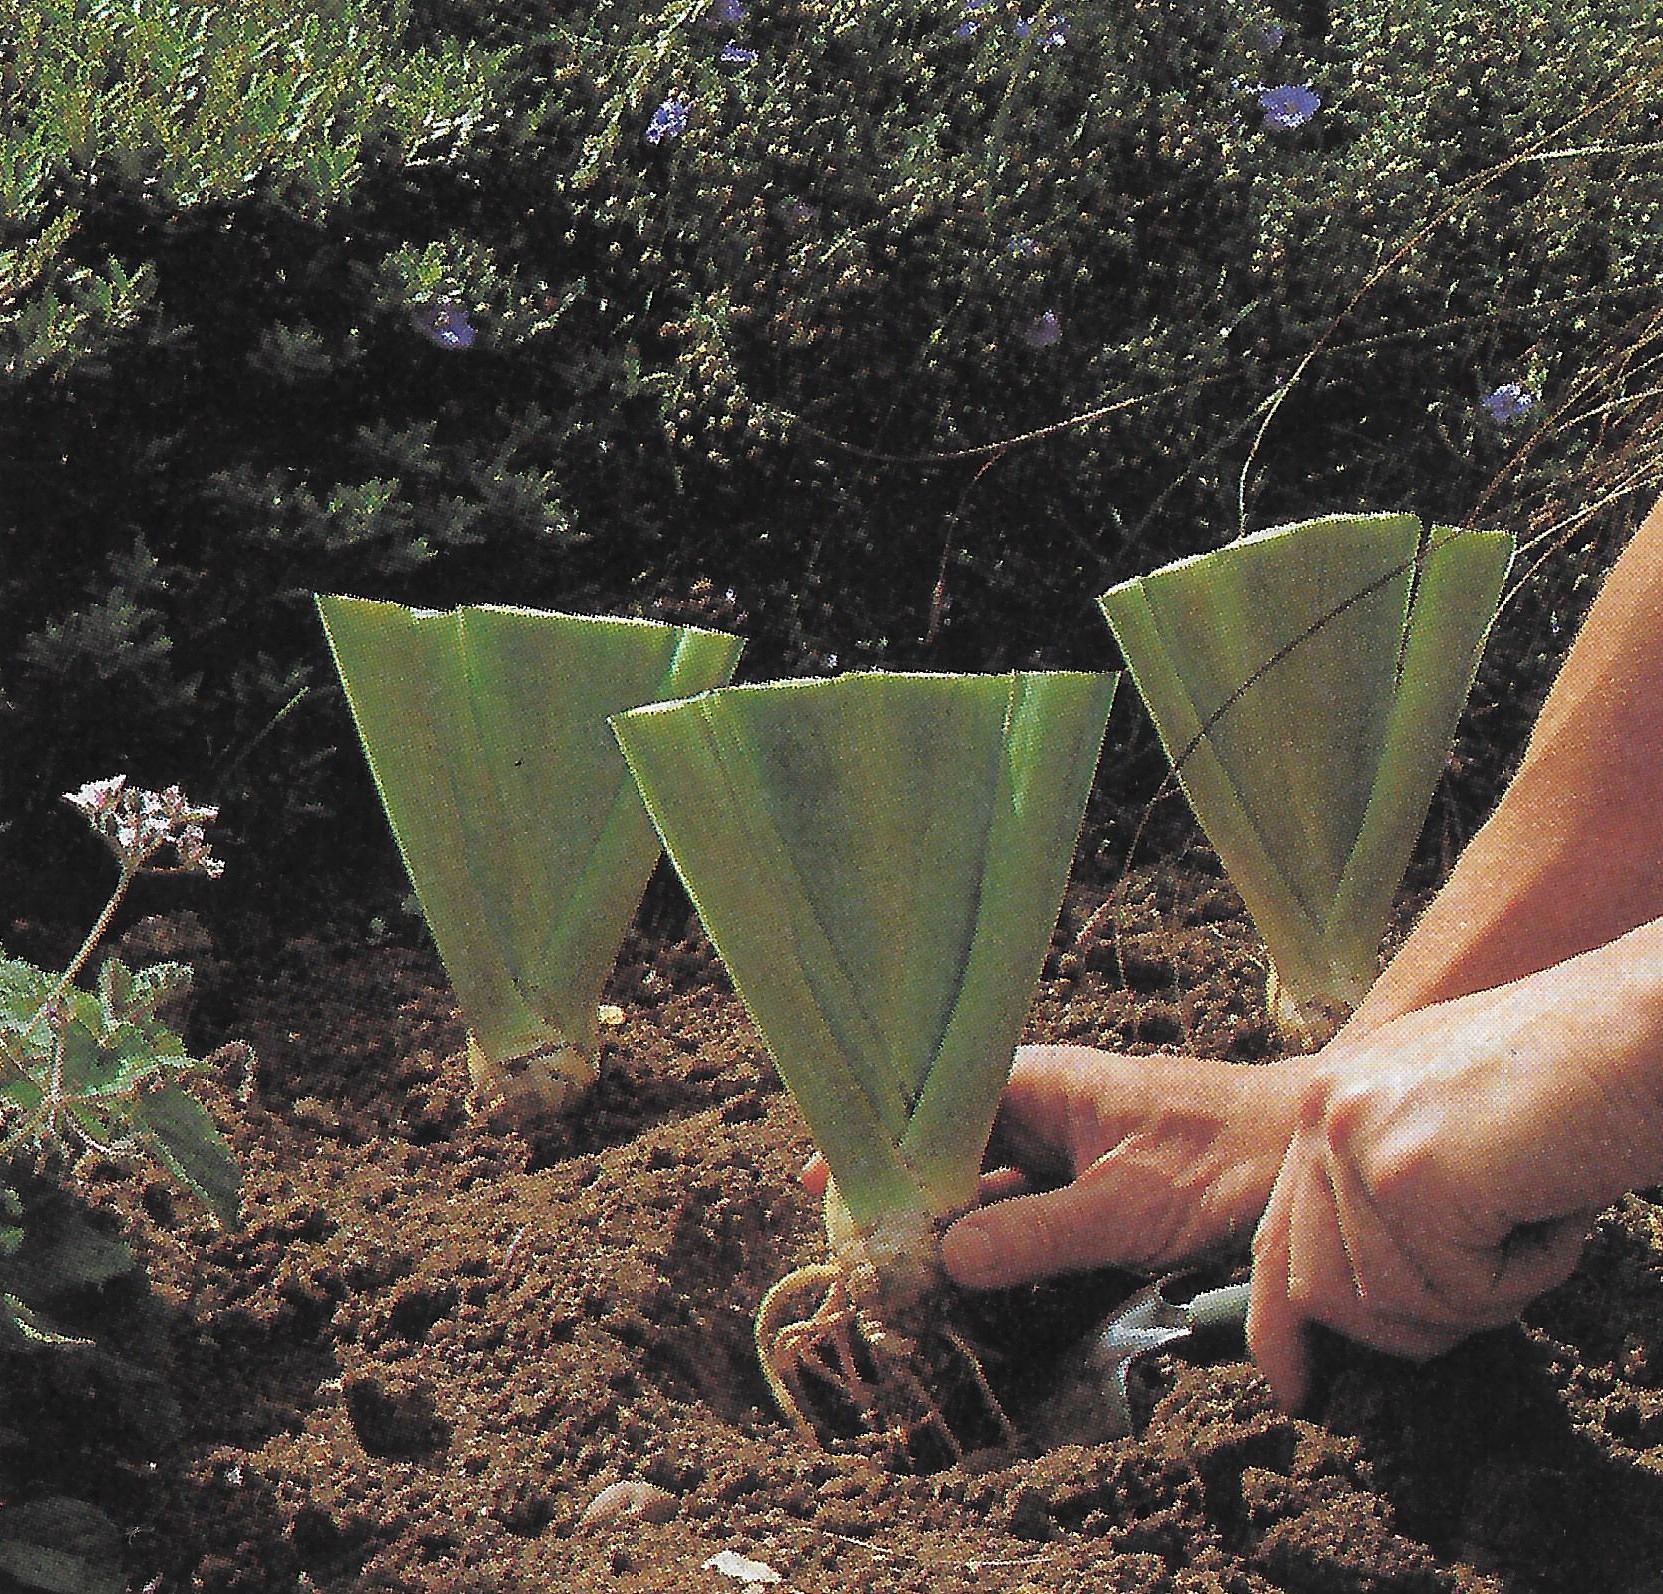
Once detached, cut the leaves to half its present size to prevent wind rocking the plan. Place the young rhizome in a large container full of multipurpose compost, so that the top of the rhizomes are just visible on top of the compost.
BUDDING
This is a technique used to propagate roses, fruit and many ornamental trees, It involves removing a bud from the variety you want and transferring to a special rootstock. The reason for doing this is to control the vigour of the variety, for example, weak rose varieties are budded onto strong-growing varieties to make the plant grow healthier and stronger.
It is best to bud in early summer when the plant is actively growing so that the bark comes from the stem easily. This is not an easy propagation technique to master as it requires some skill. Do not expect to get it right the first time, so do not be discouraged as with everything in life with perseverance it will produce new, sturdy plants.
The major drawback is getting hold of the rootstock, which is difficult to do. You will need to search for professional growers who will sell you some of their rootstock.
ROSE BUDDING
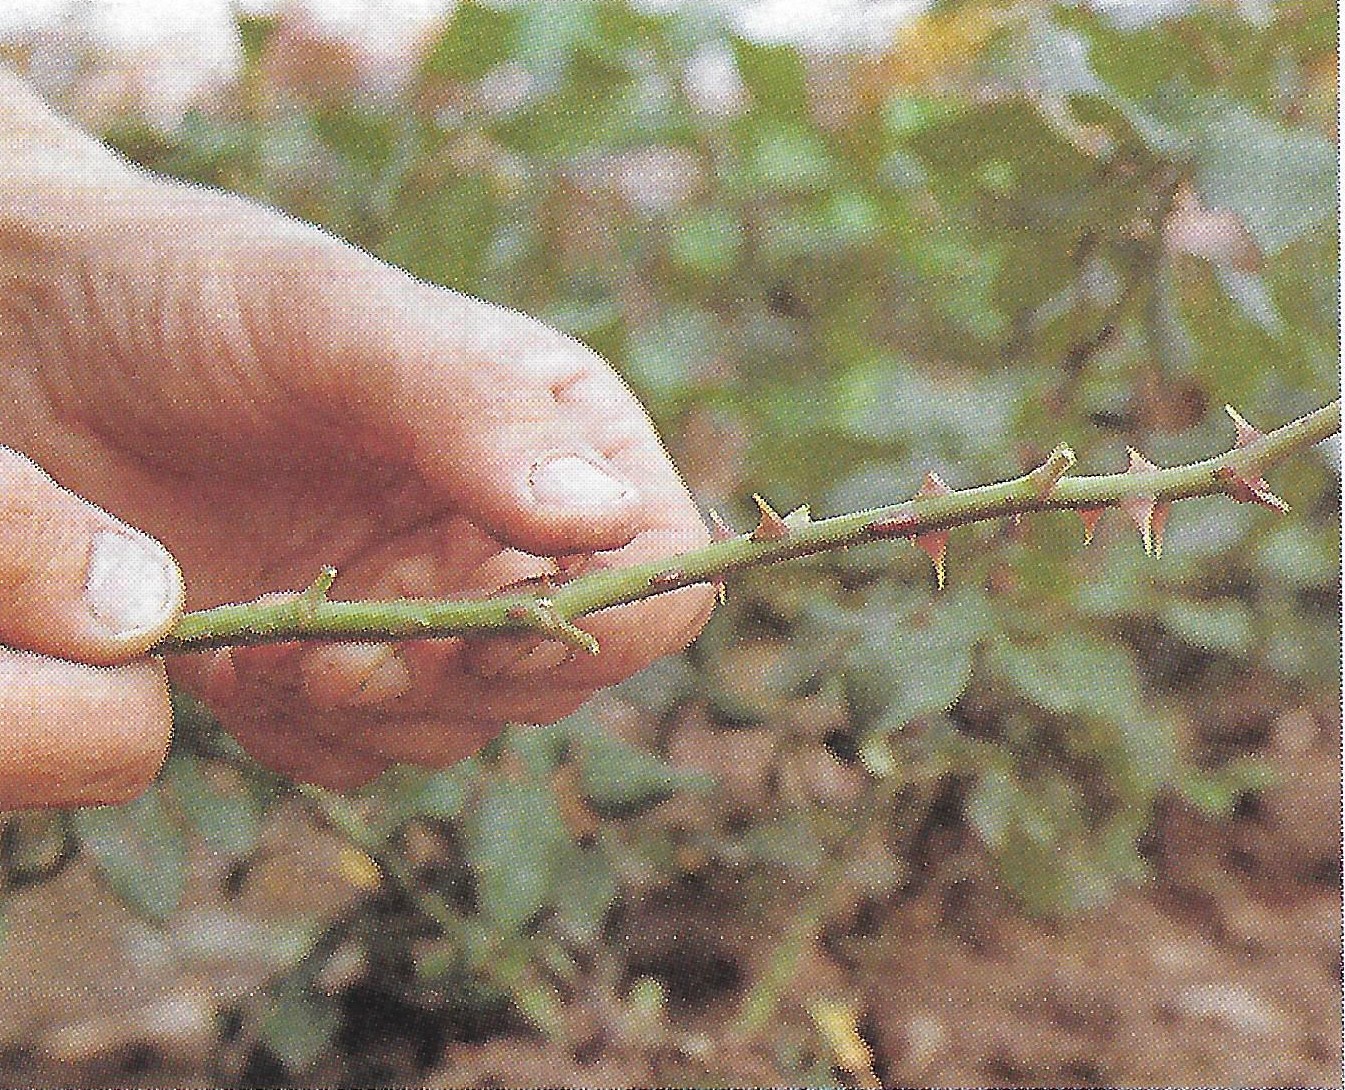
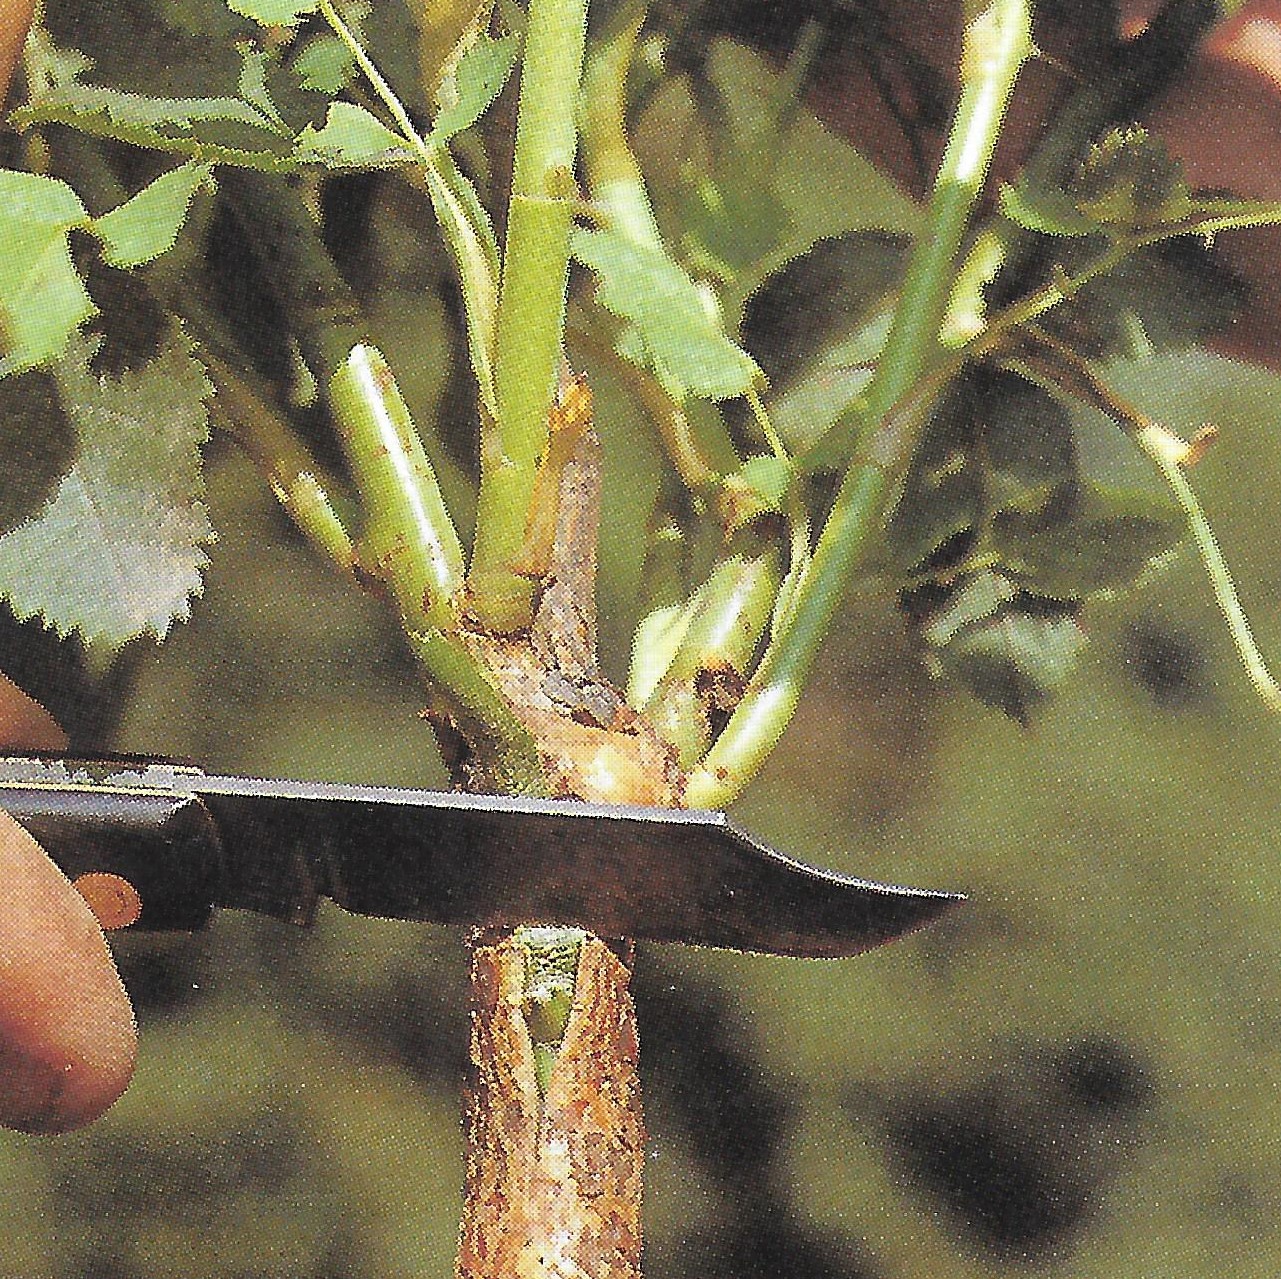
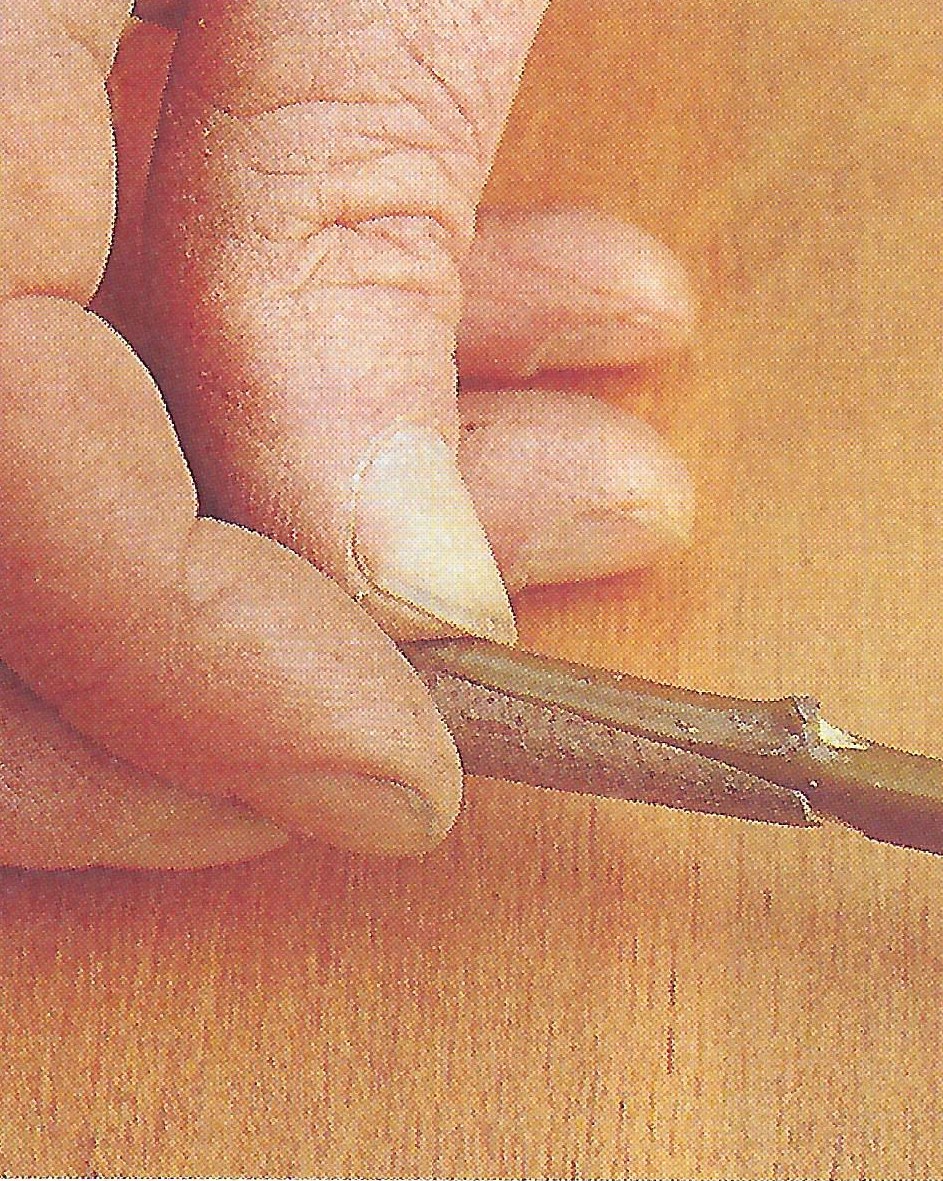
Cut a fresh, strong, young shoot that has not flowered from the rose plant. Remove any thorns and leaves, leaving only a small stem with the leaf stalks.
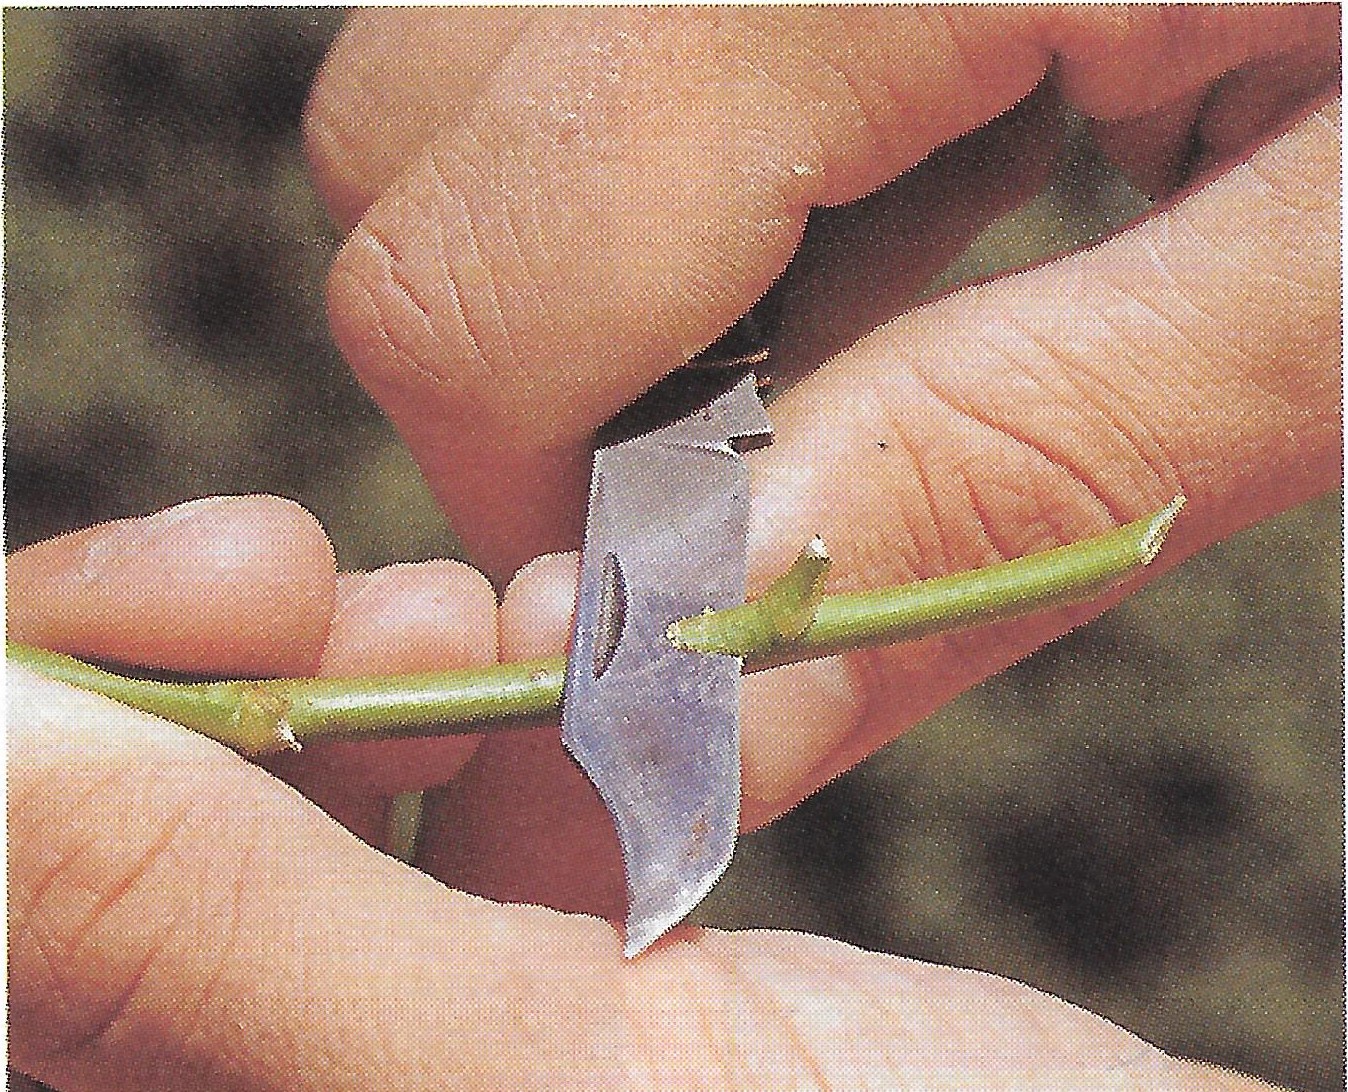
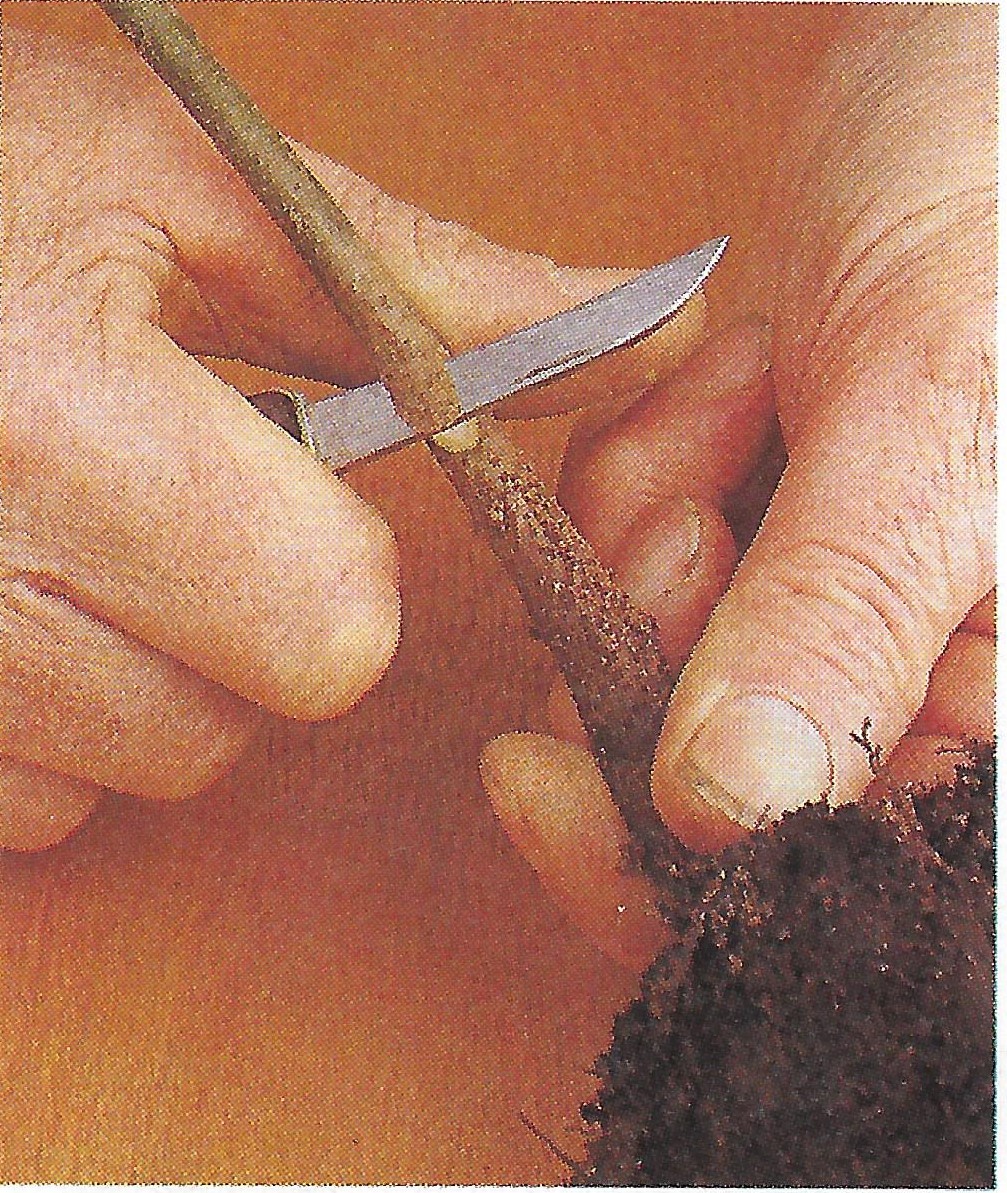
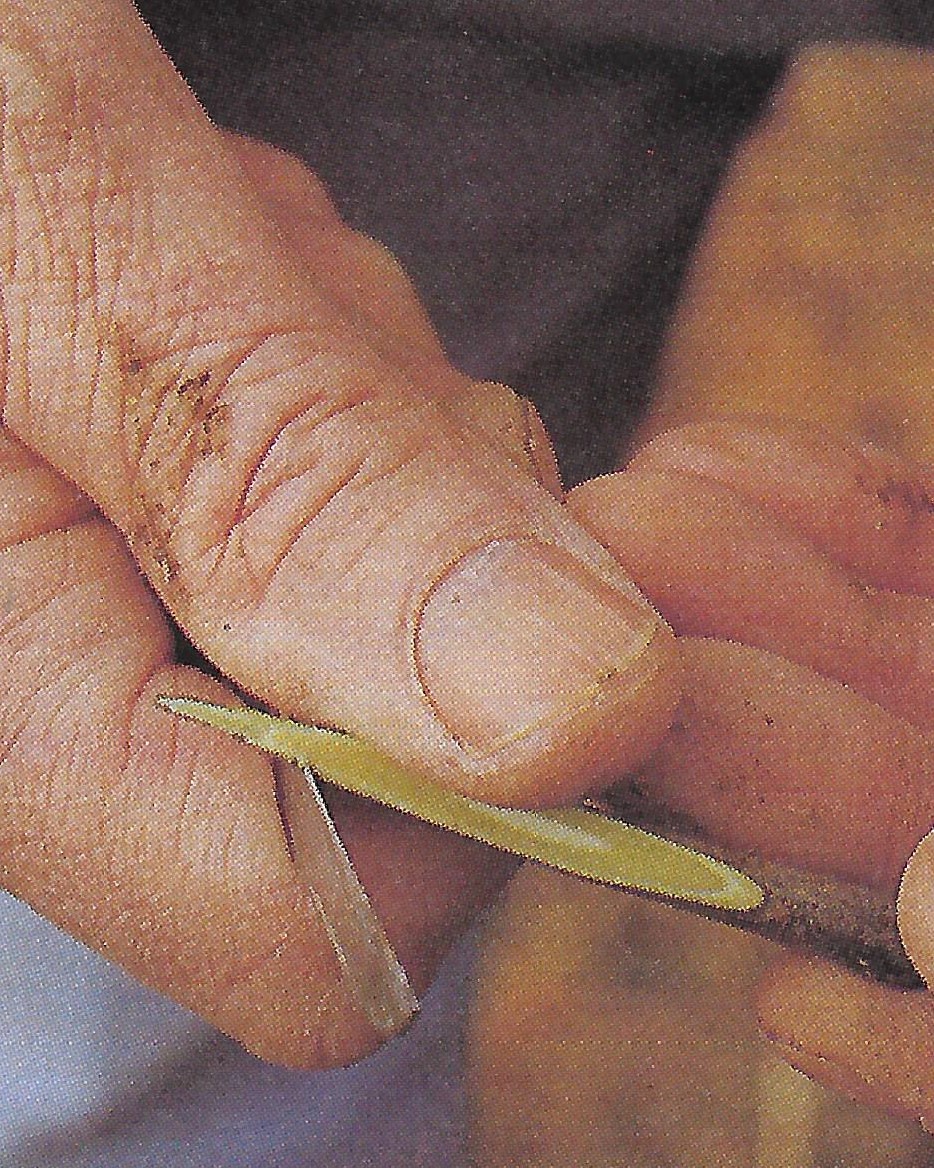
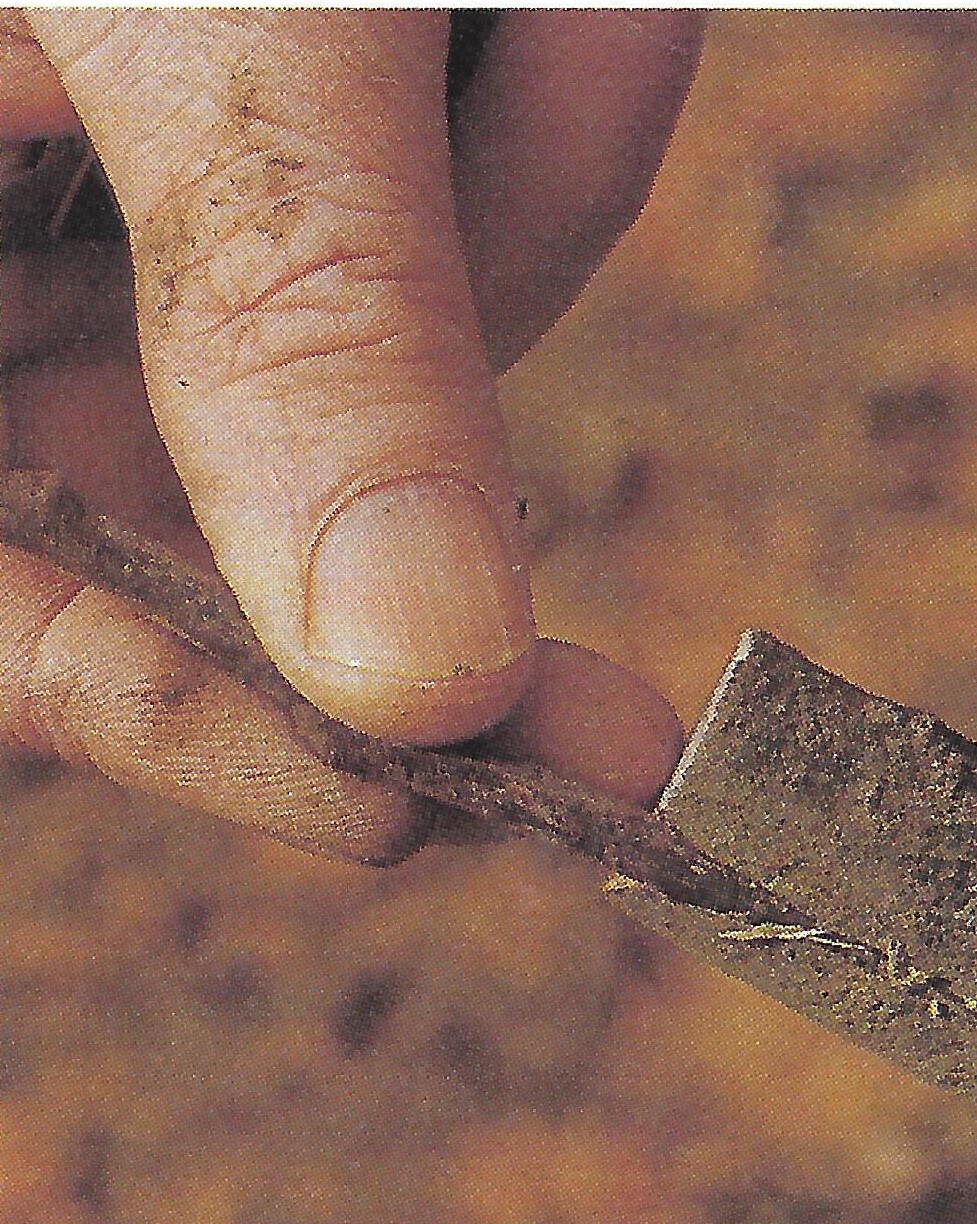
The bud is between the leaf stalk and the stem. Cut just below the bud with a sharp knife, slowly drawing it upwards until the bud sliver is totally removed from the stem. The bud cutting should be around 12 -15cm in length.
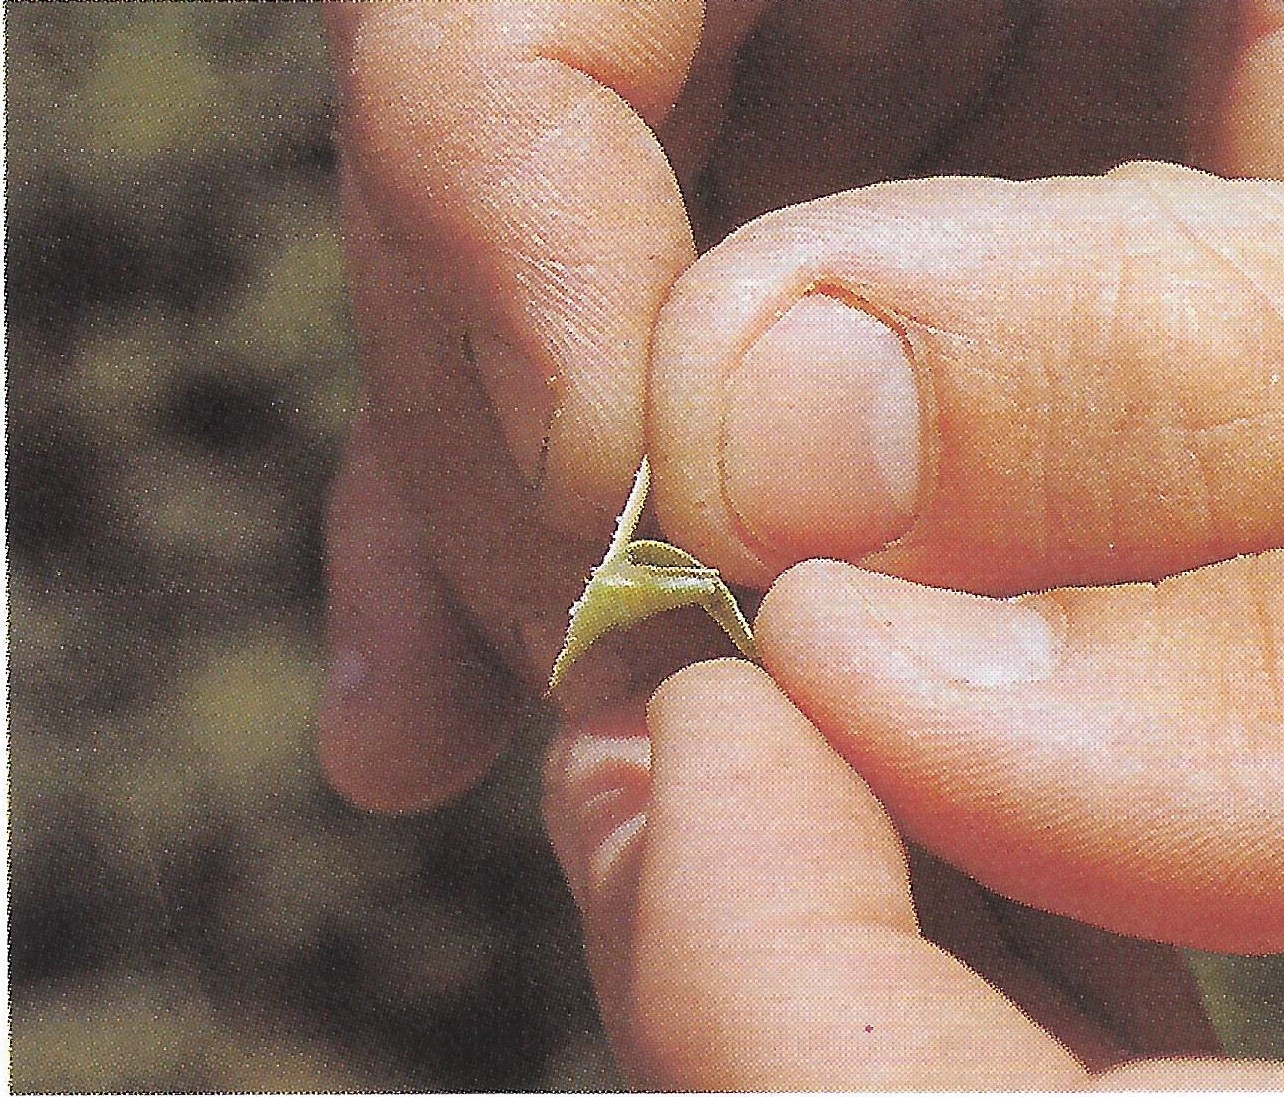
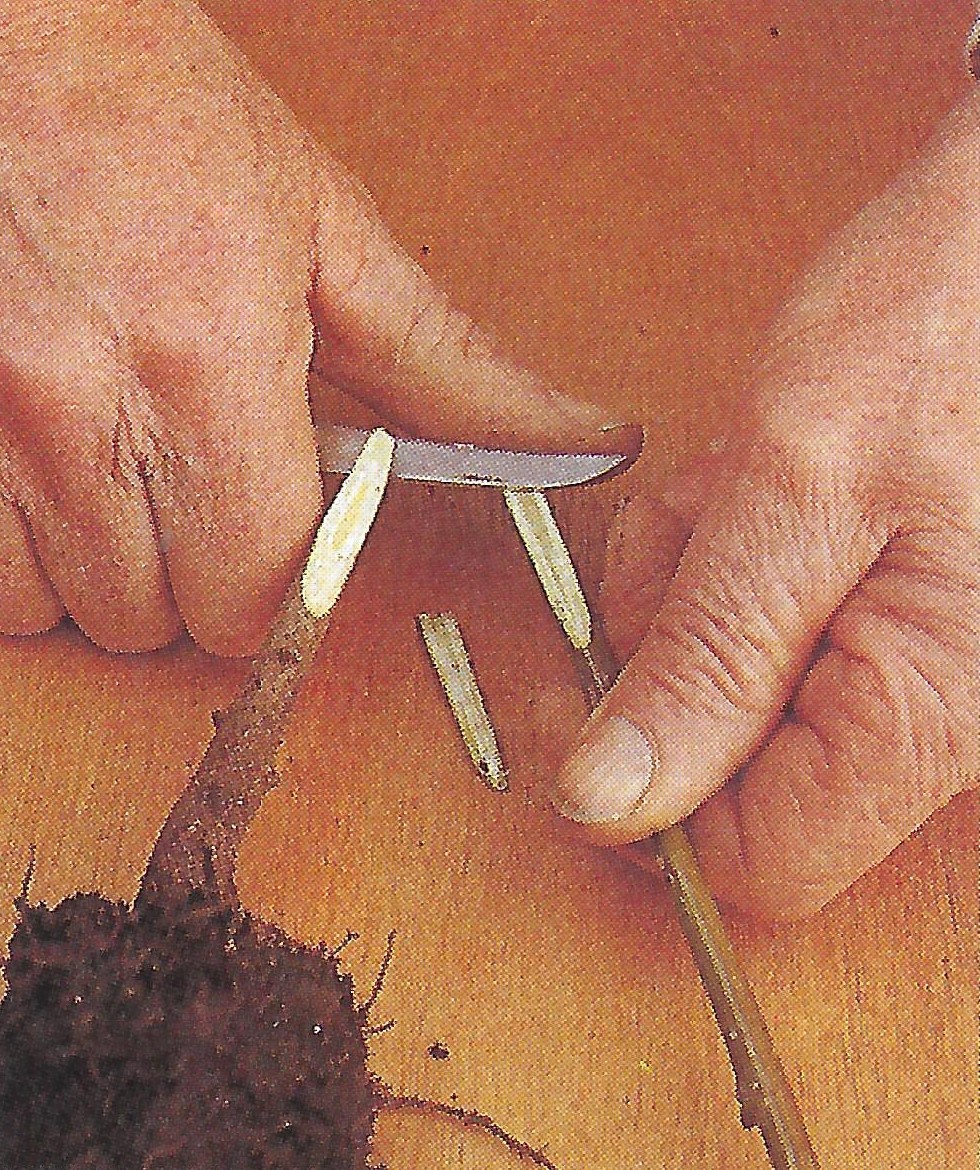
Behind the bud, there will be a small sliver of wood, which should be carefully removed.
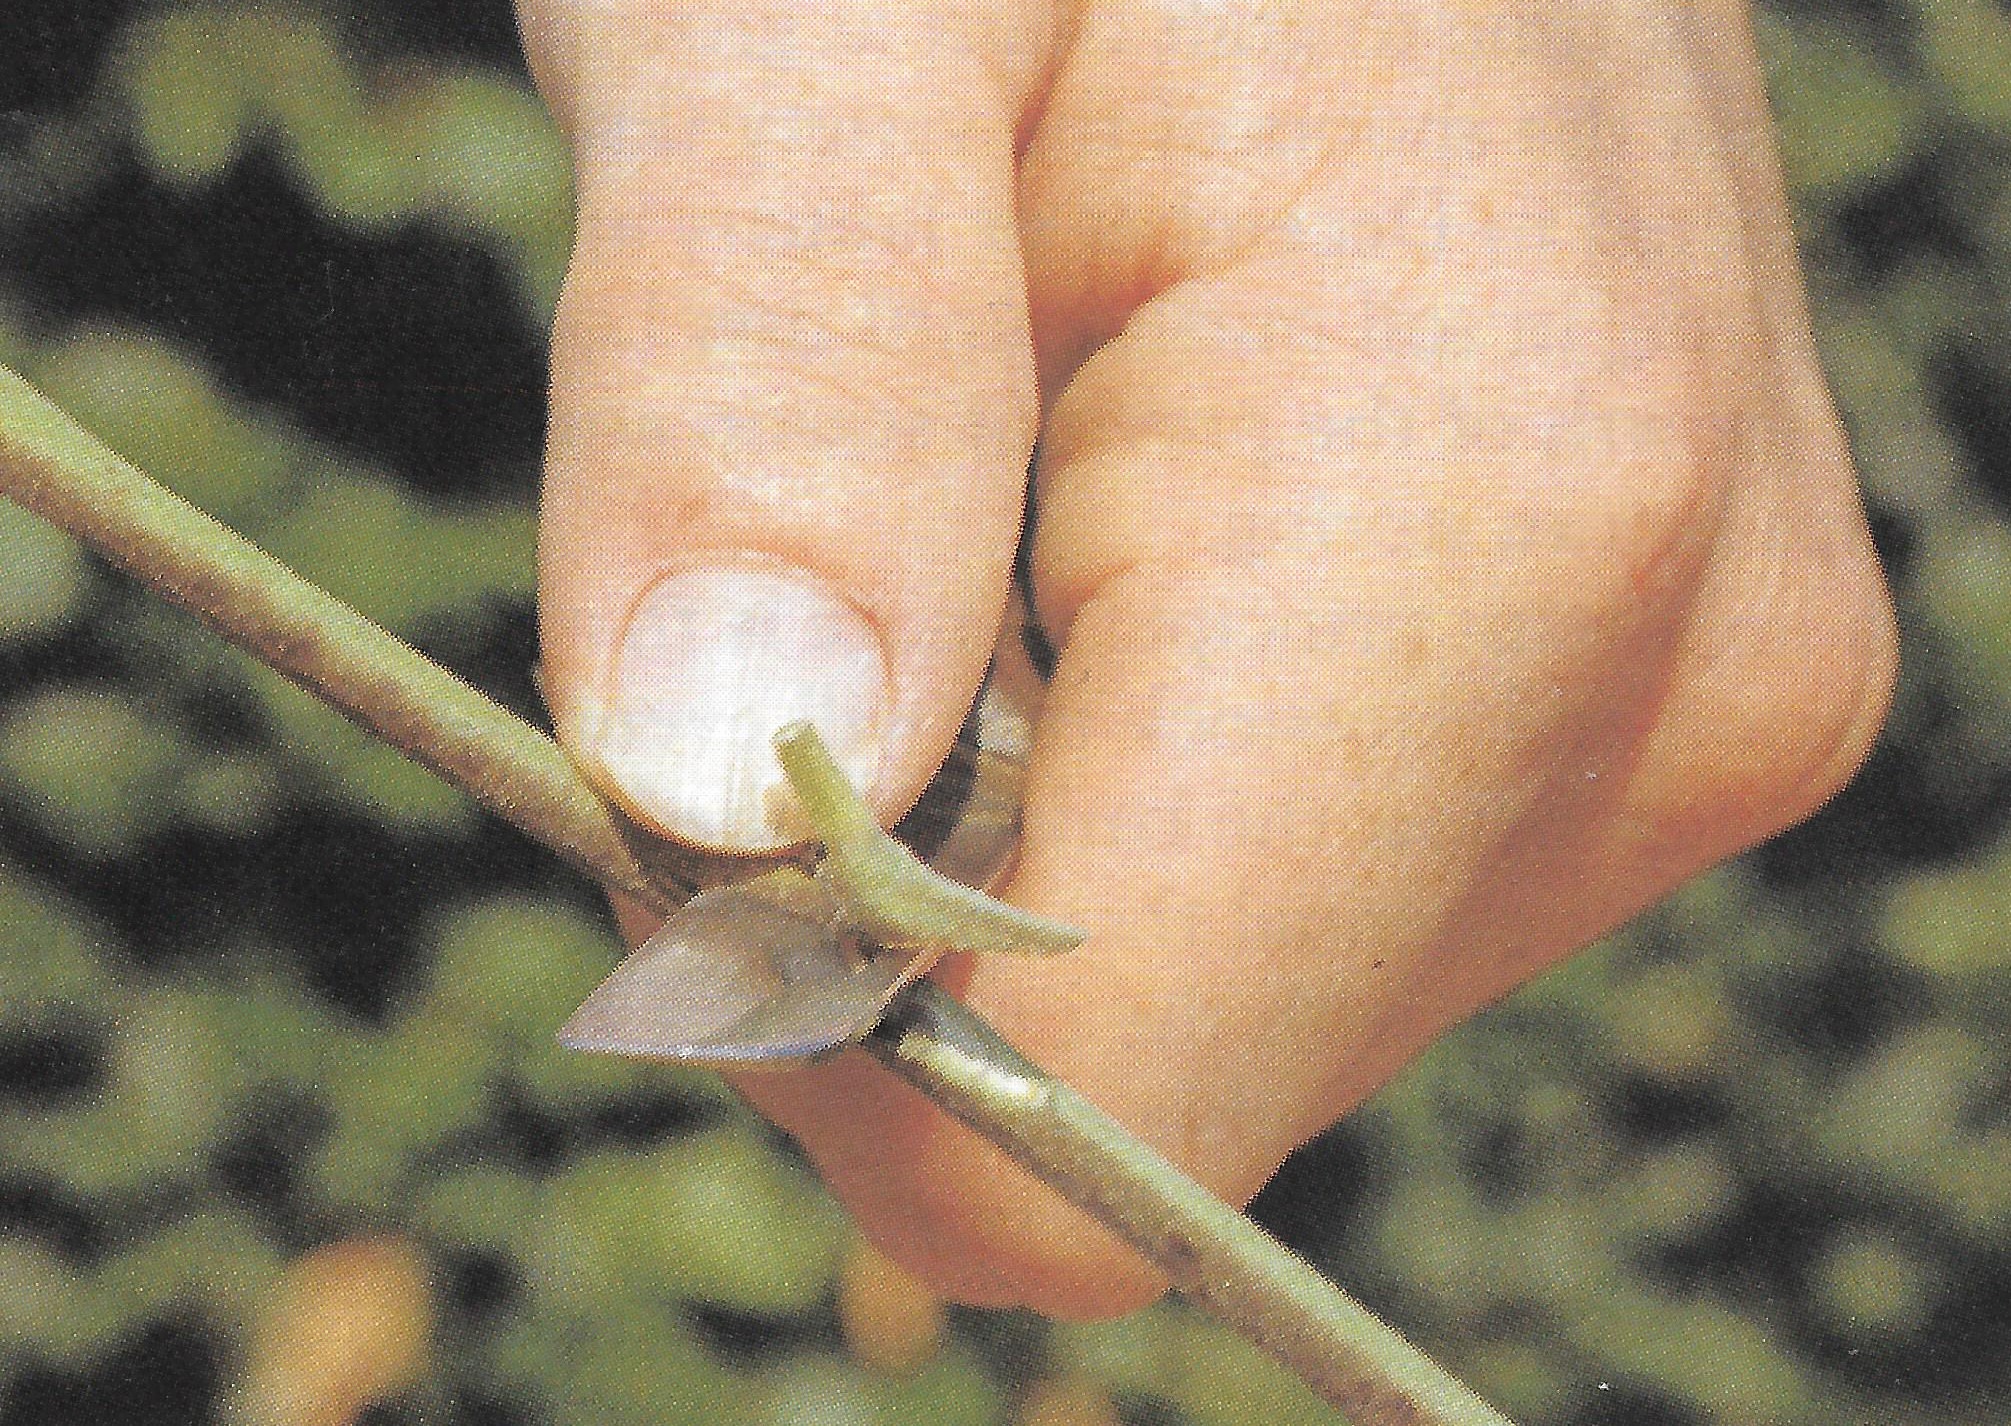
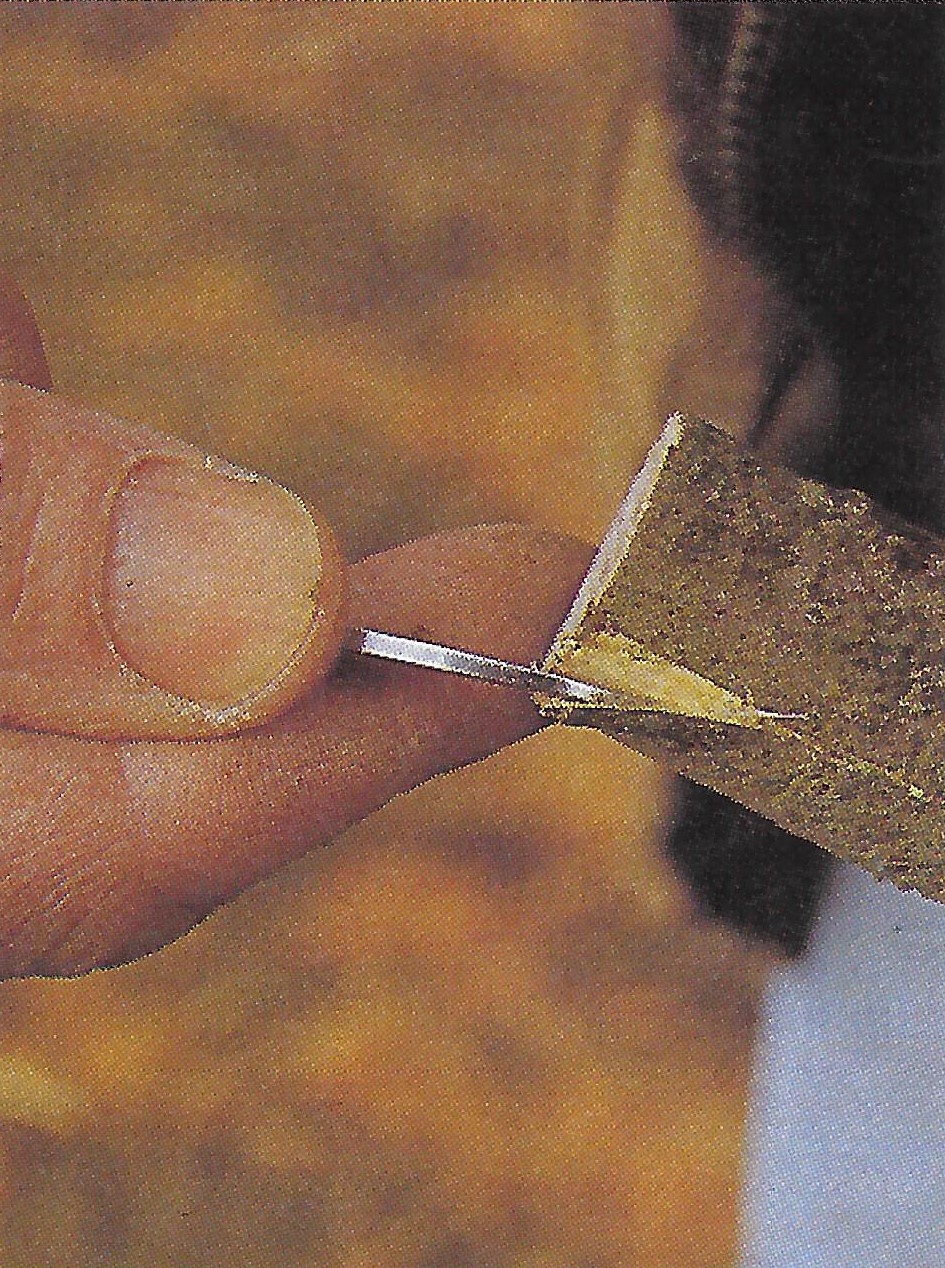
You will need to prepare the rootstock by cutting a small, upside triangle slit in the bark, around the size of the bud.
Lift the edges slightly away from the stem, where it should come away easily. Now push the bud sliver into the upside-down triangle slit, so that the bark holds it in position. The bud must fit snuggly into the groove, and must not be forced in.
Cut it the top of the bud, so it is flush with the top of the upside-down triangle. The bud should be snug as a bug inside the rootstock.
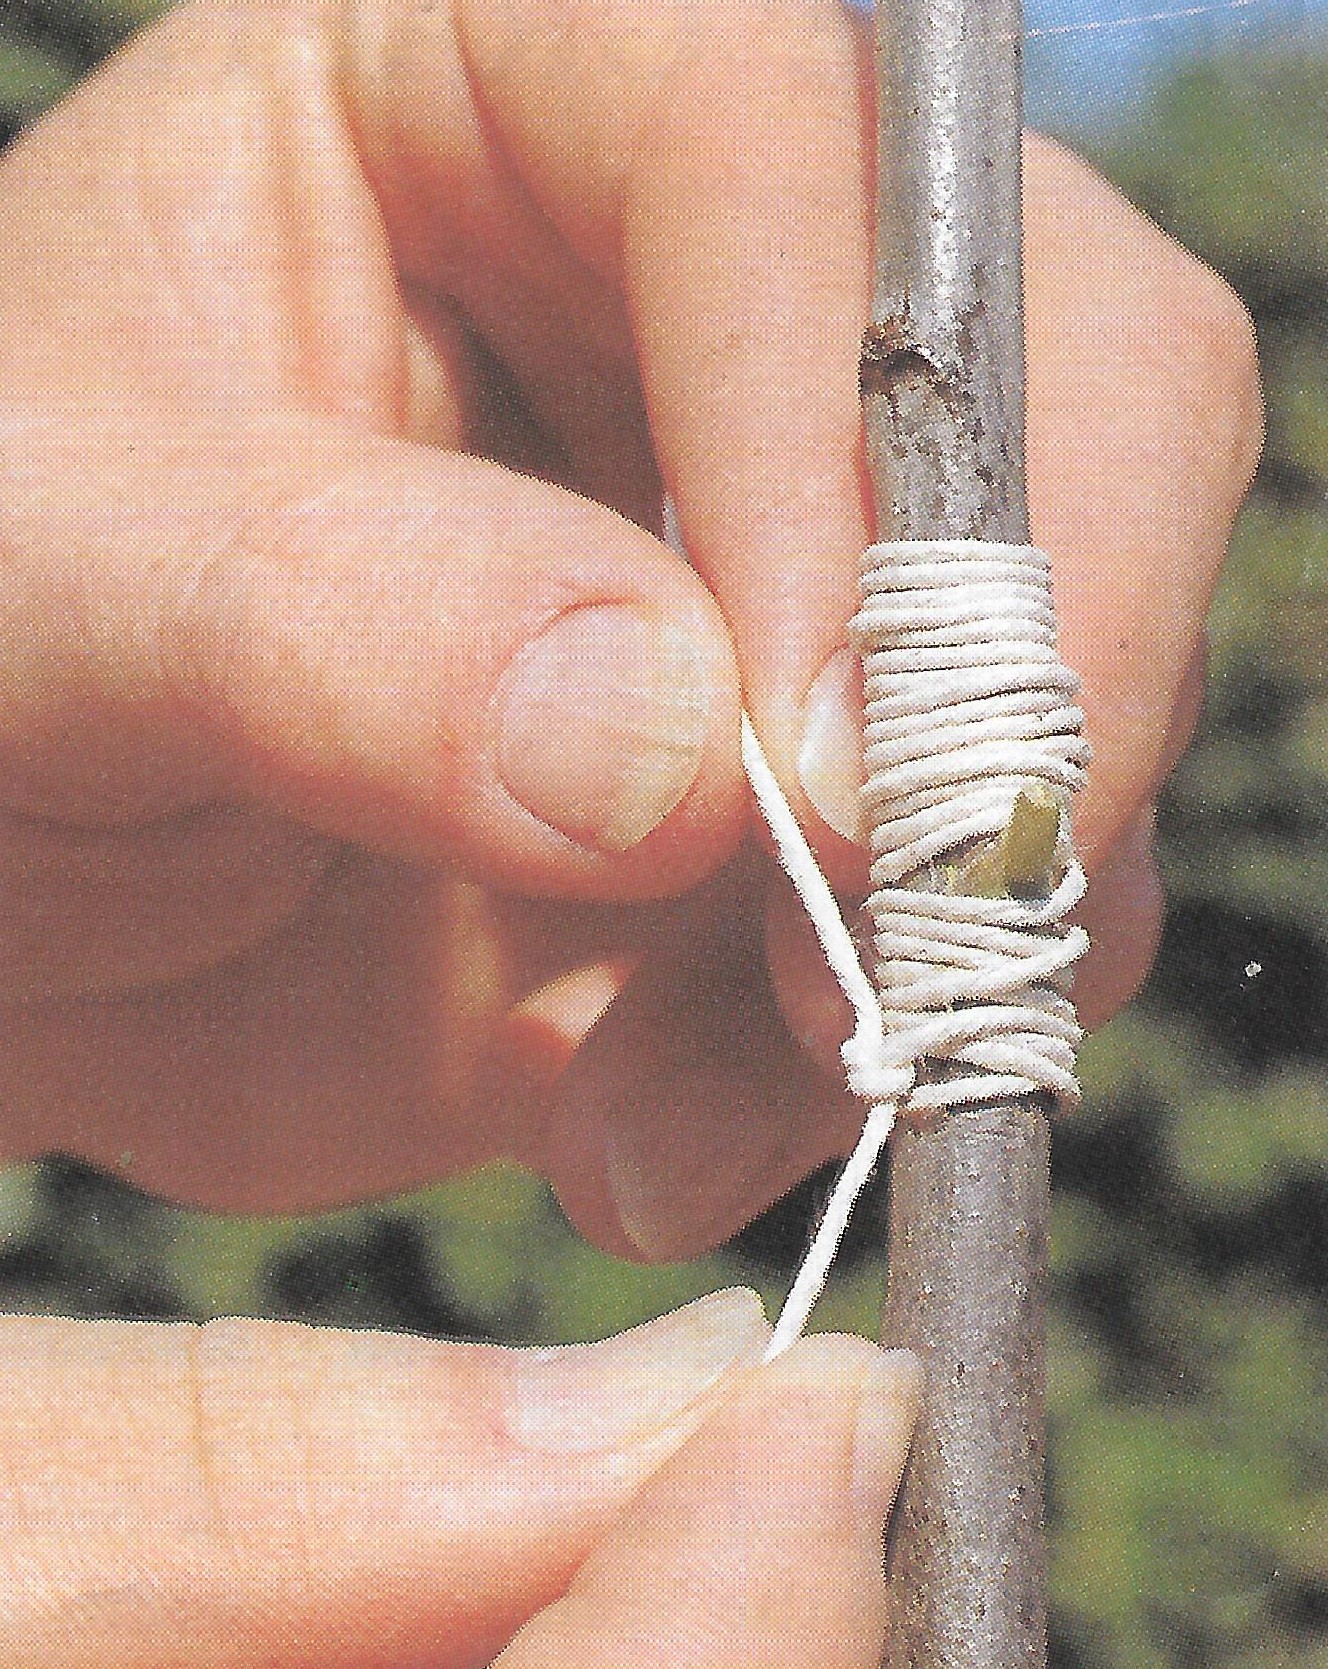
You will need to hold the bud in place using a rubber band or special budding tape. When you are buying rootstock try to beg a handful of these budding tape from the grower.
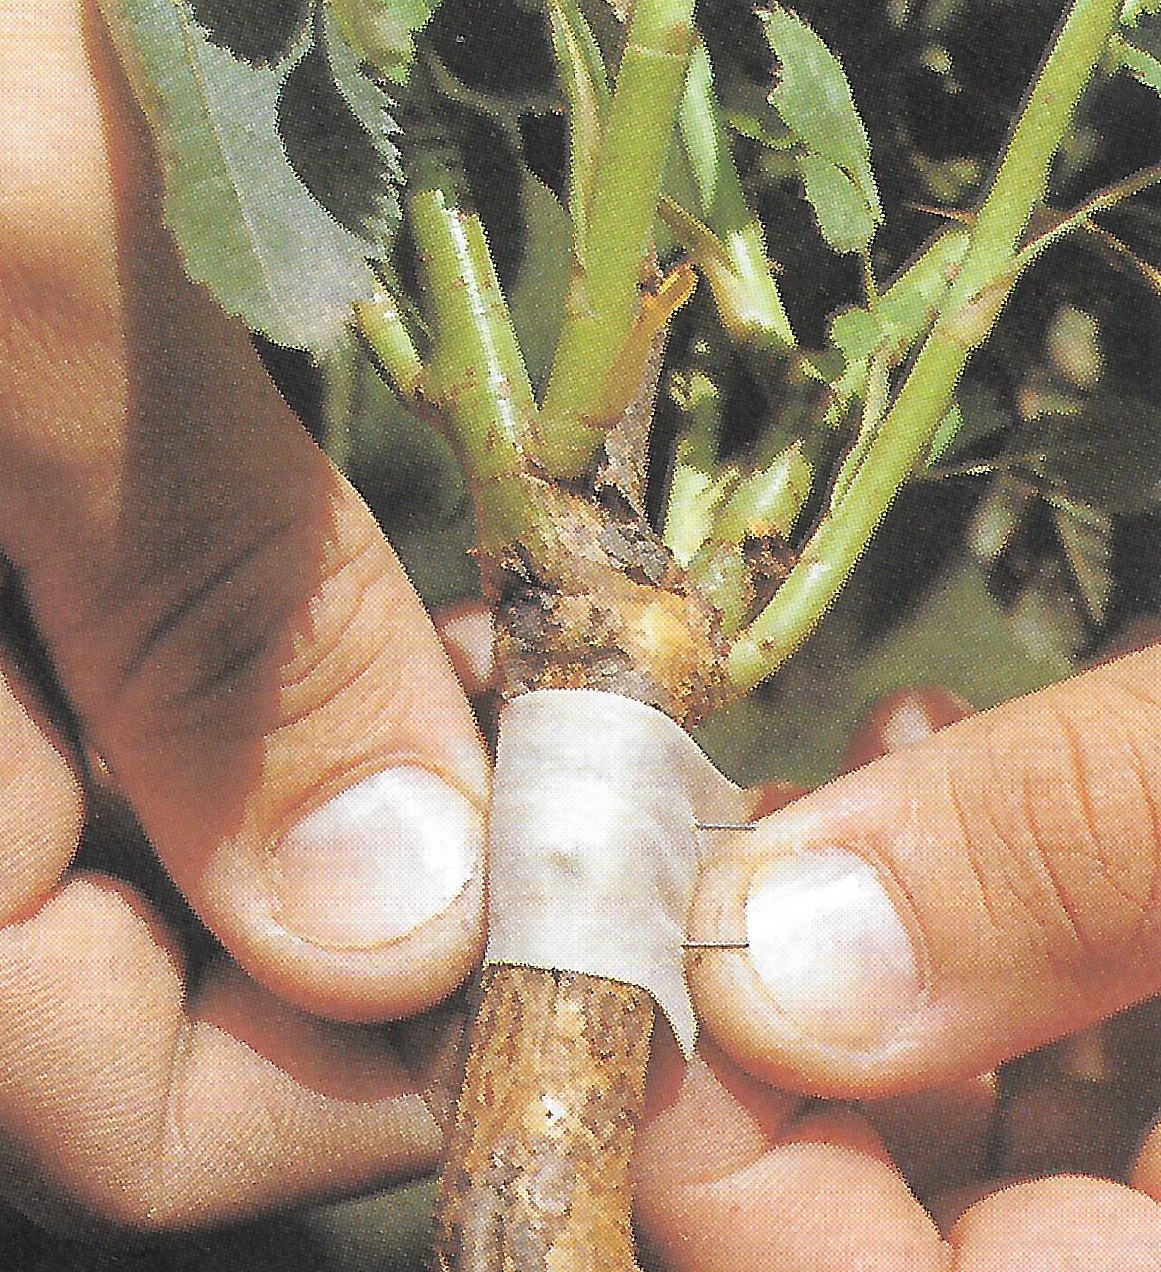
Three weeks to a month later, the bud should have taken and should be starting to show sign of new growth. The spring of the following year, you will need to cut off the top of the rootstock plant to allow the budding variety to grow on in its place. By the following autumn, it should produce a respectable plant that can be planted in your container garden.
CHIP BUDDING
Fruit and ornamental trees are budded slightly different. It is done in order to reduce the size the tree grows too. This slightly different technique is known as chip budding’. It is not a difficult technique to master, where it has a high success rate.
Finding fruit tree rootstock can be difficult to find, so you may need to get friendly with a local fruit growing nurseryman.

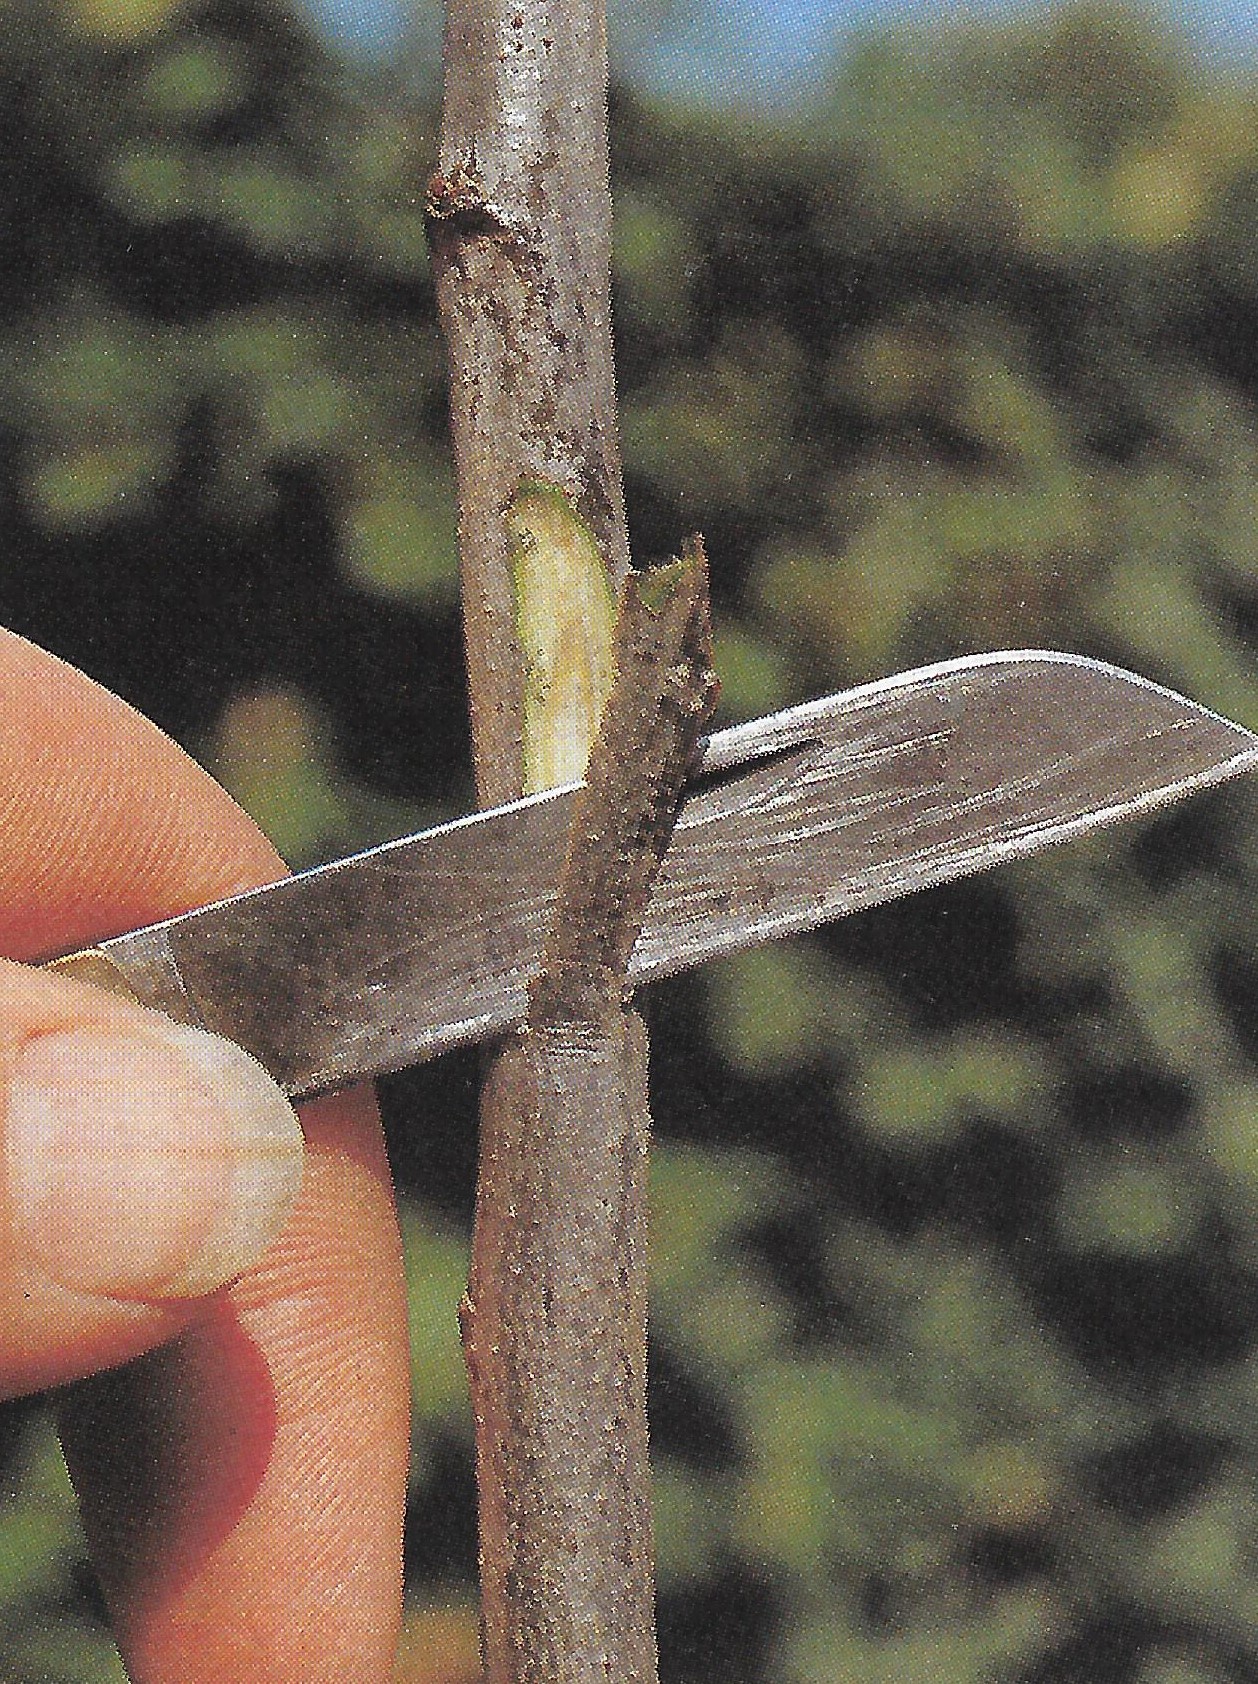
First, remove the bud from the variety you want in much the same way as recommended for rose budding. In this way, a sliver is produced but this time the wood behind the bud does not need to be removed.
You now need to prepare the rootstock by making a nick in the bark, where a slice is removed right down to where the nick finishes. The nick and bud slice have to be roughly the same size.
All you have to do is simply replace the slice of bark you have removed with the buds, holding the bottom behind the nick in the bark.
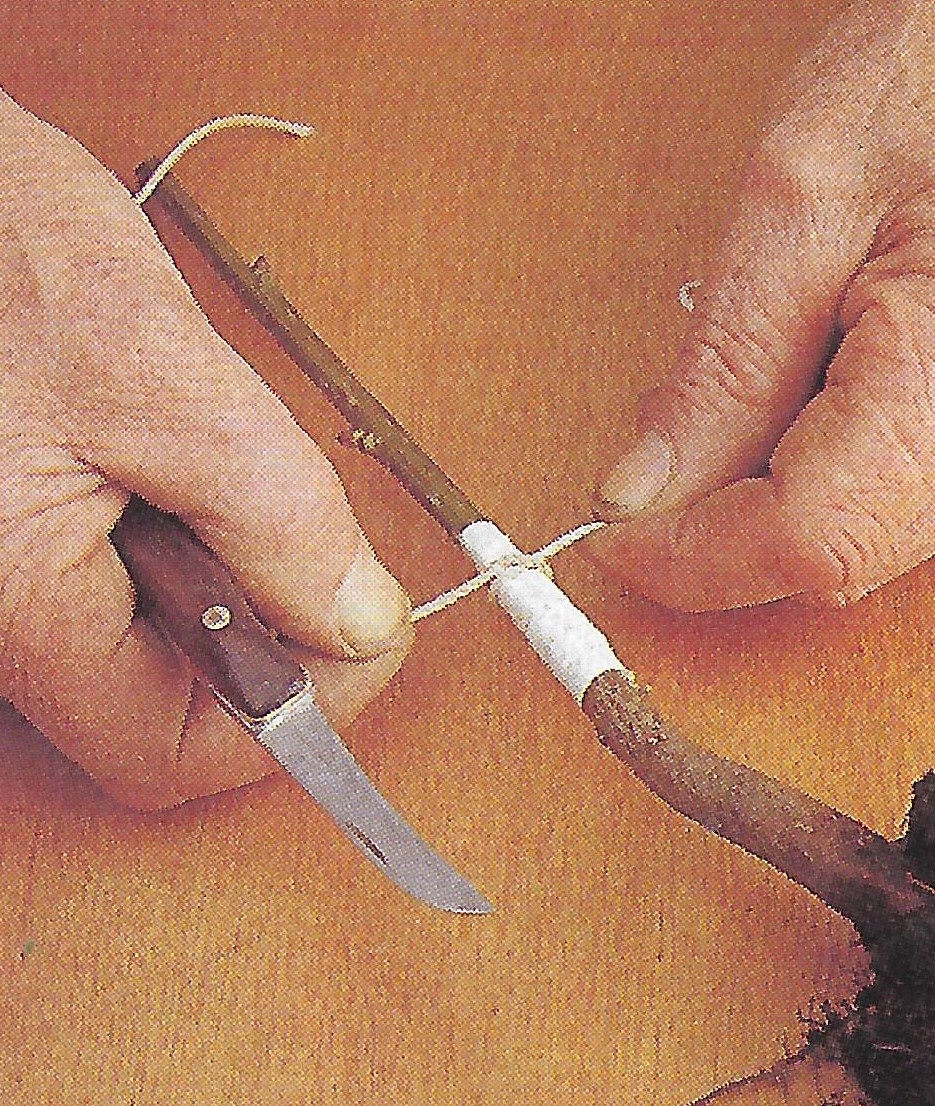
Finally, tie the bud in with the special rubber tie if you can find them, or using tape or string if you cannot. Once the bud has taken you can follow the procedure recommended for budding roses.
GRAFTING
This is another form of budding but instead of just the bud, whole lengths of shoots are used. It is a method used widely in preparing fruit trees, ornamental trees and shrubs. To graft any plant on to rootstock, they have to be compatible so you need to choose the same genus or use what variety has been successfully in the past.
The best time to graft is just as growth begins in spring but the shoots of the chosen variety (known as scions) are collected in December or January, and after stored by half- burying them in compost outside until it is required. You have to look for strong, young shoots from the previous growing season, where you need to remove the soft growing tips before storing.
An important consideration is that the area the scion and rootstock fuse together is situated just below the bark. This is called the ‘cambium layer’ and it is essential that the cambium of the scion is in direct contact with the cambium of the rootstock. You will have double the chances of success if the cambium on both sides of the stem is fused together. This means that the diameter of both the scion and rootstock must be identical in size.
SPLICE GRAFTING
This is the easiest and the most popular graft.
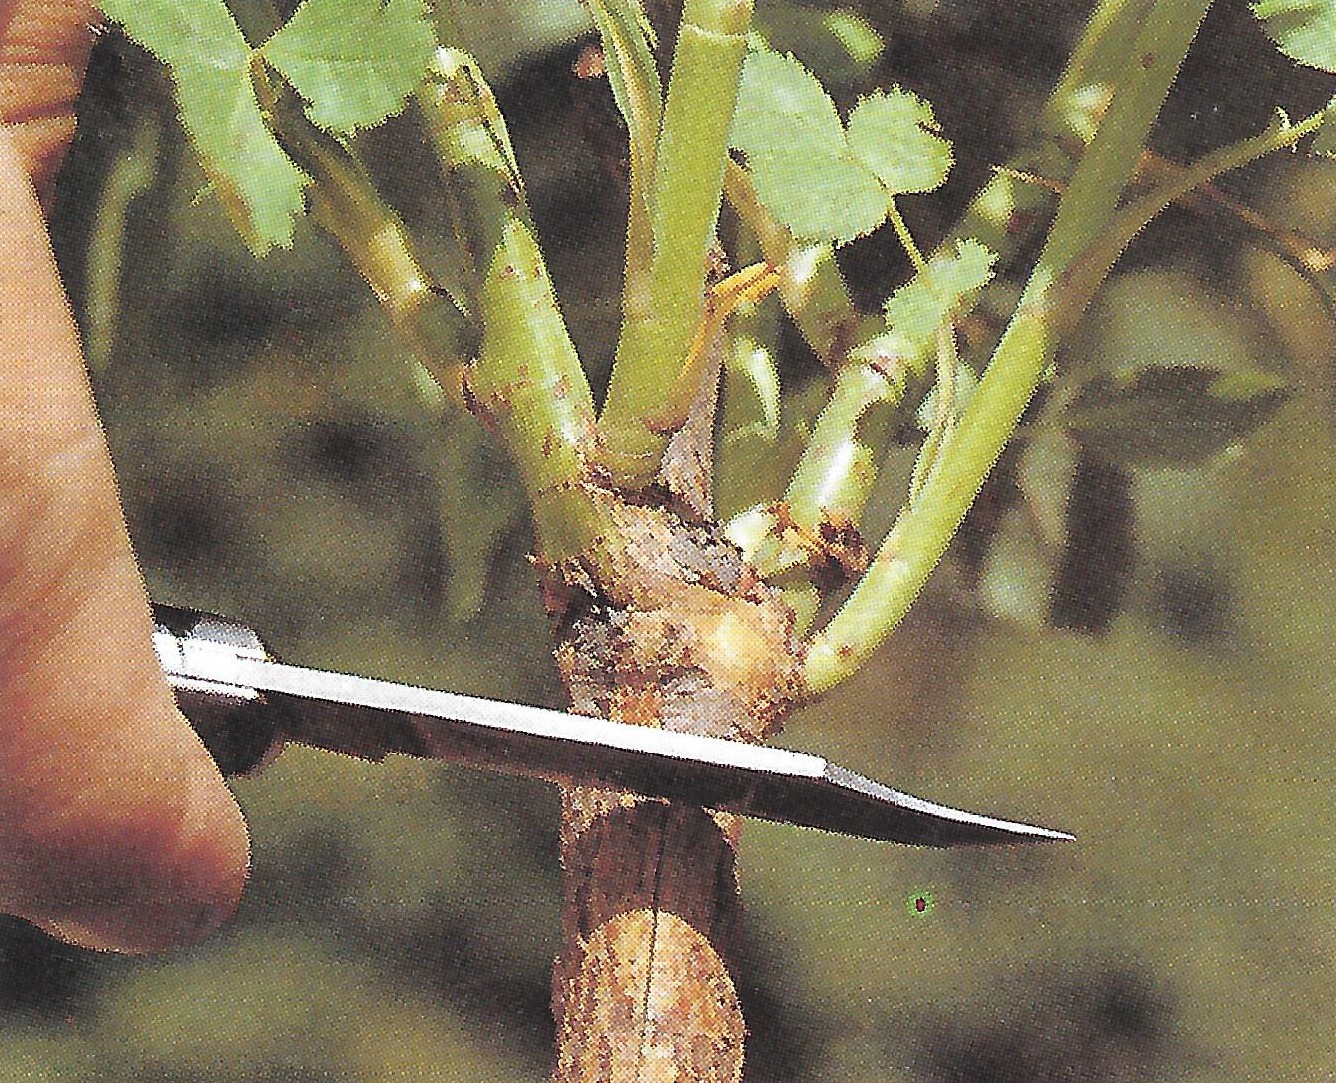
Start by making a long sloping cut in the rootstock, at an angle of 30 degrees to the vertical. The cut should be made at a distance of 15cm from the roots.
Select a scion of the same diameter and make another 30-degree cut. You have to make sure that the cuts are straight and even. This will take a lot of practice, so be prepared to fail the first few times.
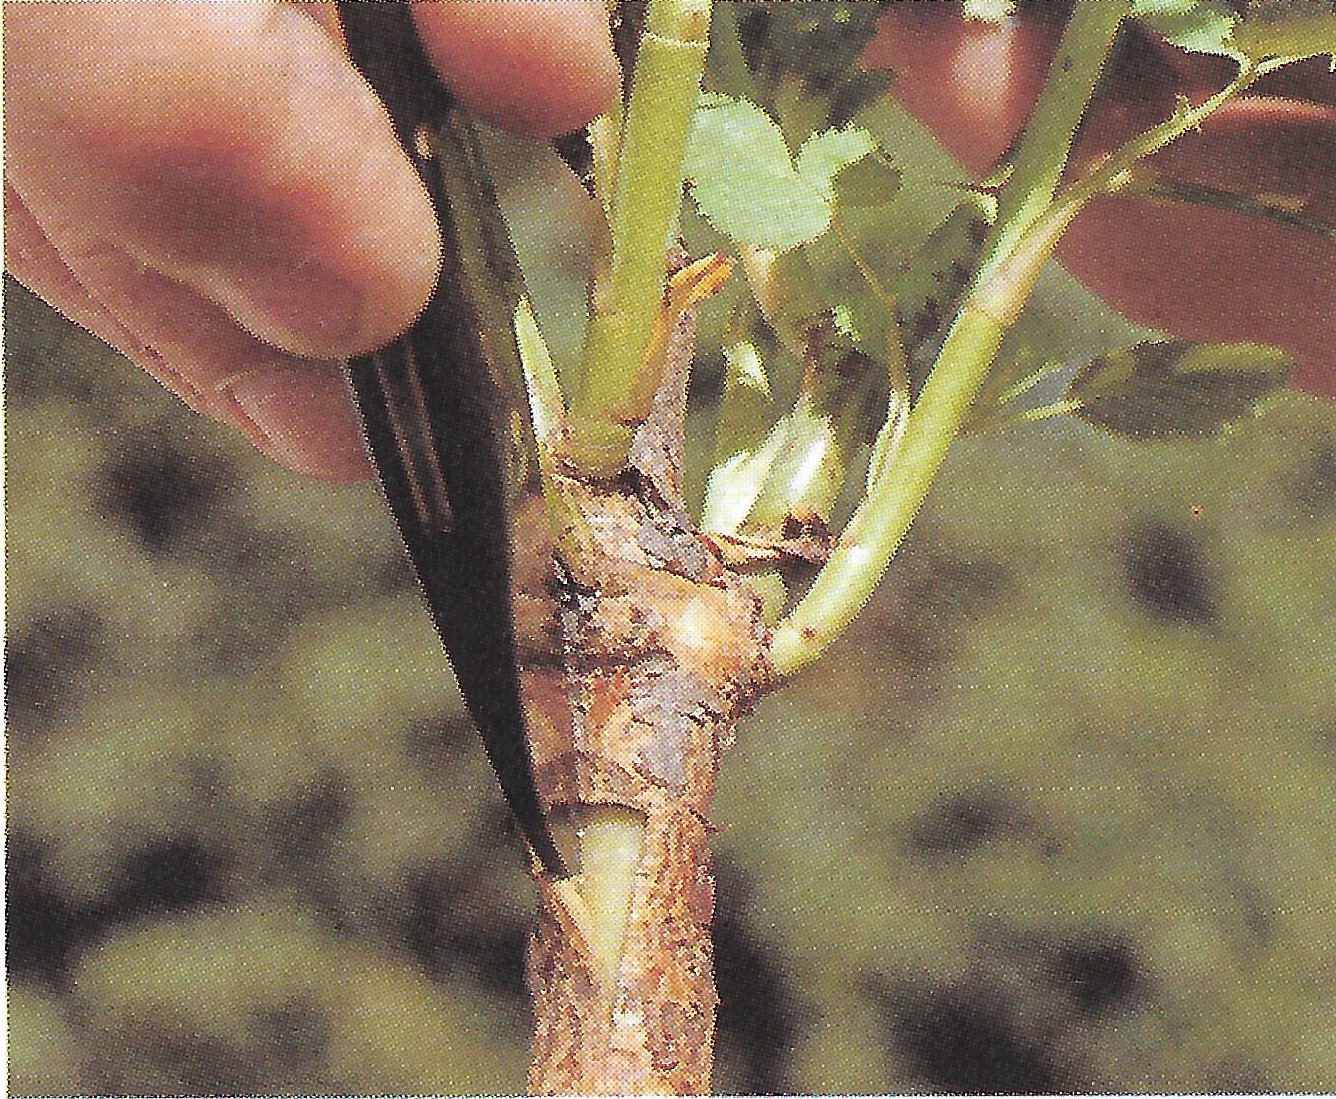
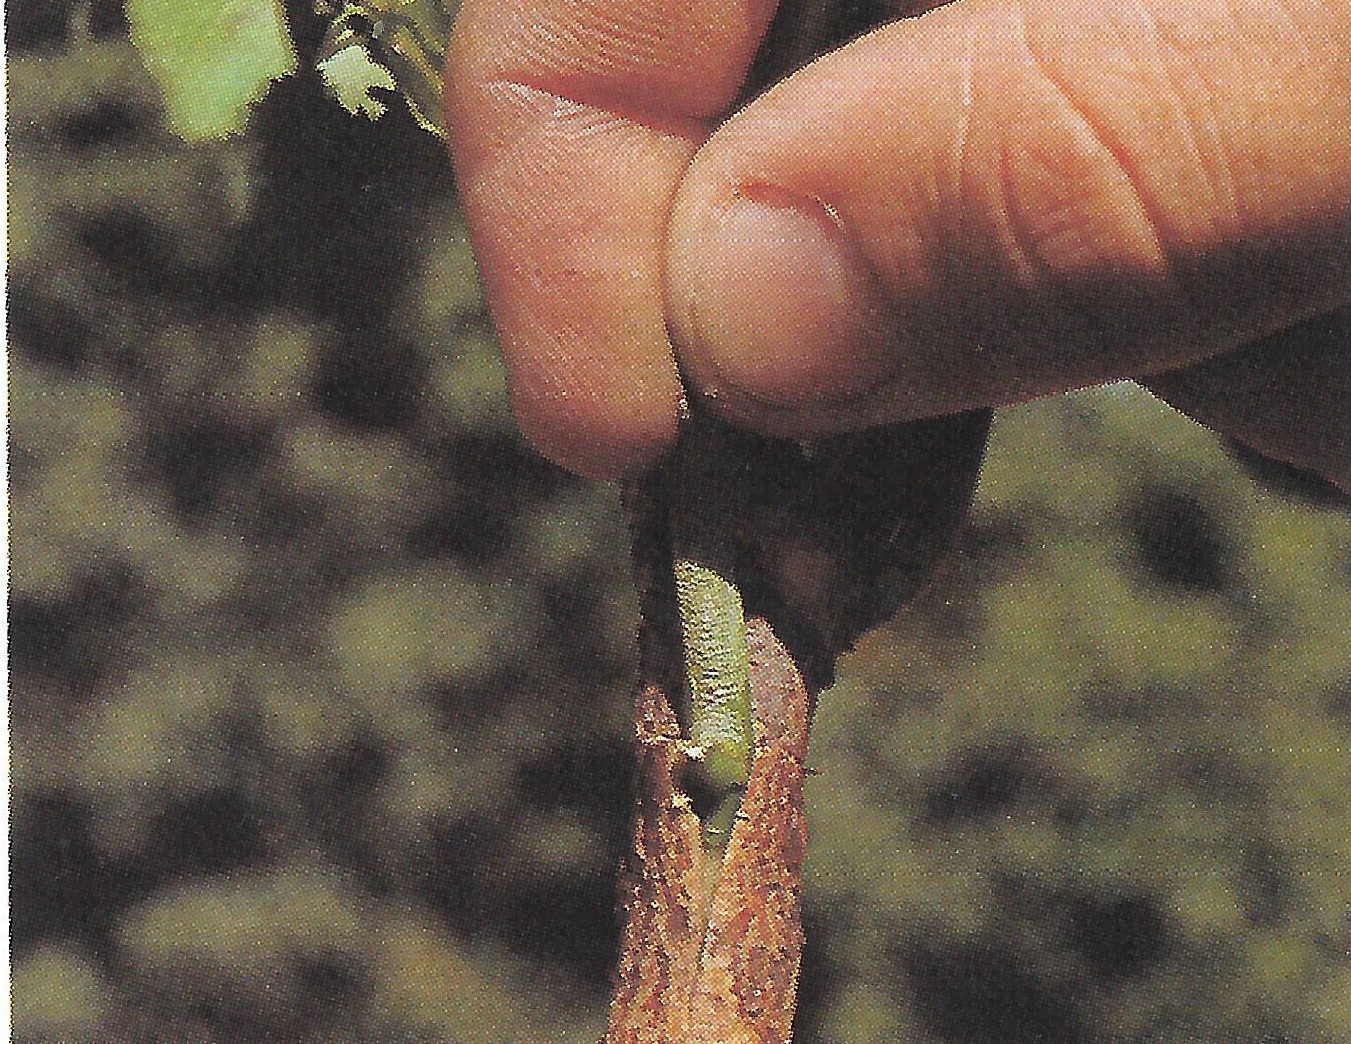
Pit the scion on to the rootstock, so that the cambium layer match precisely and a clean joint is made.
The graft can be tied together with string and then covered with grafting tape. After a few months, the two would join to form a new plant.
FRAMEWORK GRAFTING
This is used if you want to change the variety of a fruit tree or if you want to add additional varieties to an existing fruit tree. If you decide to change the variety completely, much of the existing wood should be removed.
Take off all the main side branches and just leave the main framework, along with a few small branched just below the grafting point. Alternatively, you can leave a couple of main branches, which will need to be removed later on.
Their function us to simply to draw up water and nutrients, just enough to keep the tree alive, whilst the new grafts take.
Saw back to convenient length the branches you intend to graft. It is best to cut smaller branches as these heal quicker than thicker branches. The preparation should be done during dormancy and the scion cut and stored as when splice grafting.
Framework grafting should be done in late April where the bark is easy to part from the branch.
Remove most of the side-shoots except the few sap drawers, as mentioned above. Cut back branches to leaves just the main framework of the tree.
Tidy up the sown ends of the branches so that they are clean and smooth. You will then need to cut a 7.5cm silt in the bark, making sure that it is away from the main trunk.

Prepare the scion in the same way as suggested by splice grafting but without the tongue (i.e. remove the tip as it is not required)
Slide the scion downwards into the silt of the bark, which should be held quite firmly by the slit itself. Repeat the process two or three times with other scions. This is dependent on the size of the branches, larger branches hold onto more scions.
Finally, tie the branches firmly around the scions to prevent them from moving and seal with grafting tape. Within a few months, the scion will have grafted with the rootstock.
CONCLUSIONS
In this final part on how to propagate plant for free in the container garden has concentrated on how to propagate through layering, division, budding and grafting. Although layering and division are quite straightforward, which can be done with little experience.
This cannot be said for budding or grafting, where more experience is required as it is difficult to prepare the scions or slits and rootstock to give a perfect match. Difficult but not impossible. These techniques are more suitable for a wide range of plants, whilst budding and grafting is more designed for ornamental and fruit trees.
In this series, we have discussed the many propagation techniques that can be used in the garden. If you want a technique to propagate your plants the techniques present in this series can be used to increase your stock, and produce more vigorous and healthier plants for free or at least at small cost. This sound like a win-win situation to me.
I have hoped you have enjoyed this series.
If you have any questions that you have been grafting or any comments that you wish to make, please do so below.
Happy grafting.
Hello, I really want to appreciate your effort in putting together this website and writing this article.. I understand layering and that is the method I use for propagation of my plants. I have heard of the rest but I had no I depth know of them prior to this time. Your article is very well researched and it will be of great help to a lot of people
Hi Benny
I am glad that you enjoyed this article and the series
By following all techniques you have a comprehensive list of all possibilities. There is no excuse not to try some.
Thanks
Antonio
Thanks for such a detailed article. I am a fan of both garden and garden flowers, so this post will be of great use to me. I especially liked the part about the roses because I have three shrubs of roses and I was always afraid to propagate them because I thought I would harm them. Now I will follow your instructions carefully and I believe I will succeed.
Hi Blue Moon
Propagating roses is such a fun way of producing new stock and is highly recommended. Propagation is such a valuable technique for increasing your stock at such little cost. Grafting is such a good way of making a more productive plant.
Thanks for commenting.
Antonio
This is exactly what I was looking for. I particularly wanted to know lore about the division of plants in the garden as I think it’s such a frugal but good use of the space outside. I’m certainly saving this website and coming back to it in the future! Thanks so much for sharing
Hi Mike
Thank you for stopping by and commenting. Propagation is such an important technique and surprising many gardeners do not do it. If they did this then they could get many plants for free.
Kind regards
Antonio
Wow! I love this website. Because it gives an idea of how to gardening (bookmarked website).
I am among those who like to garden. And every time I want to propagate a plant, I’m often confused about how to do it. I think this website will answer every problem I face.
And oh yeah, why should every branch that I cut and plant, have to be put in a separate place? Because many of my plants that after I cut and put them in the ground directly, the next day withered and a few days later died?
Hi Ronnytan.
If you have problems with cuttings or other propagation techniques, is because you are doing something wrong. If you follow to the tee my propagation methods then you should have more success. Sometimes with propagation it can fail but that is the beauty with propagation as if you fail with one, it should work with others.
Hope this helps
Antonio
Hi Antonio,
Superb article, I really enjoyed the reading!
I was searching on the net on how I can propagate some of my plants, and that’s how I found your informative website.
It can become costly to buy plants, so this a great technique to save money. I will follow all the steps, and I’ll tell you how it goes. Just a question, please. Can I separate plants that have grown together in the same container after a year? I want to separate them and put them in different boxes.
Thank you for this useful post!
Hi Daniella
Thank you for stopping by and commenting. Yes you can separate plants in containers when they start looking overcrowded. In fact it is beneficial for the plants as it will give them more room to grow and flourish. You so get to fill empty containers for free.
Keep propagating and save money.
Kind regards
Antonio
Hello there. Thank you for sharing the part 3 of this series of how to propagate plants for free in the container garden. I am quite familiar with the first two parts which are sowing seeds and cuttings and I am not familiar with division but it looks really cool and easy too. My favourite of all these methods are budding and layering.
I found this post to be comprehensive and well detailed in order to learn the various methods with which we can multiply the plants in our garden.
Regards!
Hello Mr Biizy
Thank you for stopping by and commenting on the importance of propagating. There are so many technique that can be used and division is one of the easiest technique to use to increase your plants for free. Budding is great for those who wish to make new varieties and therefore a much more advance technique. All methods should be possible for gardeners.
Kind regards
Antonio
Hiya Antonio,
Wow your article on how to propagate plants for free was fantastic, thank you! I have bookmarked it and I can see myself referring to it again and again. I am a terrible gardener, I kill so many house plants I’m sure they tremble in the shop when they see me coming!
I love plants but my enthusiasm is in no way matched by expertise sadly. I keep trying tho and fabulous articles like yours with clear photos of the steps involved are perfect for me. I was particularly interested in the section on cutting rhizomes as I love orchids and would love to have a load of new ones for free!
You said to put the new rhizomes in multi purpose compost but are they not supposed to grow in those wee pieces of bark? I think I need to read some more! I look forward to the answer to my question, krs PurpleLioness
Hi purplelioness
Propagating indoor plants is slightly different, especially orchids where the pseudobulbs often needs to be replanted in their preferred growing media, which for orchids means using specialised orchid compost. Multipurpose compost is mostly for outdoor plants, which houseplant compost is used much more for indoor houseplants.
Orchids tend to be easy to propagate from pseudobulbs taken at the right time. I am currently writing an article on orchids which should be of interest to you, so come back soon.
Thanks for commenting.
Antonio
Hello Antonio, Thank you for writing on Propagate Plants for Free in the Container. I enjoyed your guide while reading your full article. My father is a Gardner so, your guide is very helpful for me on layering, division, budding and grafting. I know layering and division are quite straightforward, which can be done with little experience.
Thank you for helping my father in Gardening.
Deepu
Hi Deepu
It is great to hear feedback from people like yourself. Propagation is such a great technique and should be in the armoury of all gardeners. It is great to get plants for free, as long as you are prepared to learn and adapt your techniques. Learn and have a more fruitful garden.
Kind regards
Antonio