In this three-part series, we will be discussing how to propagate plants for free in the container garden. Propagation is defined ‘as the breeding of specimens of a plant by natural processes from the parent stock to produce new stock’.
Gardeners, in general, are life creators, as we actually produce hundreds or thousands of new life each year. This is why getting propagation techniques correct is important to increase the new life you create in your garden.
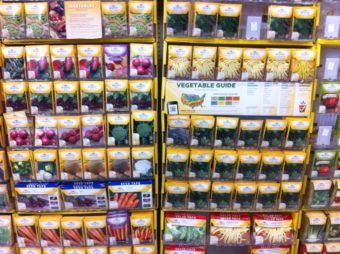
Propagation is a fascinating technique, where you can see the seeds you plant emerge to form young seedlings or cutting starting to take root. The bug is catching and soon you want to plant more seeds and take more cuttings.
When you are propagating plants you are adapting the natural process to work in your favour. These techniques I show to you in this series have been adapted from methods used by commercial growers but have been reduced for small scale gardeners.
They are not too difficult to use and will cost next to nothing so are well worth learning. I cannot guarantee that all the methods I propose will work 100% or all of the time, but you should have more success than normal.
There are 5 main methods of propagating plants which will be discussed in this series in great detail. This present article will cover seed sowing.
WHAT IS TO COME?
Taking and propagating cuttings will be discussed in part II of the series, whilst layering, division, budding and grafting will be discussed in the final part of the series. We are now fastly approaching the new growing season, where seed planting will begin in full swing. We all have slightly different techniques but if you follow the one recommended in this article, you cannot go wrong.
All relevant techniques will be covered for the container gardener.
SEED SOWING
You can sow seeds under the cover of greenhouse or in the home or directly in the container. In the house and greenhouse, it is possible to provide suitable conditions to enable successful germination.
In fact for seeds that are not hardy that this is the preferred method of growing seeds inside. Often at the back of seed packets, there are detailed instructions that are self-explanatory and should be followed carefully.
In the home or greenhouse, you need to control the temperature, as the seed germination process do not like wide temperature fluctuations. For seed germination unless it says so on the packet, do not need light to germinate so does not need the seed trays to be placed in a sunny location until the seeds have germinated.
If the seeds need light to germinate then you would need the place the seed trays in front of a windowsill or use an artificial light source.
SOWING IN SEED TRAYS
First, you need to slightly overfill the seed tray with seed and cutting compost and then firm it lightly. Do not over firm the compost as this will compact it, where seeds need a loose compost in order to germinate well.
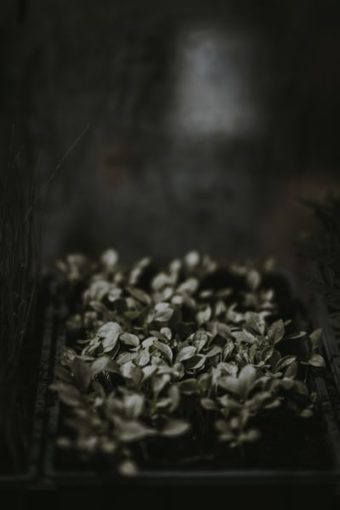
All you need to do is push the compost in the corners with your fingers and at the sides a couple of time to level it off. A few pushes in the middle will also not go amiss. The compost now should be slightly below the top of the tray, but not too compact but loose.
Now water the seed compost before sowing, as watering afterwards tends to move the seeds around and even wash them out of the tray. You will need to seed accurately and thinly, as recommended on the seed packet.
YOUR SOWING TECHNIQUE IS VERY IMPORTANT
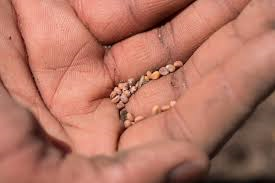
Large seeds can be planted individually, whilst small seeds can be placed in the palm of your hand, bending your fingers up to make a channel. You will then need to tap the outside of your hand with your other hand‘s fingers so that the seed falls on the compost at the required rate.
You can pinch the seeds between fingers and sprinkle it over the compost thinly. This can be fiddly but with practise will become easier with time.
You will need to cover the seeds with a very light layer of seed and cutting compost, sieved over the top. if the seed does not require light in order to germinate. I would then add a thin layer of vermiculite to control moisture levels and to keep the seeds warm. After this, the vermiculite layer should be lightly misted with water to keep it moist.
The seed tray then needs to be covered with a propagation lid to keep the moisture in and to prevent draughts from changing the temperature too much. Some seed need a high temperature to germinate, and the heat of a heated greenhouse may still not be enough to germinate them.
In this case, you will need to use an electrical propagator or a seed heat mat under the trays. This will encourage the seeds to germinate.
SOWING IN POTS
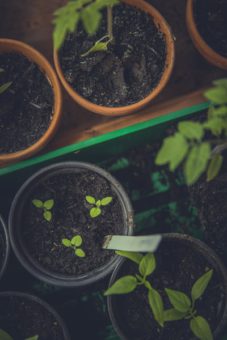
Sowing in pots is recommended if only small amounts of plants is required. This is because seed trays will waste compost. The methodology is exactly the same but instead of covering with a lid, cover with a layer of Clingfilm.
Place the pot in a warm area and use heat underneath if the seed likes high temperature to germinate. Some seed like impatiens need light to germinate and moisture around them at all times. This can be successfully done by sowing them in rows in a seed tray or pots and then cover them with a thin layer of vermiculite.
SOWING IN MODULES
Trays are good for those whose seeds can be pricked out and transplanted, whilst pots are great if you only need a few seeds to be planted, but what about plants that hate root disturbance?
This is where modular cells or cell trays come into play. The advantage of this is that the seedlings can remain in their cells without any root disturbance and then planted out at the right time. In this way plants’ roots will not be damaged, making them easier to position in the garden, as no pricking out will be required.
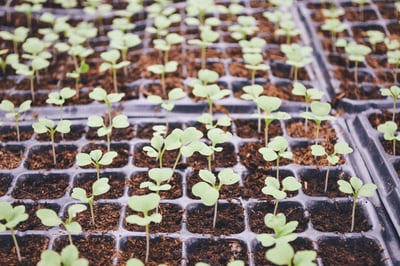
Use seed and cutting compost and overfill each cell with the mixture. You will then need to level off the compost by simply tapping the tray once or twice on a bench. Do not over firm the compost.
Plant large seeds individually, one per cell, whilst small ones sow multiple seeds sparingly in groups. If you sow thinly then the seedlings do not need to be thinned out later on.
Cover with sieved compost and vermiculite if they do not need light to germinate, or only with a thin layer of vermiculite if they do require light to germinate.
You will then need to cover with a propagation lid to control the temperature and to increase the germination rate.
SEEDS NEED MOISTURE TO SURVIVE
It is best to place the modular trays and seed trays into a gravel tray in order to keep them moist and to help with the rotation of the trays every couple of days. This will ensure that the seedlings do not grow up lanky and weak.
What I have noticed through many years of propagating seeds is that it is better to water from below the tray rather than from the top. In this way the seeds get the water when it requires it and less likely the seeds will rot over time. Remember to keep the seed compost moist at all times, not too dry or overly wet.
When the plants are ready for planting out they can be pushed out of the cells en bloc.
PRICKING OUT SEEDLINGS IN THE GREENHOUSE OR ON THE WINDOWSILL
Once the seeds have germinated, they are vulnerable and then need optimum growing conditions in order to grow into healthy plants. In a heated greenhouse, it is not difficult, but many of us do not have the luxury and so will have to raise our plants in our homes.
They will need all the help they can get, getting the light right is difficult in the home as if they do not get enough will make the seedlings grow up long and lanky. They need no shocks of any kind which can retard growth. The seedlings also need to be watered correctly, whilst avoiding too much sunshine and keeping root disturbance to a minimum.
You need to inspect newly sown seeds daily to make sure that they are not overdrying and to see if the seedlings are starting to emerge. Once the first seedlings are observed, you will need to remove the propagation lid or Clingfilm and bring the container to the light.
The best seedling are short and bushy, so you will have to ensure that they get maximum light, In early in the year this means placing it as near to the windowpane as possible, but avoiding strong sunlight. The only problem is that sunlight comes from in one direction only.
WINDOWSILLS ARE THE BEST
If you are limited to a windowsill you can improve the growing conditions by turning the seed tray, modular trays or pots around 180 degrees, every couple of days.
The windowsill is the cold place in the room at night, so you may need to bring them into the room unless you are using a propagator or a heat mat.
If direct strong sunlight is present, this can scorch young seedling leaves, especially if they have water droplets on them. If strong sunshine is seen, cover the seedlings by using a newspaper.
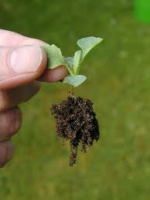
When seedling are large enough to handle, which is normally when the first true leaves start to emerge, then they can be transferred to another container at wider spacings. To ‘Prick out’ handle the seedling by the cotyledon leaves (seed leaves) to avoid damaging the stem. This can be done by using a pencil, a seed label or a widget.
Some seedling such as lobelia and begonias are so tiny to be transplanted individually so instead they are transferred as clumps. This can be easily achieved by using a plant label, which is the ideal width for each clump. The clumps will grow on as one plant without any need to space or thin out further.
Transfer the seed the seedlings or clumps to fresh, multipurpose compost spacing them individually in cells, pots or other seed trays. Plant them deep enough so that the seed leaves are near the compost level. Firm around them by pressing near the roots with a finger or a dibber. It is best to make a hole deep enough with a dibber before planting the seedling in it.
After you have pricked out your seedling, water well with tap water and place them in a light spot. Keep the compost moist without overwatering.
HARDENING OFF IS IMPORTANT
Before they are planted out in the container garden, young plant need to be acclimatised to the lower temperature and growing conditions found outside.
This is known as hardening off. To do this you can use a cold frame and then gradually ventilate more each day until it remains open all day, but close it every night.
You will then need to repeat the process at night, opening the top frame a little more each night until the frame is fully open all day and all night. Watch out for frosts and is it threatened you will need to close the cold frame completely. This should take around 7 to 14 days.
Alternatively, you can bring your plants in a sheltered area in the garden during the day, bring them back in night. First few days in the shade, and the next four days in sunlight to get the plants accustomed to the sunlight. After one week, you can start leaving the plant outside overnight for another week before planting them out. Do not leave outside if frost is forecasted.
CONCLUSIONS
In this article how to propagate plants free for the container garden has been discussed. The first part of the series covers the reason why we may what to propagate our plants and how to get the best when we plant our seeds. This important technique is one of the mainstays of producing new plants every year for our container gardens.
The tips given here will ensure that your seeds are given the best chance for success, which is very important to reduce plant losses and money wasted.
In the second part, we will discuss all the cutting techniques that can be used to increase your plants. The third part we will be discussed further propagating techniques of layering, division, budding, and grafting.
I will look forward to seeing you there.
If you have any questions or comments that you wish to make, please do so below.
Keep propagating.

Thank you so much for the awesome post! I have been trying to find an effective way to do this for a while now, and for whatever reason I have been having trouble with it. That being said, I think my biggest issue is that I am not giving them enough moisture. I don’t have a greenhouse, so this can be extremely complicated.
Hi Jessie
The beautiful of sowing is that you do not need a greenhouse to do it, as many rear their seeds in their own home. You do not need to have a big space but just a suitable growing area and enough, heat and light, then they will do fine. It is easy to grow from seed and the you will a large choice of what seeds to plant. You will soon run out of space where to plant them.
Kind regards
Antonio
Hello, I really want to appreciate your effort in putting together this website and writing this article.. Techniques in planting are essential for us as gardeners. Your post has been helpful. From propagation of plants in container to sowing in modules and in pots. Even to planting in trays and the correct composition and moisture to exposure of light. Every gardeners needs to see this post and learn a lot of things
Hi Benny
You could not have spoken more truer words. Sowing seeds is such a satisfactory thing to do for gardeners and is the recommended method of growing most seeds that you will use in the garden.
Thank you for stopping by.
Kind regards
Antonio
Hi Antonio! I have been wanting for a time to sow seeds in a greenhouse but that hasn’t been possible. I know this is the preferred method.
I’m now focused on sowing them in seed trays or cell trays before planting in containers. I have been reading seeds don’t need light to germinate so I already have an ideal location for them in the house.
Hi Abel
Thank you for those kind words. I hope you all success in the forthcoming growing season. Many seeds to be planted.
Kind regards.
Antonio
As we all know, plant share their lives with us and we share ours with them; I mean exchange of breath. Reproducing these in containers would be an awesome way to get more freshness especially when we plan on using these in our homes or maybe sell them for money. Really appreciate you for tips and techniques on this guide on how to propagate plants for free in our container garden.
Hi MrBiizy
Thank you for this insightful comment on gardening. Seed sowing is getting back to nature, where you can get new plants for relatively cheaply. You also have much more of a choice than that if you buy a plant from a garden centre. Why do you not plant a seed or two.
Kind regards
Antonio