In this article, we will discover how you can glue mount small orchids to an attractive mound. In a previous article, we discovered how to mount an orchid to give a hanging display, but in this article, a different method is shown that uses a slightly different approach to how you can have a beautiful orchid display without spending too much.
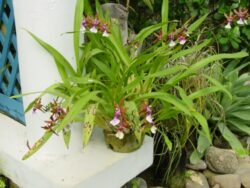
Many orchids that you found in shops are epiphytes and climbers and can be used for this task. Plants that belong to the Maxillaria family. These plants also have long rhizomes, as do Bulbophyllums, Brassavolas and Brazilian Miltonias. These traits allow these plants to be rooted onto a mount.
In this article, we will find out how this can be done by using glue only.
HOW TO MOUNT A MAXILLARIA
First, you need to buy a Maxillaria specimen, which as stated early is suited to be grown on a mount because of the large root system it has. All these plants that will be used are those that do not mind being thoroughly dry between watering or those that like to live in the fringes of the forest canopy, such as Cattleya walkeriana. You do have a wide choice of what orchids can be used.
It is best to use a plant that is easy to be potted on, where green tips on the wiry roots are the best indicator of this.
Remove the orchid from the pot it came in if you can do so. If not, you may need to break the pot or cut it from the plastic to get the plant out. Remove any compost that remains and have a clean root system.
Remove any dead roots, sheaths or old flower spikes, whilst inspecting the plant for any disease or insect problems. This can be achieved by gently scrubbing the plant with a toothbrush that is loaded with rubbing alcohol. This will not only remove the hard, old sheath but will deal with most pests including aphids, mealybugs and scales.
At this time it will be a good time to examine the plant’s growth habit. If it has a climbing habit like the Maxillaria then it will be best suited to mount it vertically and not horizontally.
BUY A MOUNT
You must now buy from a DIY Shop or find a suitable mount that looks the best in your home. Drill a hole using an electrical drill in the centre and 5cm from one end of the mount.
To this insert, a 5cm diameter galvanized piece of wire through the hole and then use a pair of pliers to bend it backwards. Make sure that the wire is firmly attached through the hole and will not come out when tugged.
To the other end, bend the wire to create an S-shaped attachment that can be used to mount the piece of wood to the wall.
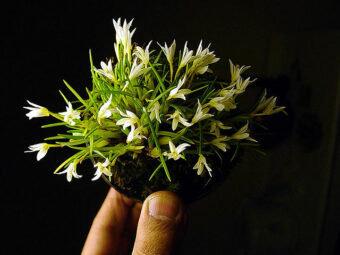
For this orchid suggested, it may be best to use contoured slabs as they have natural crevasses that may anchor the orchid to the mount more securely. Place the orchid on the slab to find the best fit to where you want to place it in the final position.
YOU CAN GLUE IT ON NOW
Squeeze a few dabs of glue onto the contact point that the orchid makes with the mound, where you will attach the orchid to it. This is why it is important to determine all this before starting to glue it on, as any errors made can make it difficult to correct the problem and for the orchid to be moved.
Place the orchid on the glue contact points and hold there and wait for 5 minutes for the glue to set. This is why I recommend that you use quick-drying glue, as you do not what to spend half the day holding the orchid and mount together, waiting for the glue to dry. It is best to add the glue to the mount and not the other way, as this avoids the potential damage to adding glue to the tender plant,
When you mount the orchid in, you must make it not only look secure so that it will not fall off in a couple of months’ time, but it must appear natural as it has always grown from that mount.
The rhizome should be against the surface of the mount, where the growth should be toward the top of the mount. It looks more naturalistic and in many ways more suitable to display your orchid in.
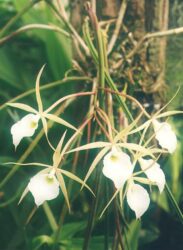
You have now finished the display and it should start to attract visitor eyes to it. You can create a stunning display if you use a Coilostylis parkinsoniana, which had a natural, pendent habit when grown on a bark mount. A truly stunning way to display your orchid.
CONCLUSIONS
In this brief but important article, we have discussed how to create a mounted orchid by glueing it. This is a simple but elegant way of displaying your orchid to get the biggest impact, and it will make it more observable and pleasing to the eye.
This is not for all orchids but those that climb such as Maxillarias, Bulbophyllums, Brassavolas and Brazilian Miltonia species. It is easy to do and you do not need much DIY experience to be able to create one.
If you are looking for a design and a great way of displaying your orchids in that is not often seen by home then I recommend you try this one out today.
If you have any questions on how to glue mount your small orchids, please do so in the comment box below.
Happy Orchid Mounting.