In this article, we will discuss an unusual way of displaying your orchids in by actually mount them on a piece of wood. Many orchids that you buy from shops or garden centres are epiphytes that can root high on tree branches or trunks of host trees. For those who wish to exploit these growing conditions, it can create a simple but stunning hanging display by transferring plants, such as Cattleyas or Epidendrums, to a plank of wood or even better on a piece of bark.

In this way, it will look more natural and liberated from its confines in pots.
In this article, we will discuss how this can be achieved.
WHAT YOU WILL NEED
Before I dwell on what you need to do in creating a hanging display, you need to learn the basic rule of repotting orchids.
1. Only divide and propagate vigorous stock that will freely flower. No point in using weak and old stock, as this will not only grow weakly as it will propagate unsatisfactorily. Always use fresh stock as this will give the best results.
2. Any tools that you use from knives, secateurs, levels etc will need to be sterilised by using a lighter over it for a few minutes. This will ensure that any microbes on the instrument will be killed and treated.
3. Any tissue that is cut should be dressed with a broad-spectrum fungicide either in powder form or alternatively it can be mixed into a paste and used like that. This will prevent the cut from becoming infected and it is best applied by the use of cotton swabs.
THE PROCESS EXPLAINED IN FULL
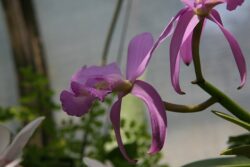
First, you need a young plant of Cattleya or Epidendrum, which is best bought online or from garden centres. In this example, we will be using Cattleya walkeriana, a species that is known to trail and will survive growing up on high on a wooden mount, where it will certainly look better than if it was left to trail from a pot. Make sure that the Cattleya is pot bound and ready to be rehoused, as this will give more success.
Remove the seedling from the pot, use a lever if necessary and especially so if it is stuck. As the plants can become difficult to remove from the container, if that is the case you will need to sacrifice the pot by either cutting it out if it is plastics or by breaking it if it made out of terracotta, It is best to lay the pot in a desk and cover it with newspaper as it will be a messy job. Any old decaying growing media that comes out of the pot should be composted, as it cannot and should not be used again.
Once the plant is out of its pot, trim away any old, dead or untidy roots, as well as any long, dead flower spikes.
You can now use an old, clean toothbrush and dip it in rubbing alcohol, as this will be used to remove the old sheath that surrounds the bases of the orchid. It will also deal at the same time with any pests that may be hiding in the orchid. When you do this be careful and be gentle and do not rub too vigorously as this can damage new growth or root tips. When you are scrubbing the pseudobulbs.
BUY AN ATTRACTIVE PIECE OF WOOD
Buy an attractive wooden mount of appreciable size (around 20cm by 10cm in width) and using a drill and appropriate drill bit, drill a hole in the centre near the end of the mount. You can use a wood slab or cork bark as both works equally as well. Generally, all hardwoods that will not deteriorate fast can be used.

With a pair of pliers, turn a 5mm thick galvanized wire and pull back to create an S-shaped hanger. The other side of the wire will go through the hole you have drilled in the centre of the end of the mount,
Make sure it is securely attached and the wire will not come out.
Dampen some sphagnum moss. A little clump will do around a handful in size, and place this on top of the mount, this will provide additional support structure until the plants get established.
PLACE THE ORCHID IN A SUITABLE POSITION
Ideally, the clump should be placed three-quarters the way opposite where the wire is attached. On top of the clump of sphagnum moss, place a division of orchid so that the newest growth is facing up and away from the mount.
Now use plastic-coated twist-ties that are readily available from garden centres and other shops, to attach the orchid to the mount.
If you are worried that you will damage the plant then you can use an old pair of stockings or tights cut up to strips to fasten the delicate plant to the wood. To ensure that the orchid is firmly attached, it is advised to use two twist ties to make sure the orchid is not loose and firmly attached to the mount.
As now the orchid is securely mounted on the piece of wood, you should allow it to grow as nature intended and should only be removed if it gets too big of the wood starts to rots and degrade. Make sure that the wood you used is not treated with stains or varnishes as this can be detrimental to the plant.
Look after the orchid like you would normally do and soon you can experience new bloom appearing once again.
CONCLUSIONS
In this article, we have demonstrated how to attach and mount an orchid to a hanging display. You will not often see them in homes but with a little time and effort, you can create a stunning Cattleya walkeriana display.
All you need to do is make sure that all the tools you use are heated to kill any potential diseases from being spread to the orchid. You can readily buy the mounts to display your orchids in from most DIY shops and make sure that the Cattleya you buy is a young one, as it has more chance to develop on the mount.
I hope that you will give it a try and if you have any questions or comments that you wish to make, please do so in the comment box below.
Happy Orchid mounting.