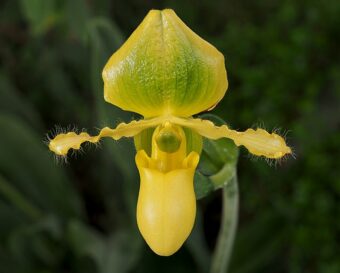
In this article, we will learn how to repot a typical Paphiopedilum, which believe it or not, is one of the easiest orchids to repot. You may wonder why this is so, but this is because Paphiopedilums are the closest to a standard houseplant in its requirements. It is one of the easier orchids to repot as you will see in this article.
They do not have thick rhizomes and thick roots, which are easier to clean and then repot, and you do not need any tools.
REPOTTING AND DIVIDING TYPICAL PAPHIOPEDILUM
First, you will need a Paphiopedilum that needs to be repotted, which can be easily told as there will be roots sticking from the bottom the pots tend to be easy to separate from the plant as the roots do not adhere tightly as they do for other types of orchids.
If it does struggle to get away from its prison, you can turn it upside down and give the pot a gentle tap at the bottom.
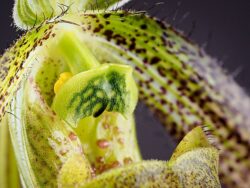
Once the plant is out, you can decide if you want to divide the plant by examining it and finding the natural and best separation point. Each division you are thinking about must-have one mature growth and one new lead on them.
You can grab a division in each hand and then gently snap the stolen, so you have two, new plants. You see what I mean that no tools will be required, as the stolen between the divisions are soft and so easily broken. If you do not have the strength and nobody to help you to spit the plant, you can cheat and use a sterile pair of shears to cut your way through.
CREATE YOUR NEW DIVISIONS
Each division will develop new growth to which new flowers will be produced. From the broken roots, you will need to apply a paste of powder fungicide mixed with water. You need to dab on the cut stolen with a cotton bud so that the broken roots will not develop any fungal infections and possible root rots.
Any roots that look dead, dry. Mushy and soft will need to be cut away. This can be hard to find as the dead roots look no different to healthy roots. The easiest way around this is to realise that dead roots will originate from the old-growth rather than any new roots. This will only need to be done if you find dead roots, otherwise, this will be the only time you would need to use a tool.
FIND A POT OF SIMILAR SIZE
Find a pot of similar size, so that the division can grow into it. You will be getting two plants for the price of one. It is best to used plastic pots as this is easier to adjust to your new growing conditions. Select the smallest pot possible is that the stiff roots will fit comfortably into it and will allow the plant to grow for two years.
Inspect the plants for any pests and diseases and deal with them, but this so going to be highly unlikely.
The best-growing media to use is so dependent on you growing conditions in your home. One of the easiest and best ones to use for Paphiopedilum is a mixture of crumbled rocks, coarse perlite and a little fine fir bark. You will have to alter the mix to find which one works and the best for your plant.
Do not be scared to experiment as you will get better over time in your selection of compost and other ingredients that you need to add.
Place the plant in the pot and add growing media all around the plant to within 2cm of the rim. Make sure that the base of the leaves are not covered and the plant should be firmed in
Give the plant a firm tap and press the growing media in to firm the new plant in. As ever add a name tag with the name of the plant, when it was repotted and a date in the future when it needs to be repotted. As you can see compared to the other orchids the lack of rhizomes and pseudobulbs and the unusually firm-textured potting medium used, makes it the easiest orchid to repot.
CONCLUSIONS
In this article, we have discussed one of the easiest orchids to repot- the Paphiopedilum. All you need to do is take the plant out of its original container, divide it into two (if you feel comfortable in doing so), cut the old, dead roots (if required) and pot on into a fine texture growing media and you have finished.
It is so easy that most novice home gardeners will be comfortable in doing so. If you have any questions or comments that you want to make on repotting Paphiopedilums, please do so in the comment box below.
Happy Paphiopedilum repotting.
Can you repot if a new bloom is starting?
Hi Sue
I would wait until it has finished flowering to repot. It can be too stressful otherwise.
Thanks Antonio