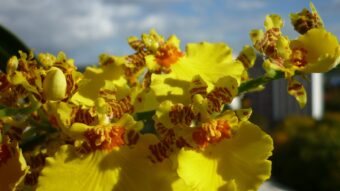
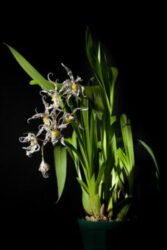
In this article, we will discuss how to repot a typical, evergreen oncidium. Plants with the Oncidium family are vigorous growers and have extensive new root systems.
This would mean that the plant will exhaust the nutrients in the growing media around the orchid, making repotting a necessary task that needs to be carried out at least every two years. You are repotting to give the roots more room to grow, but also for the plants to have access to a new source of nutrients.
HOW TO REPOT AND DIVIDE AN ONCIDIUM
First, as always you need to sterilize your knives, secateurs and scissors each time you start with a new plant. I find it easier if you keep a small blow torch that has a self-lightening mechanism.

Next, you will need an Oncidium in which the roots are overgrowing the edge and the plant clearly needs to be repotted. You will now need to separate the pot from the plant. Normally, if it is plastic, you can squeeze it out. If it does not come out easily, you can use a lever knife to try to pry the plant out of its pots. As Oncidiums have rampant roots and clay pots are not that easy to disinfect, then if it comes in a clay, terracotta pot that it would be easier to break the pot to separate it from the plant.
YOU SHOULD SEE A WELL DEVELOPED ROOT SYSTEM
When you remove the plant from its housing, you will often see a well-developed root system that is white in colour and not dark and dried, or black and soft. You will now have to loosen the root mass by using your fingers, whilst at the same time removing any stuck, old growing media. Be gentle and a lot of the old compost will come away. A finer growing media is commonly used for oncidiums rather than for Cattleyas, which will be dust-like, whilst it is broken down.
If at the back of the plant there are old pseudobulbs that have little leaves and are severally shrivelled, then this is best removed before placing it in the new pot. Use a knife and dress any cut that is made with a suitable powdered fungicide, to stop the plant from developing any fungal diseases.
You can now turn your attention to the roots. Any old, dead roots that are dry, soft, brown or black need to cut off. The rest of the roots can be given a haircut to 2/3 of its depth of the pot into which the plant will now be placed in.
SELECT A MUCH LARGER POT
Select a pot that is at least three times bigger than its original housing. It must be big enough to take two years’ worth of new growth. It is best to choose a plastic container, as it will hold on to the moisture better and will make it easier to pot on in the future.

When you are potting on, it is best to use a fir bar mix of orchid compost with a little bit of perlite, charcoal and expanded clay balls. At the bottom of the pot add a 2.5cm layer of gravel as this will aid drainage. Very important for those who have a tendency to overwater.
Fill the pot up to halfway up with the aforementioned growing media and then place the plant in. In any gap that remains should be filled with more growing media and the plant firmed down This will stop the plant from rocking or wobbling and causing damage to the emerging roots. This will kill the roots, so pack as much growing media as possible in and firm the plant in.
You have now finished repotting your Oncidium, but to finish it, add a label as an aide memoir. This should have the name of the species on it, the date it was repotted and when the next repotting day should be.
CONCLUSIONS
In this article, we have discussed why you would want to repot an Oncidium and how you do the process itself. It is not a difficult process and requires little in the way of any difficult skill. As long as you have the right tools, the right pot size and a healthy plant to start with, you cannot go wrong.
Just remember that they are vigorous plants that produce vigorous roots, so do not skimp in your pot size.
If you have any questions or comments that you have on repotting Oncidiums, then please do so in the comment box below
Happy Oncidium repotting.
