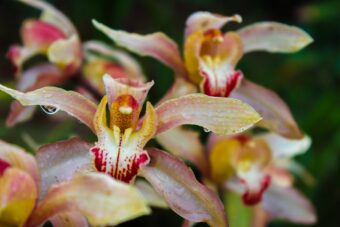
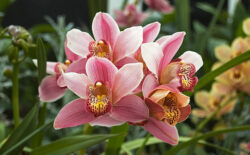
In this article, we will discuss how to repot and divide members of the Cymbidiums. This is an important job as cymbidiums tend to overwhelm small pots very quickly and as a result, they need to be potted on and divided quite frequently.

The process of repotting can lead to divisions being made and for the grower the opportunity to prune off dead roots and for the growing media to be refreshed. If you do this right you could divide a healthy cymbidium into two plants and so increasing your stock for free.
HOW TO DIVIDE A HEALTHY CYMBIDIUM
First, you must have a healthy cymbidium that is of need to be repotted. This easy to spot as it will look like a dense root mass and roots will be poking from the bottom of the drainage holes.
If it comes in a plastic pot, it is best to use a pair of shears and cut them away from the plant to free it from its confines of the plastic pot. If it is in a terracotta pot and it is stuck, you will need to break the pot as that can be replaced, where the plant will cost more to replace it.
Many times the roots will be apparent and can completely fill the pot with no growing medium is apparent.
Before you use any cutting tool (scissors, shears, knives) will need to be sterilised by applying heat via a lighter or portable blow torch for a minute or two. This is important to do as this will prevent any chance of infections from taking hold in the plant.
Now, it is time to start cleaning the plant by cutting off any dead, unhealthy leaves and to clean and cut off dead leaf tips. It is better to cut the leaves at an angle, as this will give a natural appearance.
YOU CAN DIVIDE THE PLANT
Look at the plant and see how the overgrown cymbidium can be divided. It may be able to be divided into 2 divisions or more. Look for natural division lines and try to keep each piece at least of equal size.
Now you have a picture of where you want to divide, you can start the process. Because the root mass is dense, there is little point in using shears to carry out this process. You can use a pruning saw as this has sharp teeth and will be easier to use.

To do this, you may need to exert some force to cut through the thick Cymbidium roots. A good starting point may be to cut a 2.5cm or so off the bottom of the root mass, as this will give you access to enter the interior of the roots and where you will more easily and natural division points. Be careful when you cut the saw as it is easy to slip and cut yourself and that is why it is better to cut away from yourself to avoid potential injury.
Cut halfway through and you should be able with brute strength to split the rest apart with a little effort. You can separate it into two or more divisions, depending on how developed your plant is. If you are still struggling, you will need to cut further up and deeper.
Now you will have two or more divisions, where it need to be cleaned up further. Remove any old potting compost mix and cut away any dead roots. Any old leaf sheaths should also be removed around the pseudobulbs and now you should have clean and healthy roots.
TRIM AWAY OLD ROOTS
Trim away any soil, mushy old roots using a sterile pair of scissors but if the roots look healthy then you will not have to do much. Leave as many healthy roots as possible, as this will anchor the plant better in its new pot.
You will now need to select a new pot that is big enough to take two years of growth, where the preferred material of construction is plastic.

Now place a layer of a mix of fir bark, charcoal, perlite and Orchid compost at the bottom of the container. You can use equal quantities of each. It will help if it is pre-soaked to allow it to absorb as much water as it can absorb and will be readily available to the plant. You can add a couple of large pebbles at the bottom to make it more stable and not so top-heavy when the plant is in flowers.
You can now place the division into the pot and begin adding more growing media all-round the roots until it is within 1.25cm of the rim of the pot. Make sure the base of the pseudobulbs is not covered. Gently tap the pot to allow the growing media to settle and firm around the roots.
You can use a short wooden dowel to firm bark around the root mass to secure the plant in. Do not pound it in as you do not want to damage the delicate roots.
MAKE SURE THE PLANT IS SECURE
The plant should now be securely planted and will not fall out from the pot. This will ensure that it will quickly establish itself in its new home. A good way to test this is by suspending the plant from a group of leaves and to see if the pot slips.
At this time, it will be a good idea to place a label into the pot as this not only identifies the plant, but it can act as a memory aide to tell you when you need to repot it again. This is why it is a good idea to place a date on the label and check it periodically to make sure it is not getting root bound.
CONCLUSIONS
In this article, we have discussed the best way to repot and divide your cymbidiums. As you can see it is not difficult to do as long as you have a good eye and steady hands. From a good-sized plant, you may get two or more divisions but this is where your eyes come into play as you will need to visually decide where it will need to be divided.
As long as you pick a good size pot and fill it with the right growing media. You will have healthy divisions flowering in no time.
If you have any questions or comments that you have on repotting cymbidiums, then please do so in the comment box below.
Happy Cymbidium dividing and re-growing.
