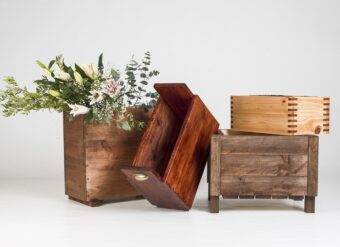
In this article, we will be discovering how to make a simple wooden planter. I know that some of us like to do our own DIY projects and creating wooden planters is no different. If you are itching to create your own and can do basic DIY jobs, then these wooden planters are for you.

In my numerous articles, I have talked about the various containers that can be used in container gardening but wooden planters are some of the most versatile that you can have (see my article on using wooden containers in the garden). The beauty of creating your own is that you can make it any shape and size using the techniques described in this article.
YOU WILL FIND OUT HOW TO MAKE A TONGUE AND GROOVE PLANTER
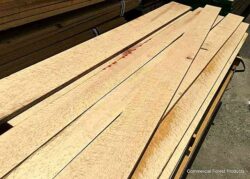
The wood that is used to make these planters are called tongued and grooved cladding, where planks can be joined together lengthways to form an as high container that you need.

You can use two planks to make a shallow planter if you can use three or more to make a deep, wooden planter. To give a neat look it is best to remove the tongue from the topmost planks to leave a tidier, flushed square edge. The tongue and groove planks can be supported internally by the use of posts or battens as they are known at each corner to make sure the container is firm.
A removable base can be made and will sit on battens fixed to the inner face of the side walls. To aid drainage, a series of drainage holes are made in the base panel of the planter to allow water to freely leave the container after it has been raining or after you have watered.
When the planter has been constructed and put together, apply two coats of a suitable wood stain that will not fade and peel as time goes by. The base panel must be treated well with a preservative, as it will be in constant contact with moisture. Use a wood preservative that has been developed to be used for plants as you do not want to kill your plants, after all, that time spent in constructing the planter.
Place a pebble over each drainage hole to prevent them from clogging and then fill the planter with a suitable growing media that will suit the plants’ growing condition that you wish to use.
WHAT YOU NEED TO CREATE YOUR WOODEN PLANTER
A saw, hammer, long nails, a hole punch, some waterproof woodworking adhesive, a drill, flat wood bit, exterior wood filler and sandpaper. You will also need exterior wooden battens and tongue and groove cladding. You will need a thick sheet of plywood for the base.
First, decide on the overall dimensions of the planter and cut enough lengths of cladding to form all four sides. For example, if you want a planter that is two cladding deep and measures 1m long and 0.5m wide, then you will need to cut 4, 1m long cladding for the front and back, and 4, 0.5m long cladding for both sides. This will be used to make all four sides of the planter. Remember to measure twice and cut once, as you cannot afford to throw away incorrectly cut wood.
Assemble each side by interlocking the cladding edges together along with the tongue and groove. Glue them together using waterproof wood glue, and squeeze some into the grooves.
Assemble the planks to form each side using a hammer and a cladding offcut to knock them lightly together. Any glue that oozes out can be wiped off using a damp cloth. Allow the glue to dry.
MAKE THE SHORT ENDS FIRST
Make up the short ends of the planter first (the two 0.5m ends). Cut two corner posts that are made up of 5cm by 2.5cm wood battens. For each end, then glue and nail the side panels to the posts with the tongue edge facing uppermost at each end. Allow two nails per plank, punching the holes and nails just below the wooden surface. Disguise the holes with exterior wood filler when assemble is complete.
Rest the base of the planter on 2.5cm slim wooden battens glued and pinned to the inner faces of the sidewalls, flush with their bottom edges. Cut and fix the two batons to the side panels of the planter first. Do not forget to add the baton at the bottom of each side and this includes the two longer sides.
To summarise what has occurred so far, the groves must be placed so it is facing upwards and the tongue must be facing downward. Attach two corner posts to each end, cut to size and on the tongue end add a batten between the two corner posts. Make sure that they are all glued and nailed together. On the long side make sure a baton is attached to the tongue end.
Glue the side walls to the two end sections using just adhesive at this stage. This allows the sections to align the corner joints and check that the whole assemble is square and that the batons align all together at the bottom.
LET THE GLUE DRY
Once all adjustments have been made, leave the glue to dry for a while. Nail the side walls to the corner post or you can use woodscrews to screw the corner of the wood planter. The planter should be square and firm now.
To finish off the top edge, it is best to cut down some narrow strips of cladding and these are glued to the grove edges with the tongue at the bottom. The planter will have its sides all secure but no base, which will be created next.
CREATING THE BASE OF THE PLANTER
Once you have assembled the planter walls the base, an exterior edge piece of plywood needs to be fitted. Although it is designed to fit loosely within the planter, you will still need to create extra drainage holes to prevent waterlogging.
To mark the outline of the base, stand the planter upside down on the plywood sheet and with a pencil draw around the internal profile of the planter walls.
Extend the pencil lines to meet at each corner and cut out the resulting rectangle, Use a tenor saw and cut the rectangle out.
Make a series of equally spaced holes in the base using a flat wood drill bit. To do this, it is best to place the plywood on some scrap wood or upon bricks so that it is elevated from the floor. This is done to avoid damaging and drilling holes on the surface that you are using. I would recommend drill a hole for every 0.05 square metre, so for the planter in this example, 10 holes would be required.
Drop the plywood base inside the planter, so it rests on the inner batten supports. You can now glue it in place if you prefer but this is not essential.
Your planter is now complete and you can paint it with wood stain to your preferred colour scheme. You can give it some time to dry and then you can fill it with your preferred growing media and filling it with plants that you desire.
CONCLUSIONS
In this article, we have discussed how to create a simple, wooden planter. As you can see if you have some DIY skills, some time and easily available materials to form a wooden planter of any depth and width that you like. It may take some practice but eventually, you will learn to make a decent planter that will revival any wooden container that you can buy.
I admit it is not for everybody but if you or your partner are willing to try, then this project is for you.
If you have any questions that you wish to raise or any comments that you like to be noted, please do so in the comment box below.
Get creative and make your own wooden planter.


