In this article, we will be discussing how to grow clematis in containers and how to get the best from them.
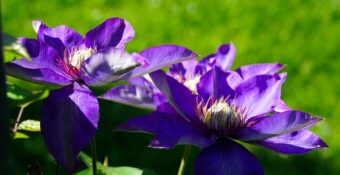
If you have a bare wall or fence to cover, or a trellis, or pergolas that need something to grow up, then the main go-to plant is a clematis. The reasons are numerous but the main two are that the flowers are colourful and produced in plenty and the second reason is that you have many varieties to choose from (over 400).
The flower can be either large or small but are produced in many colours, both singly or doubly in spring and summer. With carefully selected varieties you can soon cover a bare wall with plenty of blooms, a true gardeners’ delight.
Growing clematis in containers may be essential for some gardeners because they do not have any soil in the ground or space to grow on, or maybe the soil is too heavy for the clematis to grow in. Clematises hate heavy, wet-soil as they will require good drainage to thrive.
As you can imagine that you have a wide choice, so how do you plant them in containers, let us delve into the subject further. But first what is a Clematis?
WHAT IS CLEMATIS?
As said in the introduction, clematis is a popular vine that has wonderful, long-lasting blooms that grow to manageable proportions. The flowers once spent are soon followed by interesting plumed seeds that are decorative in themselves.
The plant will twine around everything they can get a holdoff and they do so very rapidly. This is why it is never a good idea to plant two clematises next to each other, as they will blend with each other, making it hard to distinguish between them.
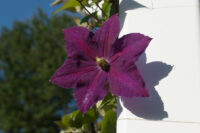
It may look stunning to have two different colour flowers next to each other, but then it becomes a nuisance to prune. This is because you do not know what twine belong to what clematis when it is not in flowers, and this can lead to pruning disasters.
There are many different clematis species and hybrids that can be grown in the garden and at the last count there was over 400 and the number is still going up. Many hybrids of Clematis are hardy, able to take cold, snow and hard frosts.
Saying all that Clematis are broadly divided onto two groups: large-flowered and small-flowered. No matter what you select, you need to support the plant to admire its beauty.
You can use trellises, arbours and pergolas to grow up in the middle of the garden, or you can grow them against walls and fences, This is, of course, if a trellis or wire mesh is used on the wall, as this will give the plant something to grip on and then twine up. Remember for large woody clematises that a strong support structure is required, as they can get heavy. If it is made out of inferior material it will break under the weight of the plant.
LARGE-FLOWERED CLEMATISES
Large-flowered clematises tend to have flowers that grow up to 30cm in diameter, but this is the extreme, normally they grow up to 20cm. Clematis x jackmanii is a firm favourite in this group with large, purple flowers.
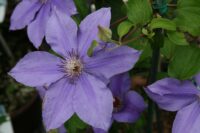
Other hybrids have been developed to give other shades. For example, ‘Comtesse de Bouchard’ is pink in colour and they tend to flower from July to autumn. Another clematis that falls in this category is Clematis lanuginosa and its hybrids. This includes the red ‘Crimson King’, the white ‘Henyri’ and ‘Candida’ and ‘Ramona’ that is pale blue.
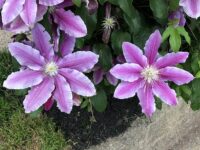
One other large flowering clematis that is often seen in the garden is Clematis patens ‘Nelly Moser’ with its mauve and pink –striped flowers that appear from June.
SMALL-FLOWERED CLEMATISES
Many of the small-flowered clematises tend to be large woody vines. This includes the often seen Clematis montana that has numerous white, star-like flowers that appear in spring to early summer. An alternative is Clematis montana Rubens that has purple flowers.

The beautiful Clematis tangutica is another small-flowered variety that has yellow, bell-like flowers that appear in June into autumn.
Clematis texensis has little red, bell-shaped flowers that appear in June and Clematis paniculata, on the other hand, has small, fragrant, star-like flowers that appear in late summer and autumn. Climbers that cover several growing months.
THE BEST CONTAINERS TO GROW CLEMATISES IN
The container you use must prevent the clematis within it from being overheated. Materials that should be considered include ceramic, stone or wood rather than plastic or metal containers, as they tend to heat slowly and not bake the roots. It should not be black but a light colour to avoid absorbing radiation.
The container must be free-draining and so have a lot of draining holes at the bottom. If you can drill holes in it, buy it, if not, do not bother.
The container that you buy must be deep and have a large diameter. Clematises have a large root system, so need plenty of room to grow. Smaller containers will result in fewer flowers and more diseases.
A good size container to use has a diameter of 40cm at the base or 50 cm at the top and is 70cm deep. These are the smallest dimensions that are suitable for growing this clematis in or you can go larger if you want.
Clematises like their heads in the sun and their roots in the shade, which helps the plant to grow at its best. This is because their roots like to be kept cool. To achieve this, you can place pebbles or stones on top of the compost in the container. This will not only keep the roots in the shade, but it will also conserve moisture as well.
You can also cast shade on the root of clematises to act as a light screen. It is advised to use another container with a less tall plant in front of it to act as this light screen.
WHAT TYPE OF COMPOST TO USE
Clematises in containers are hungry plants, so will need a rich compost to do well. What I would use is a 50% mix of multipurpose compost with 50% compost with John Innes No 3.
In this way, you are applying the best growing media for you clematises and you have not spent too much money buying expensive compost. It is easier to water, will drain easier and will release nutrients over a long period.
WHEN TO PLANT CLEMATIS AND HOW?
It is best to transplant in early spring, especially on cooler climates, whilst in milder climates, you can get away planting them in autumn. You need to plant with the crown planted 10cm below the top of the compost as this will reduce the likelihood of the plant suffering from clematis wilt. It will eventually form roots from this crown and it will make a sturdier plant.
Depending on the age of the plant, it will be slow to establish; it could take a few years for them to bloom.
Some gardeners cut clematises back for a year or two to prevent blooms and let the plant form a substantial root system.
Young plants will need to be fed every 6 weeks whilst they are growing, whilst an established plant will need a granular fertilizer in early spring.
You need to make sure that the clematis is well-watered throughout the growing season, as an under-watered clematis will never flourish.
You can feed your clematis with a liquid fertiliser such as phostrogen from when it starts to grow until flower buds start to appear. After this, do not feed again until flowering has finished. Stop feeding in August as soft growth will be produced that will be killed by frosts.
Some clematises die back to the ground when hit by frosts, so do not assume the plant is dead if in early spring you see no new growth, If you are patience, before long there will be new, green shoots appearing.
PRUNING CLEMATISES
The rules of pruning clematises are confusing to many gardeners because they tell you from a different species depending on what pruning groups they belong to.
This is problematic as sometimes you do not know what species you have bought, as sometimes the seller will mislabel the variety you have bought. It is also made more complex as a lot of clematises are hybrids made by crossing different plants of different pruning groups.

The basic rule is that clematises that bloom before June should be pruned lightly after it has finished flowering or not at all, whilst clematises that grow on this year’s growth are pruned hard in spring before new growth starts.
You have to observe when your clematis blooms on new or old wood and prune accordingly. If it grows on new wood and flowers after June, cut back to 10cm above ground in early spring. If it flowers on old wood, prune lightly after it has bloomed to keep the plant to size and to keep it tidy. It will also promote new growth when you prune it to a leaf node, as this will prevent diseases from entering via the cuts you have made.
CONCLUSIONS
In this article, we have discussed how to grow clematises in containers. As you can see, it is not difficult to grow as long as you use the right size containers, fill it with the right growing media, water often, fertilise right and most importantly prune correctly. If you do all this, you will have many years of service from your Clematises.
If you have any questions or comments that you wish to make, please climb to the comment box below.
Keep growing up.

Hello there – I really enjoyed reading this artilce on how to grow clematis in containers and how to get the best from them. I am currently growing herbs in a container and find it really flavourful and fresh. I did not know that clematis can do so well in containers. While the process was very similar to what I use for my herbs it was interesting to read the rules of pruning clematises. I will have to try these out in my indoor garden.
Hi JN
Clematises are so great in the great, bringing much welcome colour to vertical surfaces so that they can go from the bland to the spectacular. I hope you do buy some and use them to bring splashes of colour to the container garden.
Thanks
Antonio
I have never known about this clematis before now and about growing them in containers but from what I see here, I think it would be very nice for me to give it a go and see how it would work for me. I’m only trying it because you call it the versatile climber. Thanks for showing me how.
hi John
Thank you very much for stopping by and commenting. I do hope that you do buy some clematis as it is such a beautiful plant to grace anybody’s garden They tend to be easy to grow and if you use all my tips, you will surely succeed.
Thanks
Antonio