In this article, we will be discussing why the container gardener should make their own compost. Why this method of making your own compost not only saves you money but also is good for the environment. If you make your own compost at home, this will reduce the need to buy new compost every year. Reduce but not totally eliminate.
It must be remembered that homemade compost does not have the right nutrient balance in it, but with careful preparation, it can be used as a supplement in your container garden. This is why it is impossible to totally get rid of buying compost but you can reduce the number of bags you need to buy.
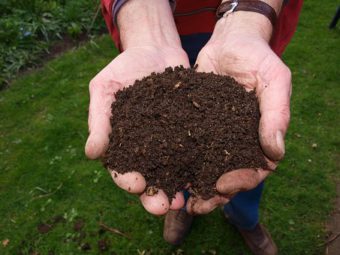
If you want to use it solely as a potting compost would need to sieve it, to remove large pieces, so that sub 20mm particles will pass through, classify it, add lime to increase the pH, add a slow-release fertilizer, perlite and then some water retaining gel. This is required to just get the compost mixture right.
As you can imagine this is a complex procedure and costly. You can now understand why homemade compost cannot totally replace shop bought multipurpose compost, as you will need a lot of material, much more than a garden can supply. This is why it is best to only use your homemade compost as a supplement to your container garden, and not as a compost replacement.
MAKING COMPOST
Ideally, you want to make compost, enough for your container garden, you will need three compost bins. Compost bin one is the initial composting stage, where new material is introduced and allowed to naturally decompose. After a few or many months (depending on how well the process goes), the waste is sorted and moved onto a second bin.
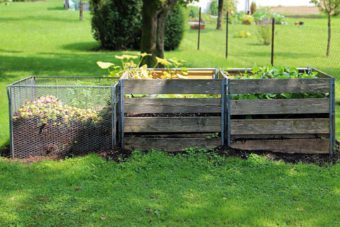
The waste in the first bin should show a decent amount of decomposition before being moved into the second bin. The larger and non-composted pieces are then returned to the first compost bin, whilst the partially decomposed material is allowed to decompose further in the second bin.
After a few or many more months, and after the material has decomposed further, it is then transferred to a final bin. In which the process continues until a fine, crumbly, sweet-smelling compost is produced. If any large or non-composted pieces remain and found in the second bin, then it is returned back to the first bin to decompose further. The moving from bin one to bin two to bin three is so dependent on judgement, as the process is dependent on so many variables.
If compost is done right it should heat up to 60 degree Celsius, which is quite hot. This can be monitored via a compost thermometer. Another identification point to decide when to move the compost is when the compost starts becoming cold. Once cold you are certain that it needs to be moved from bin one to bin two, or bin two to bin three.
You can go from green material to good compost on a couple of months, or it may take a year. Only moving from one bin to another once the decomposition has reached the desired stage.
THE THREE BIN SYSTEM IS IMPRACTICAL
For most small gardens this is impractical, especially if you only have a patio or balcony. In this situation, I would forget about it and give it to the council in their green waste collection service. In modern time this will cost you money, as where I live it cost £40 per year for one green bin.
In a small garden, the easiest and most cost-effective way of making compost is to use one of those purpose-made bins. This can be either made from wood slats or plastic compost bins, placed on the ground.
If you have a bit more in the way of cash, you can use a rotary composter, which is a big drum suspended in the air and can be rotated via a cranking handle. The advantage of using these composters is that the compost is produced much more quickly.
The choice of composters is numerous and if you do not like the look of them, you can box them in, cover them with climbers growing over them or hide being behind shrubs. One misconception is that they smell. I have been making compost now for over 12 years and if you make them right, they do not have an unpleasant odour at all.
PLASTIC DALEK-SHAPED COMPOST BINS
Most plastic Dalek-shaped compost bins have a sliding front near the base of the unit. This has been designed for removing the finished product. The only problem is that it does not work, the compost becomes so compacted that it is difficult to get it all out. You often end up breaking the door whilst trying to get the compost out.
The recommended procedure is to remove the compost bin by lifting it off totally from the base, leaving the composted and non-composted material behind in a heap. Be warned this is a difficult task, as the compost material and bin often stick together. You try to tip the bin but it will simply not budge, with some time and effort the bin and compost will be separated.
Once separated you need to place the empty bin on the ground and then refill from the top, with undecomposed material. The composted material can then be used in the container garden whilst the non-composted material goes back into the bin, to start a new batch of compost making,
This is why you need plenty of room around the bin so that you can empty and refill the bin with ease.
WHAT GOES INTO A COMPOST BIN?
There is an art and science to making compost as it is a matter of balance. Too much green materials and you will end up with a smelly, soggy mess. Too much brown materials and it will be dry and hardly decomposed at all. Get the right ratio between the two and you will end up with good compost.
You can add nearly any green garden waste but I would avoid disease material, such as any viral or fungal affected material. I would not add any weeds with seeds as this will cause them to sprout everywhere in your garden when you use the compost.

Any plant material that has been sprayed with weed killers or herbicides I would avoid, as the residues can remain and kill any plants that the compost is applied around.
Woody material can into the bin, as long as the wood is not too thick. It is best to use a garden shredder, as the shredded material will compost in a tenth of the time it would take to compost large twigs. You have to ensure that the wood is shredded very well.
LAWN CUTTINGS IS GOOD
If you have a lawn, you can use lawnmower cuttings as long as you do not overload your system. You see lawn clipping can compact and will not rot down. To avoid this you need to add a thick layer of lawn clippings followed by shredded paper, and then add more lawnmower cuttings. This will ensure that you do not end up with a smelly, mess in your bin.
ROOTS AND LEAVES CAN BE COMPOSTED
Thick roots and stems can be composted better if they are crushed by bashing a few times with a hammer to break the fibres down. Perennial weeds such as dandelions or dock plants cannot be directly added to the bin. This can cause problems as they can start to regrow inside the bin. You can add weeds to the bin once they have been processed.
This involves cutting the leaves off the weeds, which goes straight to the compost bin. The roots are then placed in a bucket of water for a couple of weeks to break them down. After this, the water and roots are tipped in the compost bin, where all the nutrients will be retained.
KITCHEN WASTE IS BRILLANT
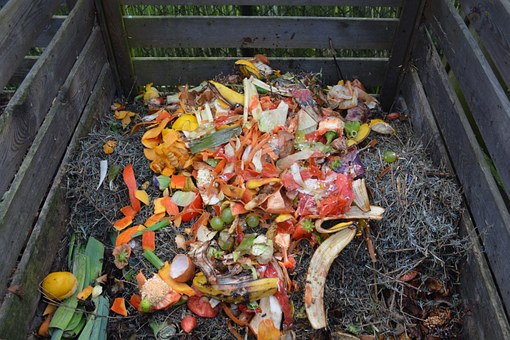
Kitchen waste is all good but apart from meat or fish products, whether raw or cooked, which cannot be used. The reason why is that it will stink and it will attract rats. Eggshells are okay as long as you crush them, as this will provide a source of calcium to the container garden.
WHAT BROWN MATERIAL CAN BE USED?
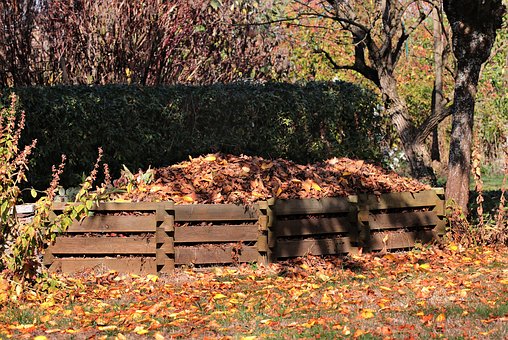
The brown materials that you can add include shredded twigs, leaves, brown cardboard and small amounts of shredded paper, which is good for balancing lawnmower cuttings.
Brown cardboard needs to be ripped up into small pieces and makes an excellent compost material. Make sure all staples and parcel tape are removed as this takes forever to rot down. Coated cardboard is not good as the coatings prevent it from rotting down, it is better to recycle this material.
One good source of brown material that is often forgotten is vacuum sweepings, which make an excellent compost ingredient. You can also add human hair, as it will break down, giving a good source of nutrients to the compost.
Ideally, the ratio of greens to browns is 1 to 1, or 50% green materials to 50% brown materials. Do not add any plastic material at all, as this takes forever to rot down if it does at all. There are bags made out of corn starch and are compostable. These can be used to add kitchen waste from the kitchen to the compost bin.
Do not add any cat litter or dog poo to the compost bin, as this can carry diseases and parasites that are harmful to pregnant women and children.
THE PROCESS
Now all you need to do is add the materials into the bin and let nature take its course. Compost is made by the action of microbes and worms. The fungi and bacteria need to break down compost are everywhere, but the worms need to be attracted to the bins. The best way to do this is to place the bin on top of the earth and within a short time, they would have found your bin.
If you place the bin on concrete or flagstones, do not be surprised to see that nothing has happened. In this situation, you will need to manually introduce the worms. This can be done by either by buying them online or by borrowing some from your next-door neighbour who already has a compost bin.
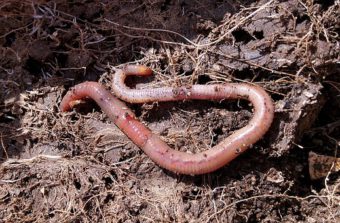
Both worms and microbes need water to work well and it is best not to let the bin dry out, but at the same time do not let the compost become waterlogged. Damp will be sufficient. The best way to add water is by using a watering can with a fine rose, as it will distribute water evenly.
If you notice your compost taking longer to decompose, you may need to add a little lime to reduce the acidity of the compost. This is because citrus peels, tomatoes, and onions can lower the pH of the compost over time, which will stop the microbes from working, and will drive the worms away. It is best to sprinkle a layer of lime every 30cm depth of compost.
HOW TO GET THE BEST FROM YOUR COMPOSTER?
You can also use a compost accelerator, which provides additional nitrogen to speed up the process. What you need to do is sprinkle some on the first 15cm layer of compost, then add lime on top of the next 15cm layer, and start alternating between the two.
To keep the compost ticking over, it is best to use a compost aerator tool. This will make holes in the compost and allows it to be turned over. Air will enter the compost heap and will ensure that the compost decomposes more quickly. If you have a compost you really need to buy this tool as it will make the job easier.
After many months the bins will have rotted down and the procedure recommend earlier on the article can begin.
CONCLUSIONS
In this article, the discussion of why the container gardener should make their own compost has been made. Making compost is not only good for the environment but also good for the pocket. The compost can be readily used in a supplement in your containers.
It is a good way of handling your waste without the need to pay councils to collect your green waste. It will also save endless trips to the Household Waste Recycling Centres. A product that is made by your own hands and can be used to refill your containers sounds like a winner to me. As long as you get the ingredients right in the right ratio, you will hit black gold.
If you have any questions that you wish to ask or compost related comments you wish to make, please do so in the comment box below.
Happy Compost Making.


Thanks for sharing this and quite frankly it does help in producing quality manure for your farming. As a food lover myself, I like to grow stuff organically so yes, making your own compost makes a lot of sense.
The only challenges I can see is the cost of setting it up as this will vary from individual preferences. If one has access to a container that is spared, the workload is done halfway.
Anyway, I thought I should contribute my own thought on this and again thank you sharing such a particular article.
Hi Richard
They initial setup cost can be large in the beginning, but after that the cost is nothing as all you put in is waste from your kitchen or garden. The compost will then lasts for years to come, all free from your garden.
It is an investment worth making.
Kind regards
Antonio
Thanks for your article! I have always thought that a compost pile is where you just dump all kinds of organic material without regard of proportions or bins, and it would just work itself over time. Apparently not. Thanks for teaching me that there is way more to that process.
Hi Mikhail
There is much more to making compost than first meets the eye and I am glad you enjoyed it.
Kind regards
Antonio
Thank you very much for this nice and enlightening post. I have once involved in container gardening which was purely organic and I know how essential it is for making our own compost and I can’t agree less with every of your point. I will bookmark this post and share it with my friend who is involved in container gardening presently and I know it will be of great help for him.
Hi Charles
It is always good to be of service and I encourage people to start making their own compost.
Kind regards
Antonio
Wow, this is really cool, there have been series of problem with compost in my garden and I really do not know what to do about it, some time ago I added some supplements to it but still not giving the desired results I want. Reading through this post gives me some assurance about the importance of making my one compost and I’ll live to try making mine. Best regards.
Hi Chloe
With compost it is all about trial and error. If it is too soggy add more browns, if it is too dry add more greens. If you see the compost worms then you know that you are doing it right. Adding compost accelerators will help the process to go along more smoothly, so add that as well. Best to have a store of browns in reserve as this can be added when necessary.
Kind regards
Antonio
Another great post and covering a subject that I really needed to get my facts straight about. A big plus is that you’ve covered some of things that I’ve been doing, which makes me feel better. I think I have four compost bins. I’ll be totally honest, I’ve never used any of the finished article. At present, we’ve still got some bags of mulit-purpose compost that we have been using for pots and the like.
My main area for composting is a two bay structure I made, that backs up against a fence that sections off the lawn area of the back garden, this way it is unseen when you look up the garden. I did it mainly for the grass cuttings. As I have a small dug over area, I would take a spadeful or two of soil and add that as a layer between cuts. It seems to work quite well.
I also have two of the ‘dalek’ shaped ones, which as you say, are fairly ‘user-unfriendly’ when left for a period of time. I end up tipping them over and redistributing the waste material.
It seems a shame not to be able to use the compost fully and the process you describe does seem quite complex, to be able to get it up to a decent quality. For separate beds or large ‘trough’ style containers, do you think I could do a 50/50 mix of ‘bought’ compost and home-made? Also, what are your thought on using the remains of bonfires for composting ?
Hi Twack
Thank you very much for that detail comment on your experience on composting. To answer your question I would use 25 % homemade compost to 75% shop bought and mix them well. Ash from bonfires are a good source of potassium and should be added to you compost mix but too much will make it too dry. I try not to encourage too much burning as I believe it is best to compost and the plants will still get the nutrients. Burning anyway tends to annoy your neighbours.
Keep on composting
Antonio
Thank you for your highly detailed article on composting. I have been considering constructing a compost bin for some time as I have a large property and many plants that could benefit greatly from it.
I am already extremely busy however and from the sounds of it, the process of composting can take some time and experimentation to get the resulting compost to a useable product. Do you suggest any reading material that might help me get all the variables correct? Thanks again, I value your input and advice!
Hi Shan
Composting is not as difficult as it seems, it just take practice. You can store brown material in a bag and then mix with green when the need arises. The brown material does not rot quickly and can be stored in garages, sheds or even outside. A little foresight helps when making compost and what I recommend in my article is the procedure most follow.
Kind regards
Antonio
Hello Antonio 🙂
This post on why the container gardener should make their own compost and i recently started a small garden in my backyard so i am devouring content on all i should need.
I have been trying out compost but seem to get the soggy smelly results and now i know why, as i have to get better at balancing Both green and brown materials.
I have been finding it hard getting brown materials but i love the suggestions you made, I would be trying them out. Thanks
Hi affiliate ghost
Getting the ratio of browns to greens is important, as too much green it will be soggy and too much brown will make it too dry. Composting should be done by all gardeners as it will save trips to the tip to get rid of it. Save it and use it in the garden.
Thanks
Antonio
Hi Antonio! I can make my own compost and I haven’t been doing it. As you explain, it can save us money and it’s relatively easy. But your post has encouraged me to get started.
I’ll get these three bins. I already have a compost thermometer. I didn’t know that temperature was that important. Thanks for this post!
Hi Henry
I always encourage anybody to make their own compost as it will be beneficial in the long run. So get started soon.
Thanks
Antonio