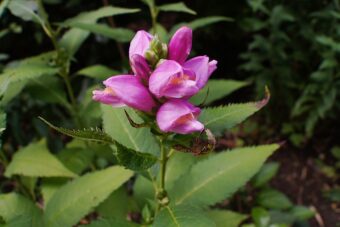
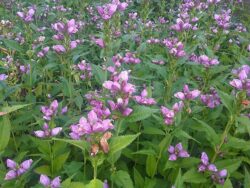
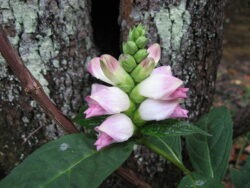
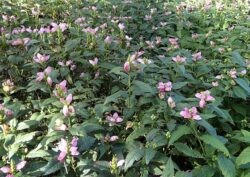
In this article, we will discuss how to grow the unusual perennial of Chelone in containers. Chelone is a herbaceous perennial that is native to North America, where four species are known to exist. It gets its common name of turtlehead because the 2.5cm large flowers that look like turtleheads but, in fact, resemble more snapdragons are produced. Although the flower may look like snapdragons, it is more related to Penstemon rather than Antirrhinum.

The plant produces two-lipped, turtle head flowers that can be red, pink, or white and are produced over a mound of dark green leaves. The coarsely toothed and prominently veined, lanced-shaped leaves will remain attractive all season long. The leaves are large and can grow up to 20cm long and are arranged in pairs along the stiff and upright stems.
For red flowers grow Chelone obliqua whilst Chelone glabra is white in colour. As noted with flowers there is a Greek myth about how Chelone came about, the story goes that a nymph called Chelone refused to attend the wedding of the god Zeus to Hera. The result was that Chelone and her home were tossed into the river, where she was transformed into a tortoise and carries her shell with her on her back. You can now see why Chelone may be associated with turtles.
Find out how to grow the beautiful plant Chelone in containers.
GROWING CHELONE IN CONTAINERS
You can grow Chelome from seeds and it is not difficult to do so, but most people seem to buy garden-ready plants.
SOWING CHELONE FROM SEEDS

To grow from seed, it is best to start in March indoors. To do this, you will need to fill a seed tray with a good quality of moist, seed sowing compost. On top of this, sow the seeds thinly on the surface and just cover them with a fine layer of sieved seed compost. Place them at room temperature with a propagator lid on top.
After two weeks to a month, the seeds will have started to germinate. Allow them to grow on and once they are large enough to handle, you can prick them out and transplant them individually into 7.5cm pots full of multipurpose compost, Allow the plant to develop further and in Mid-May, when the plant is large enough, you can harden them off to be planted out in late May.
YOU CAN TREAT YOUNG PLANTS AND SHOP-BOUGHT PLANTS THE SAME AT THIS STAGE
At this stage the young plants you have home-reared at home and shop-bought plants can be planted in the same way.
First, choose a suitable-sized container that will enhance the plant in question. Make sure it has plenty of drainage holes. Do not add any grit as the growing media must be moisture-retentive and free-draining at the same time. Fill the container with ericaceous compost and add handfuls of manure to make an acidic, organic-rich growing media and fill it up to 5cm of the rim.
Dig a hole at the centre that is slightly larger than the root ball it came in the original container. Place the plant in so that the top of the root ball is at the same level as the top surface of the compost. Backfill with the growing media, using more if any gaps remain. Firm the plant in and water well. You may find it better to add a mulch of wood chippings to preserve moisture and support root formation.
GROWING CONDITIONS

They can be grown in full sun or partial shade. Partial shade will remind the plant of its natural growing environment, where light is filtered beneath a canopy of trees. In full sun as soon as the compost dries out you will need to water.
In the first year as the plant establishes, you will need to water regularly. The rule of thumb is the more frequent you water the better the plant will be, so as soon as it feels dry to the touch, you will need to water.
This is a plant that is suitable for the UK climate as it does not like hot, humid summers. During the first year of growth do not fertilize the plant at all as it will not need it. The next year, you will need to add a balanced, slow-release fertilizer to help it bloom and get through the growing season. As the stems can grow up to 60cm tall they can become floppy, so you may need to tie them to canes to support them.
To encourage the plant to produce better blooms and a bushier plant, you will need to pinch the growing tips when it reaches a height of 15cm. As it flowers from late summer to autumn, you will not need to deadhead regularly. You must leave the dead stems until next spring as they will protect the plants from winter frosts. Every spring add a new mulch.
PESTS AND DISEASES
They do not seem to be bothered much in the way of pests but they can be prone to powdery mildew. This is why it is important to not let the plant dry out. You will need to keep the compost evenly moist and allow good air circulation in and around the plant.
VARIETIES TO GROW

You are likely to find three species, with two being more common than the others. There are many hybrids and cultivars.
The most common ones are based on Chelone obliqua. This includes the white flowering ‘Alba’ and the dwarf cultivar with pink bloom called ‘Tiny Tortoise’.
The other common species is Chelone glabra which produces white, very, fragrant blooms and is not as showy as C. obliqua. ‘Blackeye’ has almost black leaves in spring.
Chelone lyonii is the less frequent species that you will find. It has long stems of pink, rose or deep red flowers and is more tolerant of dry conditions. ‘Hot Lips’ is a noted variety.
CONCLUSIONS
In this article, we have discussed how to grow Chelone in containers. They are such beautiful and unusual perennials and they are easy to grow and care for, you may wonder why you have not grown them before.
A plant that should be grown in a container garden.
If you have any questions or comments that you wish to make on growing Chelone in containers, please do so in the comment box below.
Happy Chelone growing.
