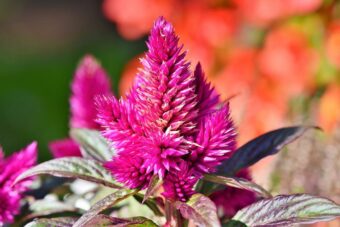
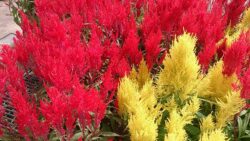
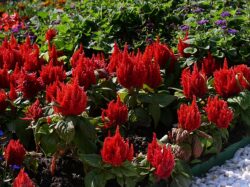
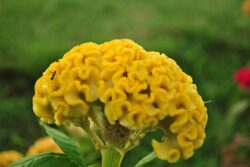
In this article, we will discover how to grow Celosia in containers. Celosia is a small genus of ornamental and edible plants that belong to the Amaranthaceae (the Amaranth) family. The name comes about from the Greek word ‘Kafsi’ meaning ‘burning’ describing the appearance of the flower heads. The two most commonly seen in the garden are the plume variety, Celosia argentea or Celosia argentea var. cristata, whose crescent-shaped flowers are normally called the Cockscombs.

They are grown for the colourful and vivid flowers for colour indoors or as part of your summer container display. Although it is a tender perennial in the outdoor display it is better to treat them as an annual to dispose of at the end of the garden season.
The flowers are normally orange, red, pink or even green. Celosia is also grown as a cut flower, where several varieties have been developed that stay in colour for six months after it has been cut and dried.
There are dwarves that only grow up to 30cm high and giants that grow up to 1m depending on what variety is grown.
Find out how to grow Celosia in containers in this article.
GROWING CELOSIA IN CONTAINERS
Your best bet is to buy the plant in bloom in garden centres as you can pick the colour you want, but they are just as easy to grow from seed.
GROWING FROM SEED
If you are planning to grow from seed, you will need to start in early spring, probably in March. As they hate their roots disturbance, you better start in 7.5cm pots. Fill one of these pots with a mixture of 70% by volume of seed sowing compost and 30% by volume perlite to make a free-draining growing media. Make sure it is moist at all times.
On top of this growing media, sprinkle a few seeds and just cover them with a fine layer of sieved seed compost. Cover the pots with some Clingfilm and place it on a heat mat/propagator as they will need a high temperature to germinate. (20 to 25 degrees Celsius).

After 10 days to 3 weeks, the seeds should have germinated. Allow them to grow on and in Mid-May, you can start to harden them off before planting them in their final position in late May. If your plants have outgrown their 7.5cm pots before planting outside then you can transplant them into 13cm pots full of the same growing media to continue to grow on before planting outside.
TREAT SHOP-BOUGHT AND HOME-REARED PLANTS THE SAME AT THIS STAGE
At this stage, your home-reared seedlings and shop-bought plants can be treated in exactly the same way.
You can plant them in groups in a large container to give a multi-coloured and impactful summer display, or you can mix them with Salvias and Dahlias to make highly colourful eye candy.
First, choose a container that will suit the display you have in mind. No matter what you choose make sure it has plenty of drainage holes at the bottom. On the bottom of the container add a 1cm layer of gravel to help with drainage further. To this add a mixture made up of 70% by volume of multipurpose compost with 30% by volume of perlite to within 5cm of the rim.
Dig a hole (one for each plant) slightly bigger than the root ball it came in the original container. Drop a plant in so that the top of the root ball is at the same level as the top surface of the compost. Backfill with the growing media so that no gaps remain, using more compost if necessary,
Firm the plants in and water well.
Alternatively, if you are growing it as a houseplant, you will need to place the container in a cool room, like a conservatory or any room that does not have central heating in.
CARE INSTRUCTIONS
You will need to keep the compost moist at all times, making sure it is not overly wet. Water once the top surface feels dry to the touch.

Every 2 weeks, you will need to feed it with a high-potash, liquid fertilizer once it is in flower.
Once the flowers have started to fade, you can cut them off as this will encourage a second bloom later on in the season.
PESTS AND DISEASES
They tend to be pests and diseases-free if you look after them right. One pest that can be a problem is whiteflies which can be dealt with by using fly traps, biological controls or systemic insecticides.
The biggest killer of Celosias is overwatering which can lead to root rot and collapsing of the plant. This is why drainage is very important and you will need to make sure that they are not in a rainy spot. Once the plant has wilted it cannot be saved.
If the leaves turn yellow, expect that you have overwatered.
VARIETIES TO GROW
As stated in the introduction the two species to grow are C. argentea and C. argentea var. cristata.

C. argentea produces plumes of flowers in white, yellow, orange, red or purple flowers, whilst C. argentea var. cristata produces crescent-shaped or cockscomb, where both are grown in gardens.
For containers, it is recommended you buy a mix such as ‘Nana Mixed’ or ‘Century Mixed’.
For a red/pink variety grow ‘Ice Cream Pink’or ‘Blaze’ that has red and yellow flowers. ‘Kimono’ has a mix of red and orange flowers.
For a unique variety plant ‘Dragon’s Beard’ which has reddish-green leaves on top of the bright red plumes that grow.
CONCLUSIONS
In this article, we have discussed how to grow the wonderful colourful plants of Celosia in containers. In general, they are easy to grow from seed or shop-bought plants, easy to care for and they come in so many colours. It is a plant that will go with summer bedding schemes that you wish that you grew them earlier.
If you have any questions or comments that you wish to make on growing Celosia in containers, please do so in the comment box below.
Happy Celosia growing.
